Every dahlia grower in zones 3 through 7 faces the same fall dilemma: dig up the tubers and figure out how to keep them alive until spring, or gamble and hope they survive in the ground. After losing an entire collection my first year because I stored them in a too-warm basement, I have tested every method and now have a system that gives me a 95 percent survival rate every winter.
Storing dahlia tubers is not complicated, but the details matter enormously. The wrong temperature, too much moisture, or too little moisture and you open those boxes in spring to find mush or shriveled husks. This guide walks you through the entire process from the moment frost hits your garden to the day you replant in spring.
Quick Facts
| Sun | N/A (storage guide) |
| Difficulty | Beginner |
| Season | Dig after first hard frost (October-November) |
| Zone | Zones 3-7 (must dig); Zones 8-10 (optional) |
| Time to Harvest | Store October through April (5-6 months) |
Stock Up On
- Garden fork (not a spade — less tuber damage)
- Sharp pruners or loppers for cutting stems
- Garden hose with gentle spray nozzle
- Clean, sharp knife for dividing (sterilize with rubbing alcohol)
- Sulfur powder or ground cinnamon (natural fungicide)
- Vermiculite, peat moss, or coarse wood shavings
- Cardboard boxes or plastic storage bins (with ventilation)
- Permanent marker and plant labels
- Min/max thermometer for storage area
- Spray bottle for winter moisture checks
Storage medium matters: Vermiculite is the gold standard because it regulates moisture perfectly — it holds enough to prevent shriveling but not so much that it promotes rot. Slightly damp peat moss is the second-best option but it can hold too much water if you over-dampen it. Coarse wood shavings are good for airflow but dry out faster and need more frequent checking.
Avoid these containers: Never use fully sealed plastic bags or airtight containers. Tubers need some air exchange or trapped moisture causes rot. Cardboard boxes are excellent because they breathe naturally. Plastic bins work if you leave the lid cracked open or drill a few holes.
Step 1: Wait for the Right Moment to Dig
Wait until the first hard frost (below 28°F / -2°C) has blackened the foliage. The leaves and stems should be dark and limp. Do not dig before frost — the tubers need the signal from dying foliage to enter dormancy and set their eyes for next year. Digging too early means immature tubers that store poorly.
After the frost kills the tops, wait 1 to 2 weeks before digging. This waiting period allows the tubers to finish setting their growth points and the skin to toughen slightly, which improves storage life. Mark each plant with its variety name now while you can still identify them — after digging, all tuber clumps look very similar.
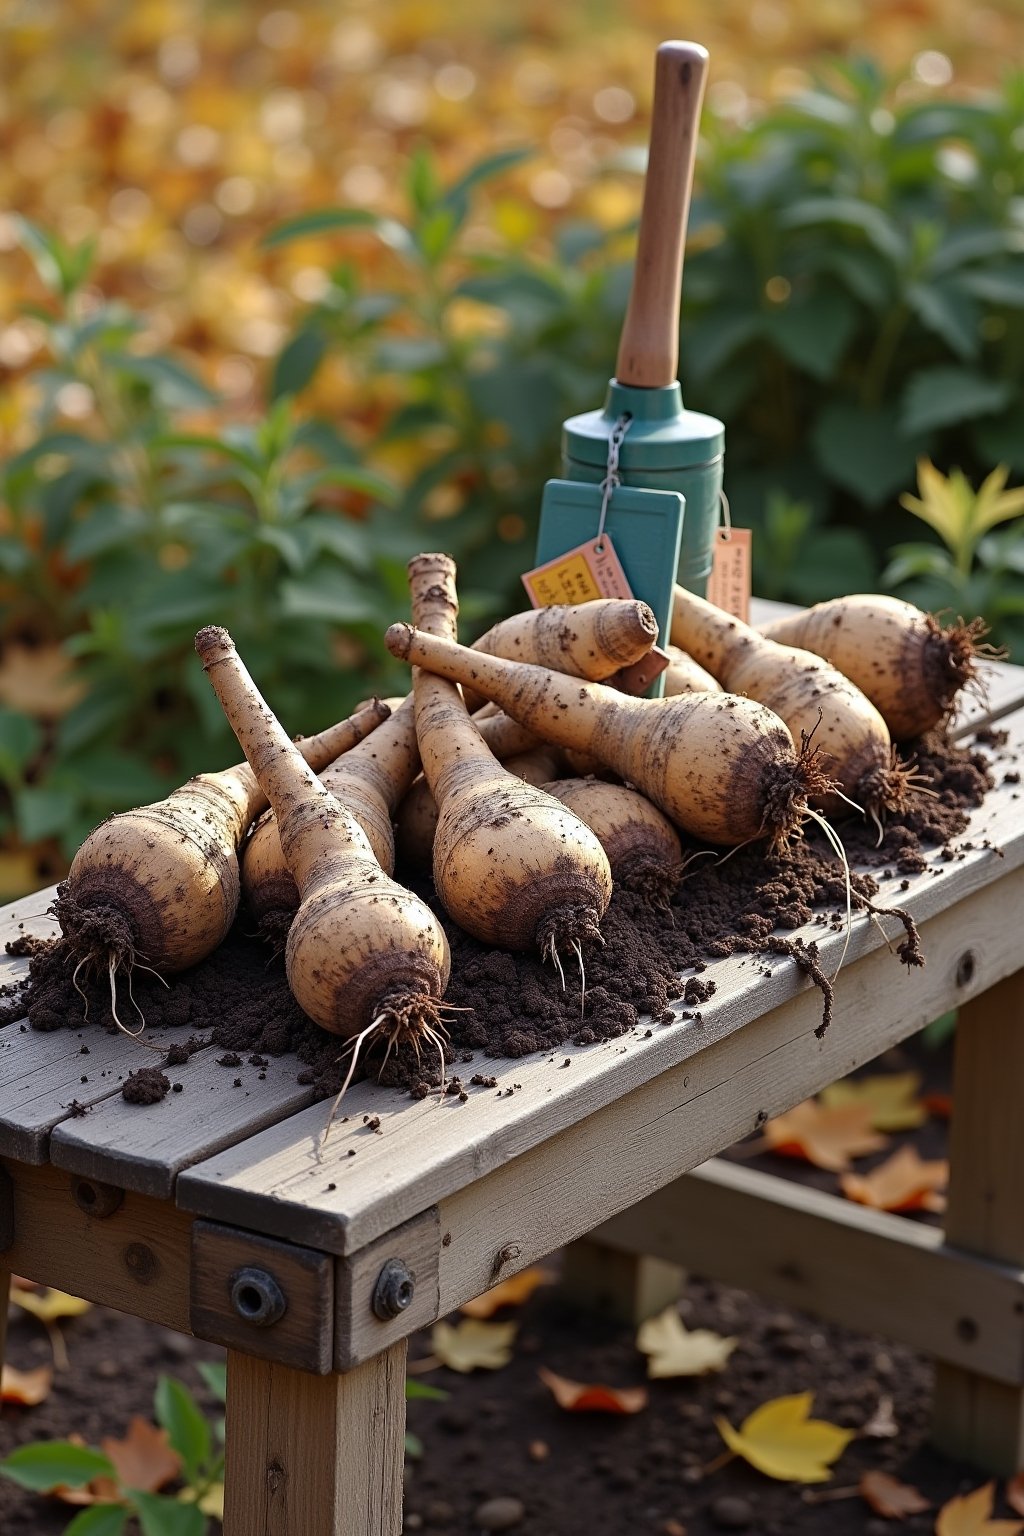
Step 2: Dig Carefully With a Garden Fork
Cut the stems down to 4 to 6 inches above ground. Using a garden fork (never a spade), insert it 12 inches away from the stem on all four sides to loosen the soil. The tuber clump extends farther than you think, and slicing into a tuber with a spade ruins it.
Gently lift the entire clump from below. Never pull by the stem — tuber necks are extremely fragile and a broken neck means that tuber has no eye and will not grow next year. Shake off loose soil gently. If you have many varieties, write the name directly on the stem stub with permanent marker immediately. Do this at the garden, not later at the cleaning station.
Step 3: Clean and Cure the Tubers
Rinse off soil with a gentle stream of water from a garden hose. Do not blast them with high pressure. Some growers leave a thin layer of soil on for protection — both methods work. Cut off fine feeder roots and remove any tubers that are damaged, mushy, or paper-thin.
Let the clumps dry upside down for 24 to 48 hours in a cool, dry, well-ventilated spot out of direct sunlight (a garage or covered porch is ideal). Place them stem-end down so moisture drains from the hollow stems. The skin should feel dry to the touch but not papery or shriveled when curing is complete. Do not over-dry — more than 3 to 4 days of curing can cause dangerous dehydration.
Step 4: Divide the Clumps (Fall or Spring)
You can divide in fall before storage or in spring before planting. Fall dividing is preferred by many growers because the eyes are easier to see on fresh tubers, smaller pieces store more easily, and rot on one tuber cannot spread to the whole clump.
Each division must have: one tuber body, a piece of the crown, and at least one visible eye (a small pink or white bump on the crown near where the neck meets). Use a sharp, clean knife sterilized with rubbing alcohol between cuts. Discard tubers with no visible eye, broken necks, or the spent mother tuber from last year. Dust all cut surfaces with sulfur powder or ground cinnamon as a natural fungicide. Let cut surfaces air-dry for a few hours before packing.
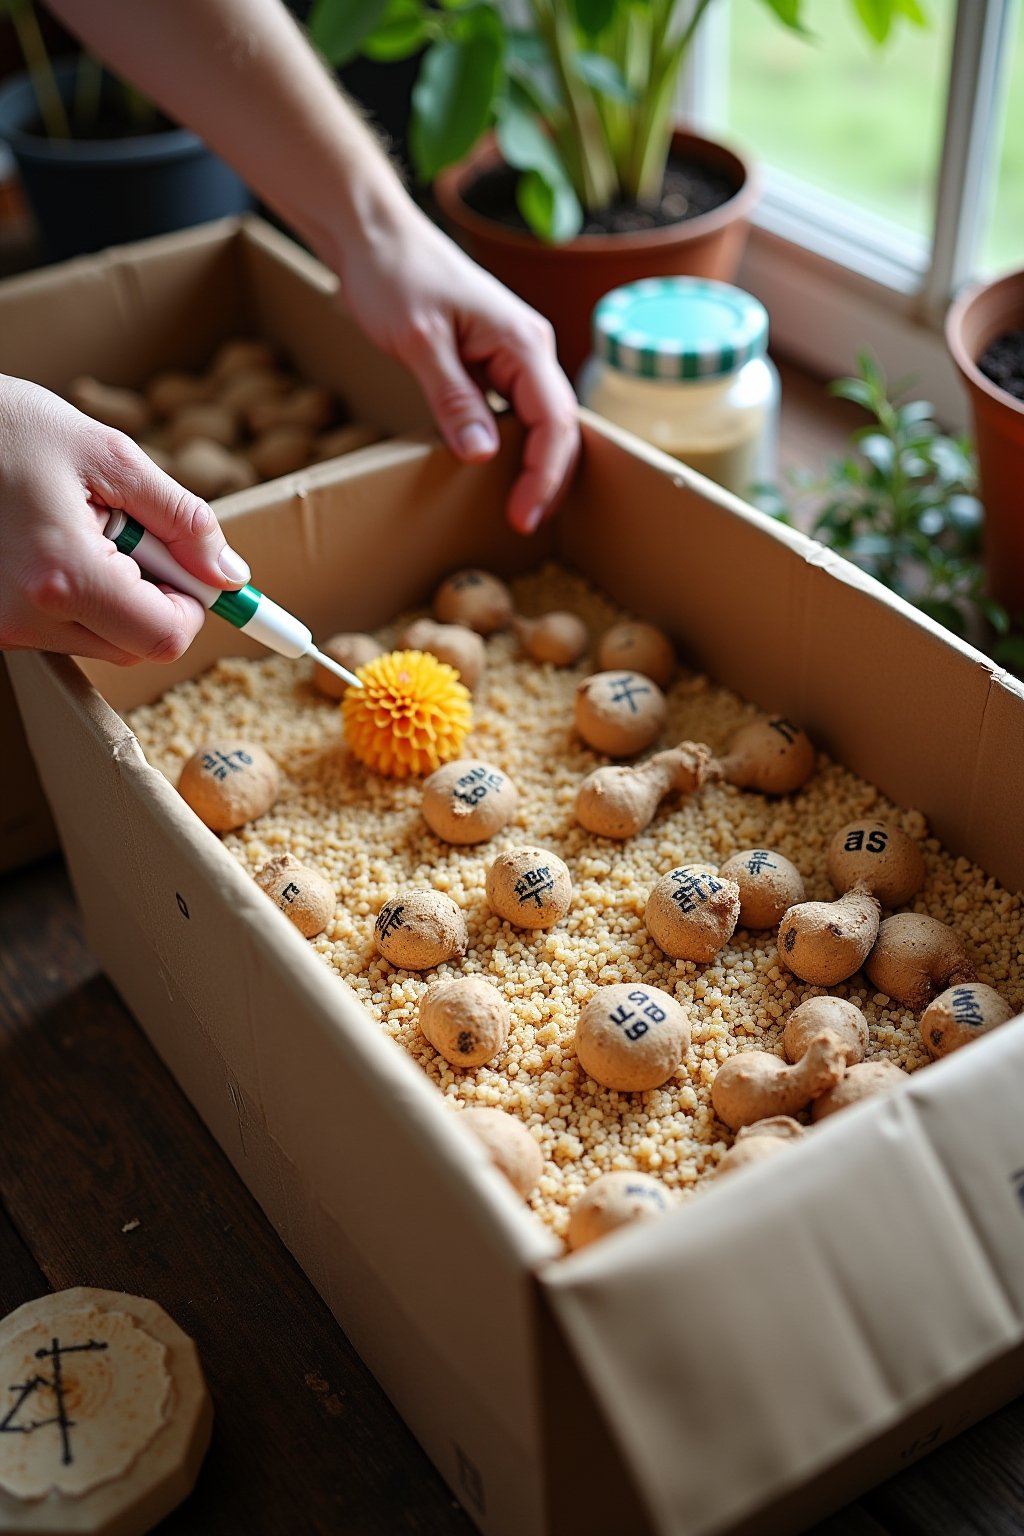
Step 5: Pack and Store at the Right Temperature
Layer tubers in cardboard boxes or ventilated bins with slightly damp vermiculite or peat moss. Each tuber should be surrounded by medium but not touching other tubers. The medium should feel barely moist — squeeze a handful and it should hold together briefly but not drip a single drop of water.
Store at 40 to 50°F (4 to 10°C) with 50 to 60 percent humidity. The sweet spot is around 41°F (5°C). Good locations include an unheated basement, root cellar, insulated garage that stays above freezing, or a spare refrigerator. Place a min/max thermometer in your storage area. Temperatures below 32°F kill tubers. Temperatures above 55°F trigger premature sprouting.
Step 6: Check Monthly and Prepare for Spring
Check tubers every 3 to 4 weeks through winter. Feel each one — it should be firm, not soft. Look for mold (wipe off with a dry cloth and improve airflow), shriveling (mist the storage medium lightly with a spray bottle), or rot (cut away soft spots into healthy white tissue and dust with sulfur). Remove any fully rotten tubers immediately — rot spreads fast.
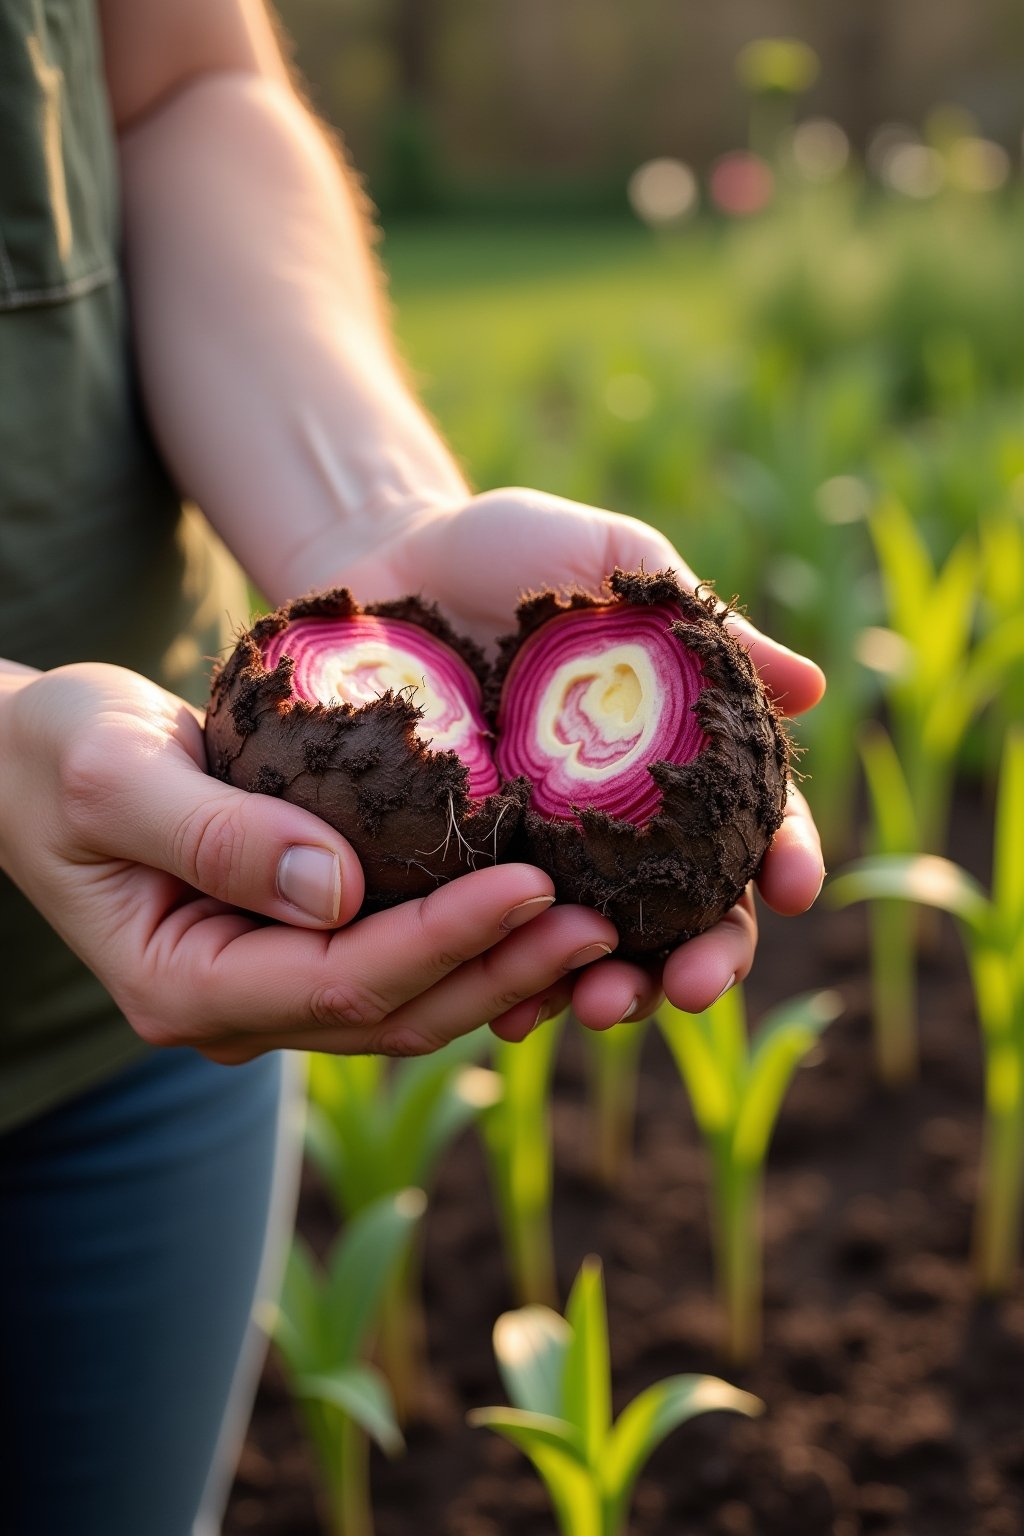
In early spring, 4 to 6 weeks before your last frost date, bring tubers into a warmer spot (60 to 68°F) and mist lightly. Viable tubers should show swelling eyes or green sprouts within 2 to 3 weeks. A viable tuber is firm with intact skin. Discard any that are completely soft, hollow, shriveled to a husk, or show no signs of life after 3 weeks in warmth.
Troubleshooting
Tubers rotting in storage: Too much moisture in the storage medium, poor air circulation, or storing damaged tubers. Ensure the medium is barely damp (not wet), leave container lids cracked for airflow, and always discard damaged tubers before packing. Dusting with sulfur powder before storage significantly reduces rot.
Tubers shriveling and drying out: Storage is too dry or has too much airflow. Mist the storage medium lightly with a spray bottle and check again in a week. Consider switching to the plastic wrap method for tubers that shrivel easily — wrap each tuber individually in cling film after dusting with sulfur. This locks in moisture while preventing rot if the tuber is clean and dry.
Mold growing on tubers: High humidity and poor ventilation. Wipe off surface mold with a dry cloth, space tubers farther apart, and ensure air can circulate. Surface mold is treatable. Deep mold that has penetrated the flesh means that tuber should be discarded.
Tubers sprouting in storage: Temperature is too warm (above 55°F). Move to a cooler location immediately. Short sprouts under 1 inch are harmless and the tuber is still viable. Long pale sprouts waste stored energy — move to cooler storage and do not remove the sprouts.
What Each Season Brings
October (After First Frost): Wait for frost to blacken foliage. Mark varieties. Wait 1-2 weeks then dig. Clean, cure upside down for 24-48 hours. Divide if you prefer fall dividing. Dust cut surfaces with sulfur.
November: Pack tubers in slightly damp vermiculite in cardboard boxes. Label every box with variety name and date. Place in storage at 40-50°F. Set a min/max thermometer in the storage area and check it weekly for the first month.
December-February: Monthly checks. Feel for firmness, look for mold or shriveling. Mist medium if too dry. Remove rotten tubers. Keep storage dark and cool.
March-April: 4-6 weeks before last frost, bring tubers to warmth (60-68°F) to wake them up. Divide spring clumps if you did not divide in fall. Pot up sprouted tubers for indoor starting or plant outdoors once soil reaches 60°F.
The Detail That Matters
- Vermiculite is the best storage medium — it regulates moisture perfectly and rarely causes rot or shriveling. Peat moss is second best but easier to over-dampen. Wood shavings dry out fast and need more monitoring.
- Label at the garden, not at the cleaning station — all dahlia tuber clumps look identical once dug. Write the variety name on the stem stub with permanent marker before you move them anywhere.
- The plastic wrap method works for chronic shrivelers — dust the tuber with sulfur, wrap individually in cling film, and store normally. This locks in moisture while the sulfur prevents rot. The tuber must be completely clean and dry before wrapping.
- A spare refrigerator is the perfect dahlia storage — consistent 40°F, controlled humidity, no light. Set it to its warmest setting. If you grow many dahlias, a dedicated mini fridge pays for itself in saved tubers within one season.
- Never store tubers near fruit — apples and other ripening fruit release ethylene gas that can trigger premature sprouting or damage dormant tubers.
- The float test checks viability in spring — place tubers in a bucket of water. Viable tubers generally sink while completely dried-out or hollow ones float. Not 100 percent reliable but a useful quick check.
If You Got Value Here
- Growing Dahlias for Beginners: How to Plant Tubers This Spring for Stunning Summer Blooms
- When to Plant Dahlias (Zone by Zone Guide)
- Growing Potatoes in Grow Bags (Easiest Harvest Ever)
Common Questions
When should I dig up dahlia tubers for winter storage?
Wait until after the first hard frost (below 28 degrees Fahrenheit) blackens the foliage, then wait an additional 1-2 weeks before digging. This waiting period lets the tubers set their eyes and toughen their skin for better storage. In most zones this falls between late October and mid-November.
What is the best temperature to store dahlia tubers?
Store tubers at 40 to 50 degrees Fahrenheit with the sweet spot around 41 degrees. Below 32 degrees kills them from freezing. Above 55 degrees triggers premature sprouting. An unheated basement, insulated garage, or spare refrigerator on its warmest setting are all good options.
Should I divide dahlia tubers in fall or spring?
Both work, but fall dividing has advantages: eyes are easier to see on fresh tubers, smaller pieces store more easily in less space, and if one tuber rots it does not spread to the whole clump. Spring dividing is better if you have trouble identifying eyes — they swell and become more visible as the tuber wakes up.
How do I know if a stored dahlia tuber is still alive in spring?
A viable tuber is firm to the touch with intact skin and at least one visible eye or sprout on the crown. Place questionable tubers in warmth (60-68 degrees) for 2-3 weeks — if they show no eye swelling or sprouts, they are likely dead. Discard any that are completely soft, hollow, or foul-smelling.
Can I store dahlia tubers in the refrigerator?
Yes, a refrigerator set to its warmest setting (around 40 degrees) is actually one of the best storage options. Pack tubers in slightly damp vermiculite in a paper bag or cardboard box. Keep them away from ripening fruit which releases ethylene gas. Check monthly for moisture levels.
What causes dahlia tubers to rot in storage?
The three main causes are too much moisture in the storage medium, storing damaged or diseased tubers, and poor air circulation. Prevent rot by using barely damp (not wet) vermiculite, inspecting and discarding any damaged tubers before storage, dusting cut surfaces with sulfur powder, and ensuring containers have some ventilation.