Flat painted walls are fine. But textured walls? Textured walls make people stop and touch them. There is something about the depth, the movement, and the way light plays across a plaster or limewash surface that makes a room feel completely different — like it has history and soul instead of just a coat of Agreeable Gray.
I limewashed my living room accent wall on a Saturday afternoon and the before-and-after was so dramatic that my neighbor asked if I had hired a plasterer. The whole project took about four hours and cost me less than going out for a nice dinner. If you have been staring at your flat walls and feeling uninspired, this is the upgrade that changes everything.
What Makes It Worth Doing
- Adds depth that flat paint cannot — textured walls create shadows and highlights that shift throughout the day as the light changes, making the room feel alive
- Hides imperfections — if your walls have dents, patches, or uneven surfaces, texture actually disguises them instead of highlighting them like flat or eggshell paint does
- Looks incredibly expensive — Venetian plaster and professional limewash can cost thousands. The DIY versions achieve the same look for a tiny fraction of the cost
- One wall is all you need — a single textured accent wall transforms the entire room. You do not have to commit to four walls to get the impact
- Viral for a reason — limewash and plaster wall tutorials are some of the most-viewed home DIY videos right now because the transformation is so visually dramatic
- Works in every room — bedroom, living room, dining room, bathroom, hallway — textured walls add character anywhere
What to Have Ready
Choose your technique:
- Limewash: Limewash paint (Romabio is the most popular brand), large brush or block brush, drop cloth, painter’s tape, spray bottle with water
- DIY plaster/Roman clay: Joint compound or Roman clay (Portola Paints), trowel or large putty knife, sandpaper, primer, drop cloth
- Textured paint technique: Flat wall paint in your chosen color, a rag, sponge, or brush for texture application, glaze medium (optional)
- For all techniques: Drop cloth, painter’s tape for edges, old clothes you do not mind ruining, a step ladder
My Working Order
Choose Your Technique Based on the Look You Want
Limewash gives a soft, chalky, cloud-like effect with subtle color variation. It looks like sun-bleached Mediterranean walls and works beautifully in warm whites, soft pinks, sage greens, and earthy tones. It is the easiest technique for beginners.
Venetian plaster / Roman clay gives a smooth, stone-like finish with more depth and a slight sheen. It looks like polished concrete or natural stone and works best in warm neutrals and earth tones. More labor-intensive but incredibly rewarding.
Joint compound texture gives a rough, organic plaster look using inexpensive drywall compound. It is the most budget-friendly option and can be painted any color once dry.
Prep Your Wall Properly
Clean the wall thoroughly and fill any large holes or cracks with spackle. Sand smooth. For limewash, the wall should be primed with a matte primer — limewash does not stick well to glossy or semi-gloss surfaces.
For plaster techniques, a coat of primer helps the compound grip. Tape off trim, baseboards, and ceiling edges carefully. Lay down drop cloths — textured wall techniques are messy. The prep is boring but it makes the difference between a professional result and a frustrating one.
Apply Limewash (Easiest Technique)
Mist the wall lightly with water from a spray bottle. Dip a large block brush or masonry brush into the limewash and apply in random, cross-hatching strokes. Work in sections about 4 feet wide, blending the edges while still wet.
The key to beautiful limewash is variation. Some areas should be thicker, some thinner. Some strokes horizontal, some diagonal. This creates the natural, lived-in depth that makes limewash so beautiful. Let the first coat dry completely, then apply a second coat the same way for more depth. Two coats is usually perfect.
Apply Plaster or Roman Clay (More Advanced)
Scoop a small amount of Roman clay or pre-mixed plaster onto a clean trowel. Apply to the wall in thin, sweeping arcs, holding the trowel at a slight angle. Work in small sections, varying the direction and pressure of your strokes.
Let the first coat dry, then apply a second thin coat. The second coat is where the magic happens — build up areas, leave others thinner, and let the trowel marks create organic texture. Once dry, lightly sand any sharp ridges with fine sandpaper. For a slight sheen, burnish the surface by rubbing the flat side of the trowel over the dried plaster.
Seal and Protect Your Finish
Limewash does not need a sealer in most living spaces — it develops a natural patina over time that is part of its beauty. In bathrooms or high-moisture areas, apply a breathable matte sealer to protect the finish.
Roman clay and plaster finishes benefit from a clear matte wax or sealer that protects the surface and enhances the depth. Apply with a clean cloth in circular motions and buff lightly. The sealed finish is wipeable, durable, and will last for years.
If Something Tastes Off
- Working too slowly with limewash — limewash dries fast. Work in manageable sections and keep the edges wet so they blend. Dried edges create visible lines
- Applying too thick of a coat — thin, varied layers create depth. Thick, even layers look like cake frosting and hide the texture you are trying to create
- Skipping the primer — limewash and plaster need a primed surface to grip. Skipping primer means peeling, flaking, and redoing the entire wall
- Expecting perfection — the beauty of textured walls is the imperfection. If you try to make it perfectly smooth and even, you lose the whole point. Embrace the variation
- Not doing a test section first — try your technique on a large piece of cardboard or an inconspicuous section of wall before committing to the full accent wall. This lets you practice your stroke pattern
Doing It for Less
Joint compound texture is the cheapest: A bucket of all-purpose joint compound, a putty knife, and a can of paint is the most budget-friendly way to get textured walls. Apply the compound with sweeping strokes, let dry, sand lightly, and paint in your chosen color.
DIY limewash mix: While branded limewash paint is convenient, you can mix hydrated lime with water and pigment for a fraction of the cost. Tutorials are widely available online.
One wall only: An accent wall behind the bed or sofa is all you need. One wall of texture transforms the room without the cost or effort of four walls.
Borrow tools: You need a trowel and a block brush for maybe one afternoon. Borrow from a neighbor or buy the cheapest option — you do not need professional-grade tools for a single wall.
Styling It
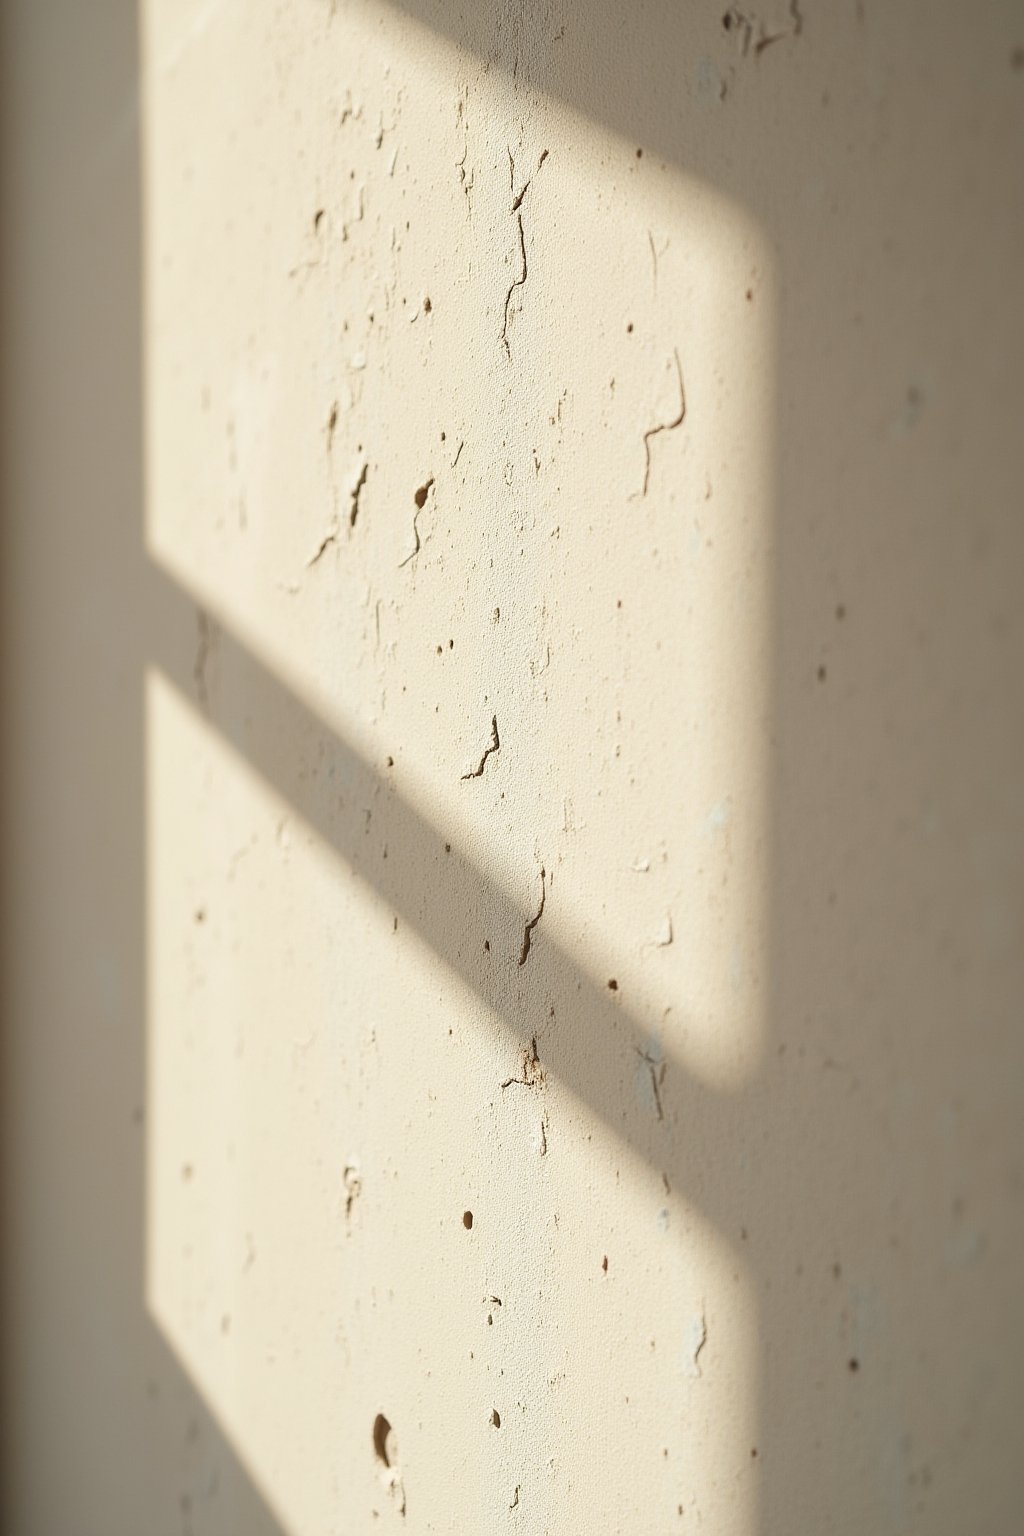
- Let natural light hit the textured wall — side light creates the shadows and depth that make texture look its best. Position your textured wall where a window casts light across it
- Keep decor minimal on a textured wall — the wall itself is the feature. One piece of art or a simple mirror is enough. Do not crowd it with a gallery wall
- Use matte finishes throughout the room — shiny or glossy furniture next to matte textured walls creates a jarring contrast. Keep everything soft and matte for cohesion
- Warm tones look best with texture — warm white, cream, terracotta, sage, and soft pink all look stunning with the depth that texture creates
- Add warm lighting — a wall sconce or picture light aimed at the textured wall from the side creates beautiful shadows that change throughout the evening
- Photograph your texture — textured walls are incredibly photogenic. The natural variation catches light in ways that flat walls simply cannot
Suiting Rooms
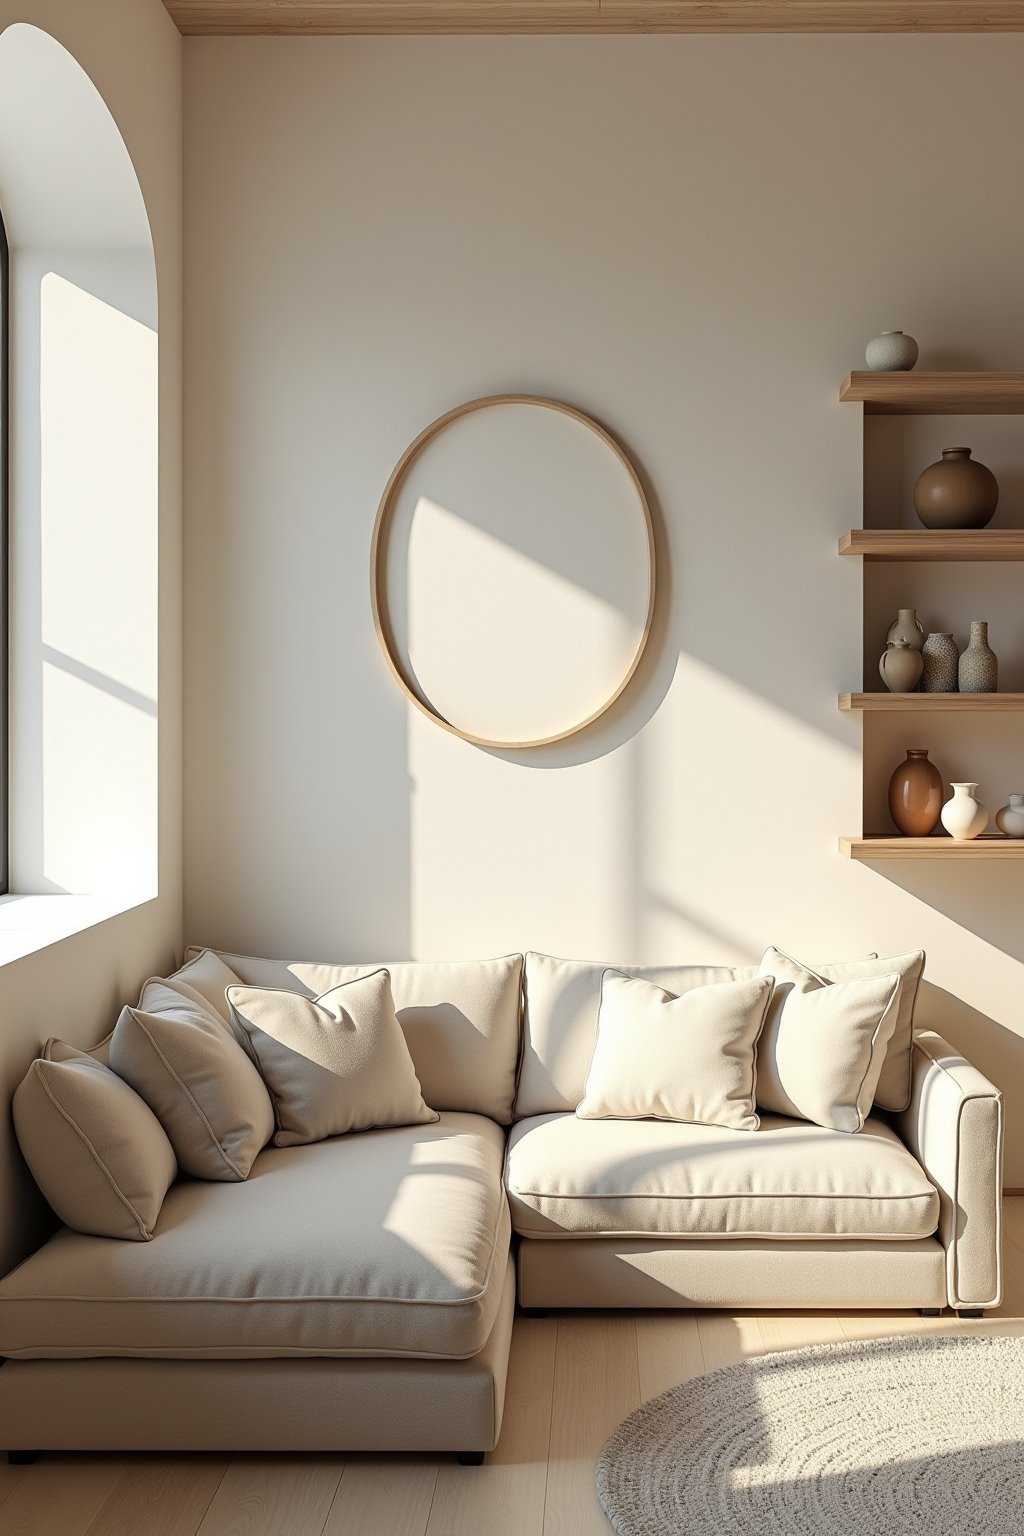
Living Room
A limewash accent wall in warm white behind a linen sofa, with the light from a nearby window casting soft shadows across the surface throughout the day. Simple floating shelves in warm wood, a round mirror, and a few ceramic pieces. The texture is the focal point and the room feels like a sun-bleached Mediterranean villa.
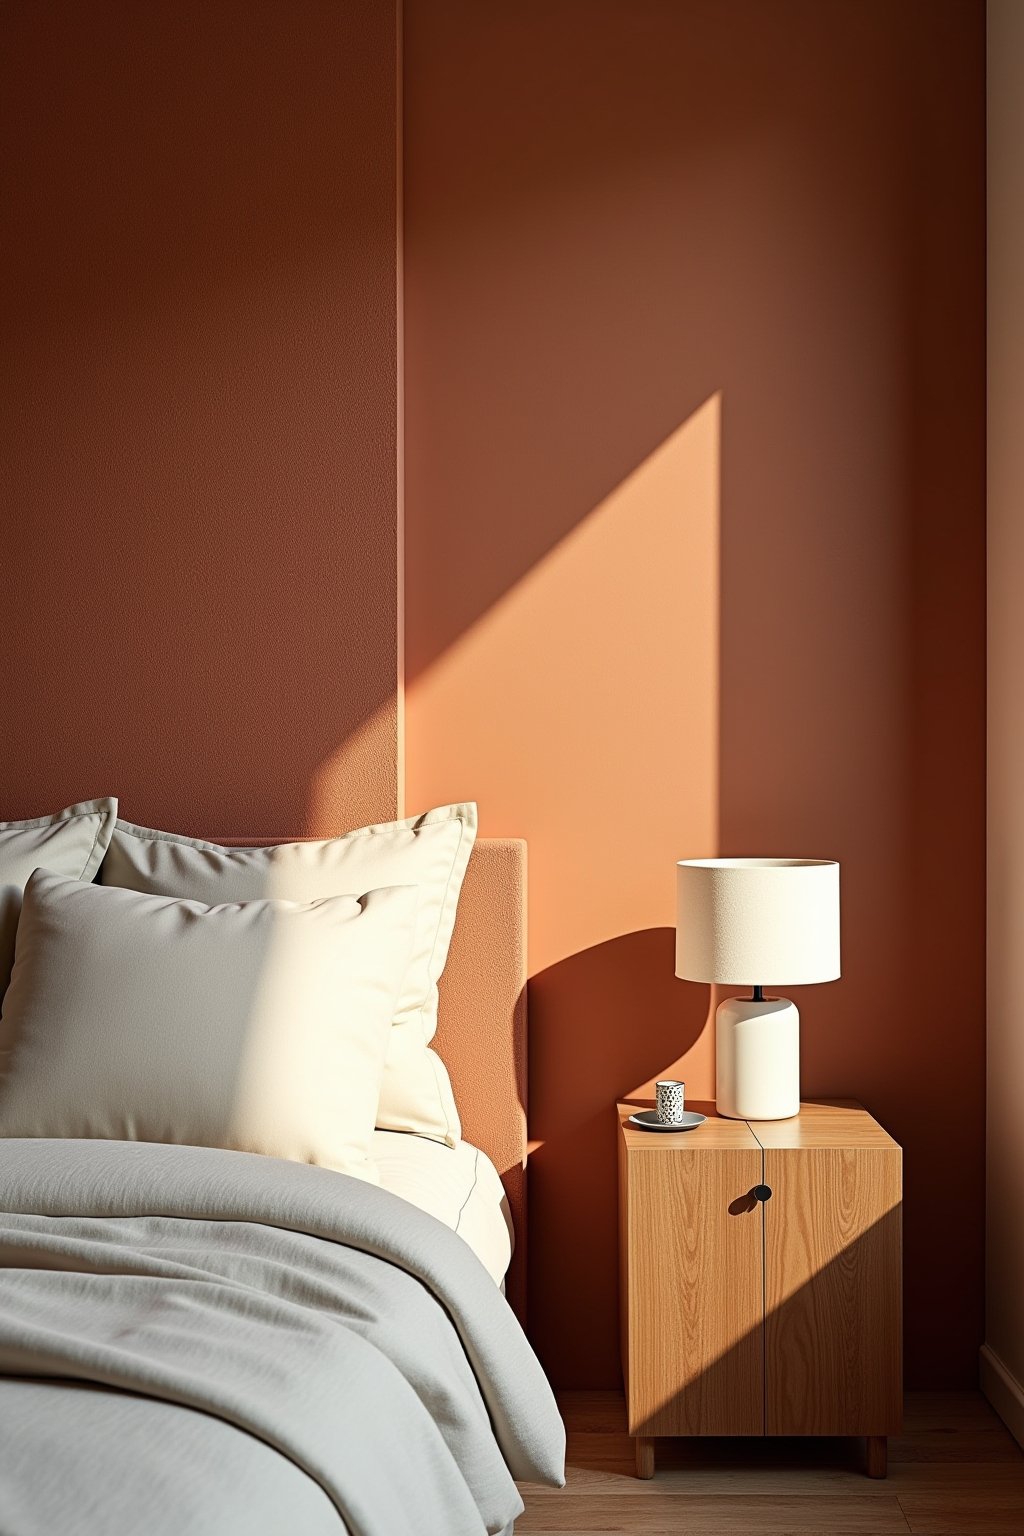
Bedroom
A Roman clay accent wall behind the bed in a warm, muted terracotta. The smooth-yet-textured surface catches the bedside lamp light beautifully at night. Cream linen bedding, warm wood nightstands, and a single piece of abstract art on the opposite wall. Rich, warm, and quietly luxurious.
Dining Room
All four walls in a soft sage limewash, creating an enveloping, cloud-like dining experience. A simple wood table with linen-covered chairs, a statement pendant light overhead, and candlestick holders on the table. The texture on every surface makes the room feel like an old European country house.
Common Questions
Is limewash hard to apply?
No — limewash is one of the most forgiving DIY techniques because imperfection is the goal. Apply with cross-hatching strokes, vary your pressure, and let the natural variation do the work. Most people find it surprisingly easy and fun.
Can I limewash over existing paint?
Yes, as long as the surface is clean and primed with a matte primer. Limewash does not adhere to glossy or semi-gloss finishes, so prime first if your walls have any sheen.
How long does textured wall paint last?
Properly applied limewash and plaster finishes last for years. Limewash actually gets better with age as it develops a natural patina. Roman clay and plaster sealed with wax are durable and wipeable.
Can I do this in a rental?
Limewash can be painted over when you move out, but it requires primer and paint to cover. For a truly removable option, try limewash on a large removable panel that leans against the wall as a headboard.
What is the difference between limewash and Roman clay?
Limewash is a thin, chalky wash applied with a brush that creates a soft, cloudy effect. Roman clay is thicker, applied with a trowel, and creates a smoother, more stone-like finish with more depth and a slight sheen.
How many coats do I need?
Two coats is standard for both limewash and Roman clay. The first coat provides base coverage and the second builds depth and variation. Some people add a third coat for more intensity, but two is usually perfect.