You do not need a garden bed, a raised bed, or even a yard to grow incredible tomatoes. A 5-gallon bucket, some potting mix, and a sunny spot on a patio, balcony, or driveway is all it takes — and the tomatoes you grow in a bucket will taste infinitely better than anything from the grocery store.
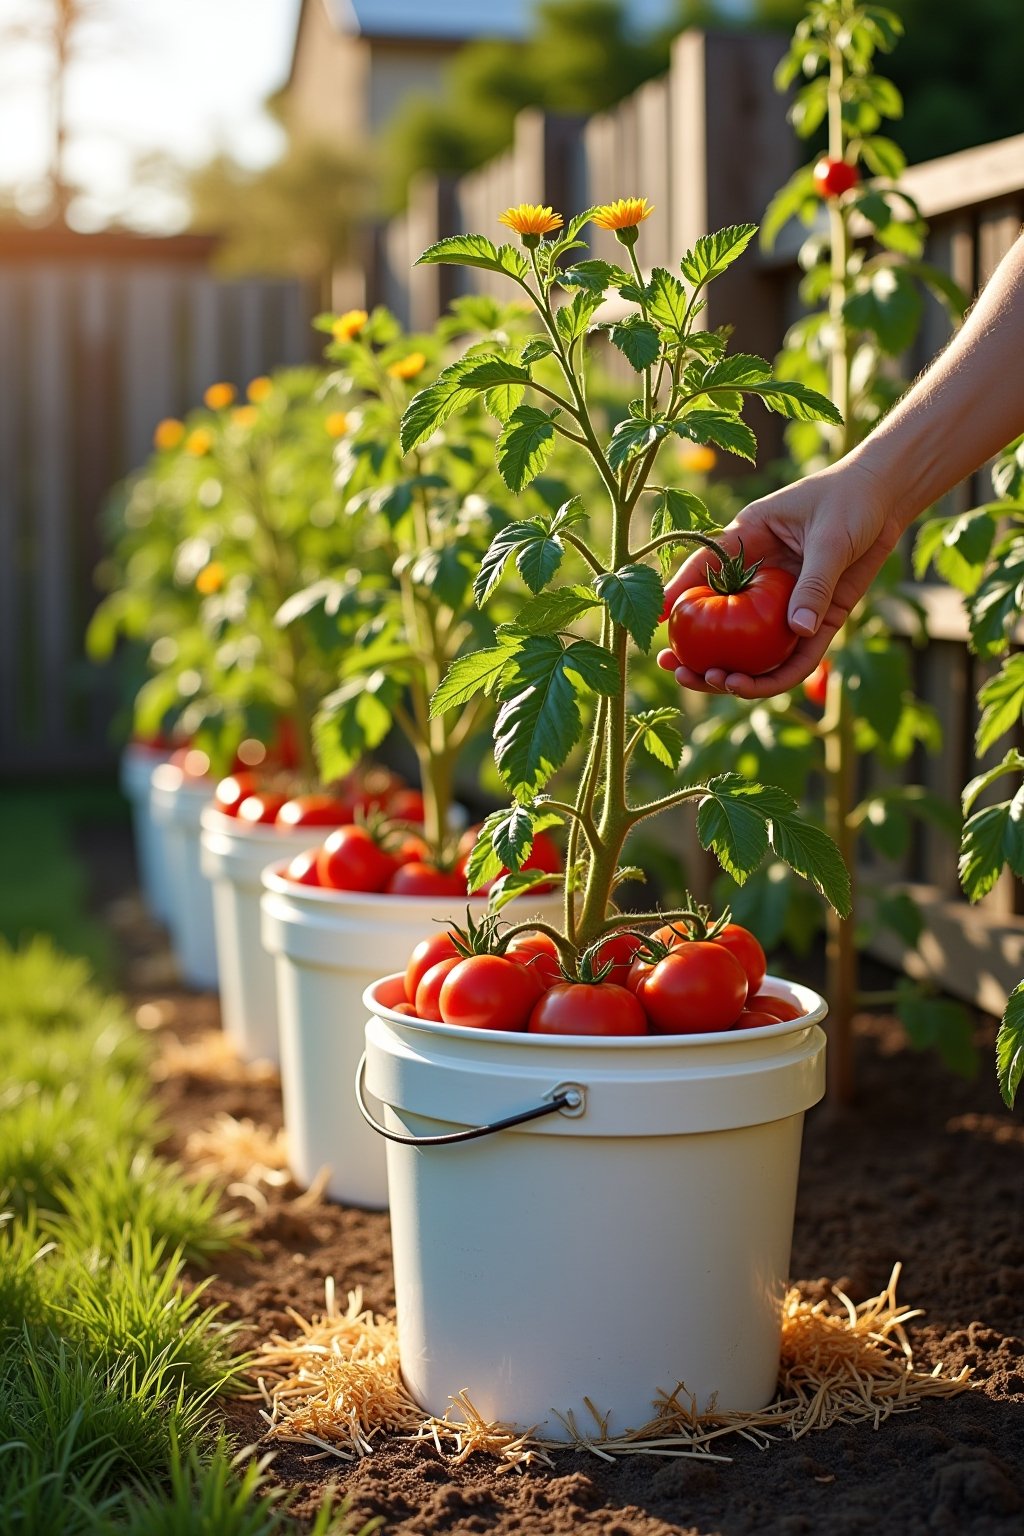
Five-gallon buckets are the perfect size for tomatoes. They are cheap (or free from bakeries and restaurants), lightweight, easy to move, and provide just enough root space for a productive plant. Millions of gardeners grow their best tomatoes this way, including people with nothing more than a sunny apartment balcony. This guide covers everything from bucket prep to your first ripe harvest.
Quick Facts
| Sun | Full Sun (8+ hours ideal, 6 hours minimum) |
| Difficulty | Beginner |
| Season | Plant after last frost (May-June in most zones) |
| Zone | All USDA Zones (containers allow any climate) |
| Time to Harvest | 60-85 days from transplant depending on variety |
What to Have Ready
- 5-gallon buckets with drainage holes drilled in the bottom
- High-quality potting mix (not garden soil)
- Tomato transplants (determinate varieties recommended for buckets)
- Tomato cage or sturdy stake
- Slow-release fertilizer (tomato-specific or 10-10-10)
- Liquid fertilizer for weekly feeding (calcium-enriched to prevent blossom end rot)
- Drill with 1/2 inch bit (for drainage holes)
- Mulch (straw or shredded leaves)
- Saucer or drip tray
- Watering can or hose with gentle nozzle
Determinate vs Indeterminate: For 5-gallon buckets, determinate (bush) varieties are the best choice. They grow to a compact size (3-4 feet), produce all their fruit within a concentrated window, and don’t need as much staking. Great determinate varieties: Roma, Celebrity, Patio Princess, Bush Early Girl. You can grow indeterminate (vining) types too — cherry tomatoes like Sweet 100 and Sun Gold do great in buckets with a tall cage.
Bucket prep: Drill 5-6 holes in the bottom of each bucket using a 1/2 inch drill bit. Drainage is non-negotiable — tomatoes in waterlogged soil get root rot and die within days. Food-grade buckets are ideal but any clean 5-gallon bucket works.
Potting mix, not garden soil: Garden soil compacts in containers and suffocates roots. Use a quality potting mix with perlite or vermiculite for drainage. Mix in slow-release fertilizer at planting time.
Step 1: Prepare the Bucket
Drill 5-6 drainage holes in the bottom of each 5-gallon bucket using a 1/2 inch drill bit. Without drainage, your tomato plant will die from root rot — this is the most critical step. Place a small piece of landscape fabric or a coffee filter over the holes inside the bucket to prevent soil from washing out while still allowing water to drain.
If using dark-colored buckets, consider wrapping them in a light-colored fabric or painting them white. Dark buckets absorb heat and can cook the roots on hot days. Light colors reflect heat and keep root temperatures reasonable. Alternatively, place dark buckets in a slightly shaded spot where the bucket itself stays cooler while the plant tops get full sun.
Step 2: Fill With Potting Mix and Fertilizer
Fill the bucket with high-quality potting mix to about 2 inches below the rim. Mix in slow-release tomato fertilizer according to package directions — this provides a baseline of nutrients for the first 4-6 weeks. If you cannot find tomato-specific fertilizer, a balanced 10-10-10 slow-release works fine.
Do not use garden soil, topsoil, or cheap “potting soil” that is mostly peat and bark. These compact heavily, drain poorly, and create a hostile environment for roots in a container. A good potting mix feels light and fluffy — you should be able to squeeze a handful and have it crumble apart rather than forming a dense ball.
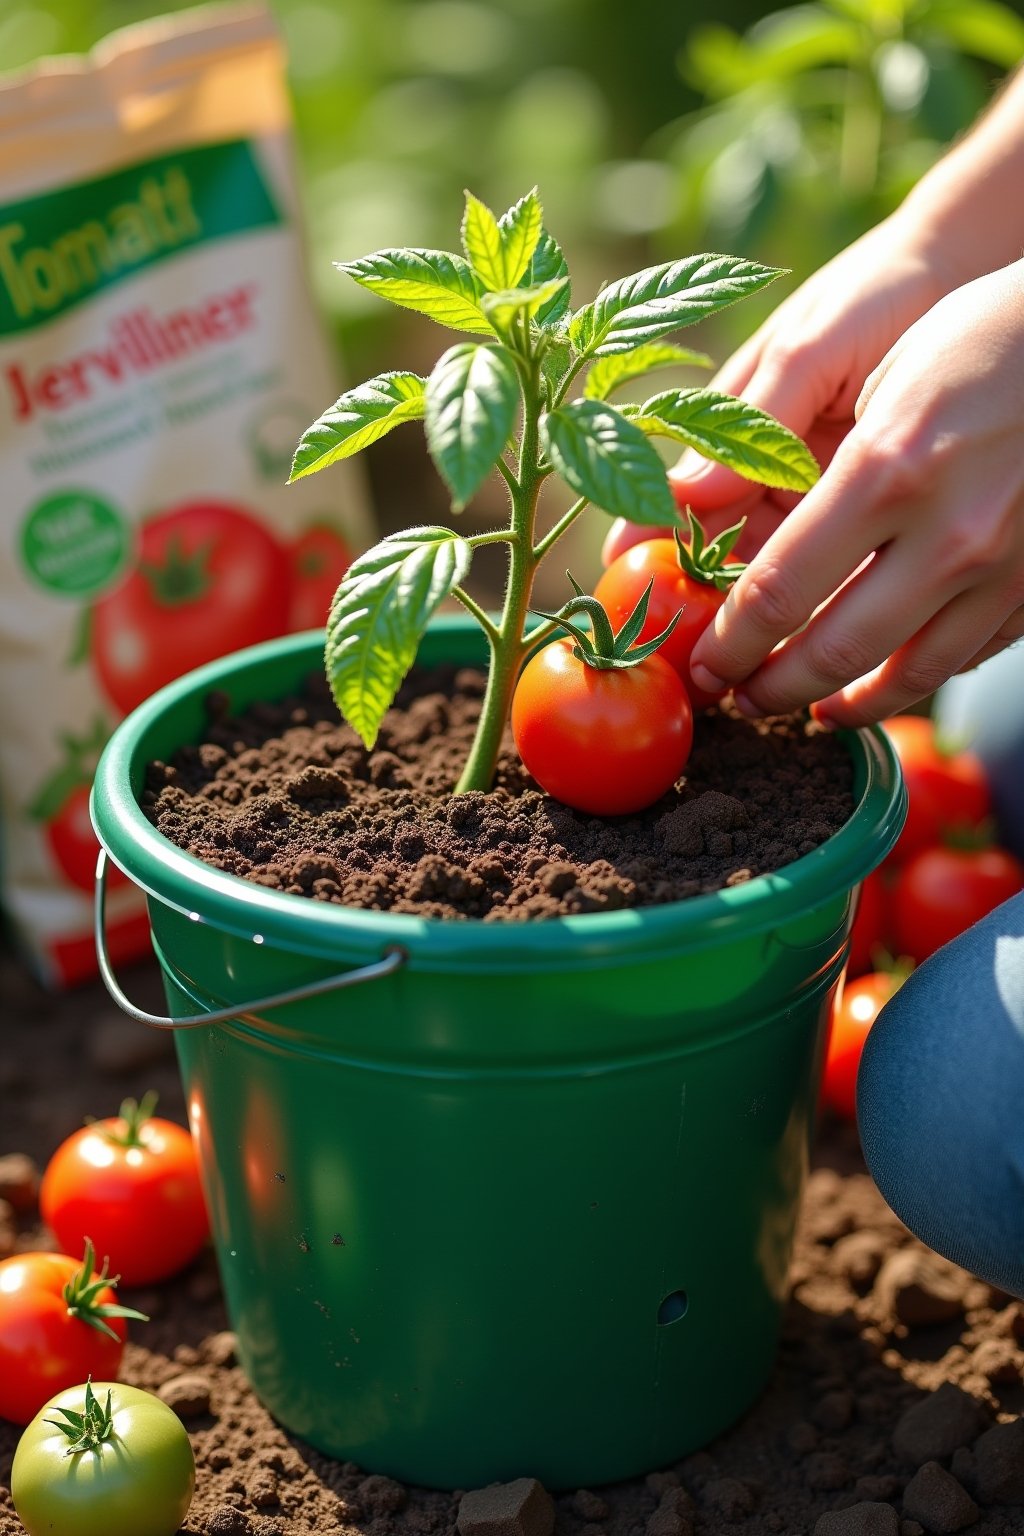
Step 3: Plant Deep for Stronger Roots
Tomatoes are unique — they grow roots along any buried stem. Take advantage of this by planting your transplant deep. Remove the bottom sets of leaves and bury the stem up to the topmost set of leaves. A plant that was 12 inches tall might only have 4 inches above the soil line after planting.
This deep planting technique creates a massive root system that anchors the plant and absorbs more water and nutrients. It is the single best thing you can do for a strong, productive tomato plant in a container. Water deeply immediately after planting to settle the soil around the buried stem.
Step 4: Install Support and Mulch
Push a tomato cage or sturdy stake into the bucket immediately after planting — doing this later risks damaging established roots. A cone-shaped tomato cage works well for determinate varieties. For indeterminate types, use a tall stake (5-6 feet) or a string trellis.
Spread 1-2 inches of mulch (straw, shredded leaves, or wood chips) on the soil surface. Mulch reduces evaporation dramatically in containers — without it, you may need to water twice daily in peak summer. With mulch, once daily is usually sufficient. Keep mulch an inch away from the stem to prevent moisture-related stem diseases.
Step 5: Water Consistently (The Make-or-Break Factor)
Container tomatoes need consistent, deep watering. This is the number one factor that determines success or failure. Water when the top inch of soil feels dry — in hot weather, this means daily or even twice daily. Water until it flows freely from the drainage holes.
Inconsistent watering (letting the soil dry out, then flooding it) causes blossom end rot (black, sunken spots on the bottom of fruit) and cracking. A self-watering reservoir insert or drip system on a timer eliminates this problem entirely. If hand-watering, water at the soil level in the morning so leaves dry before evening — wet leaves overnight invite fungal diseases.
Step 6: Feed Weekly and Harvest at Peak Ripeness
Once the first flowers appear, start feeding weekly with liquid tomato fertilizer diluted to half strength. Nutrients wash out of containers with every watering, so regular feeding is essential. Choose a fertilizer with calcium to prevent blossom end rot — or add crushed eggshells to the soil surface as a slow-release calcium source.
Harvest tomatoes when they are fully colored and slightly soft to the touch. Don’t wait until they are mushy — pick at the first sign of give when you gently squeeze. Picking regularly encourages the plant to set more fruit. At the end of the season, pick any remaining green tomatoes and ripen them indoors on a sunny windowsill.
Where Things Tend to Slip
Blossom end rot (black spots on bottom of fruit): Caused by inconsistent watering and calcium deficiency. Water consistently — never let the soil dry out completely. Add calcium-enriched fertilizer or crushed eggshells. This is the most common container tomato problem and is entirely preventable.
Yellow leaves on the bottom: Normal — lower leaves yellow as the plant matures and redirects energy to fruit production. Remove yellowed leaves to improve air circulation. If yellowing spreads upward, it may indicate nitrogen deficiency — increase feeding frequency.
Flowers dropping without setting fruit: Usually caused by extreme heat (over 90°F) or nighttime temperatures below 55°F. Move buckets to a spot with afternoon shade during heat waves. Gently tapping flower clusters can also improve pollination in still air.
Fruit cracking: Caused by sudden changes in soil moisture — the interior grows faster than the skin can expand. Water consistently and mulch to maintain even moisture levels.
When to Do What
Spring (After Last Frost): Plant tomato transplants in buckets once nighttime temperatures consistently stay above 50°F. Harden off indoor-grown seedlings for 7-10 days before moving them outside permanently.
Summer: Peak growing and fruiting season. Water daily (twice in extreme heat), feed weekly, prune suckers on indeterminate varieties, and harvest ripe fruit every 2-3 days. Move buckets to afternoon shade if temperatures exceed 95°F for extended periods.
Fall: As temperatures drop, tomato plants slow production. Pick remaining fruit and ripen indoors. Pull spent plants, dump the potting mix on your compost pile, and clean buckets for next year.
Winter: Plan next year’s varieties and order seeds. Clean and store buckets. Potting mix can be refreshed with compost and reused for 2-3 seasons.
Stuff Most Skip
- Drill drainage holes before anything else — this is non-negotiable. Five holes minimum with a 1/2 inch bit. No drainage means dead plants within weeks.
- Plant deep — bury 2/3 of the stem — tomatoes grow roots from buried stems. Deep planting creates a massive root system that makes your plant more drought-tolerant and productive.
- Water consistently or use a self-watering insert — inconsistent watering causes 90% of container tomato problems (blossom end rot, cracking, blossom drop). A $5 self-watering insert eliminates all of these.
- Choose determinate varieties for the easiest experience — bush types like Roma, Celebrity, and Patio Princess stay compact, need less staking, and produce heavily without constant pruning.
- Feed weekly once flowers appear — nutrients wash out of containers fast. Half-strength liquid fertilizer every week keeps the plant fed without burning the roots.
- One plant per bucket — it’s tempting to plant two, but overcrowding reduces airflow, spreads disease, and results in less fruit per plant. One vigorous plant per bucket outproduces two crowded ones.
Continued Reading
Quick Answers
How many tomatoes can one plant produce in a 5-gallon bucket?
A healthy determinate tomato plant in a 5-gallon bucket produces 10-20 pounds of tomatoes per season (roughly 20-50 tomatoes depending on variety). Cherry tomato plants can produce even more — up to 200 individual fruits. Proper watering and feeding are the keys to hitting the upper range.
Can I reuse the potting mix next year?
Yes, but refresh it first. Remove old roots, mix in fresh compost (about 25% new material), and add slow-release fertilizer. Don’t grow tomatoes in the same mix two years in a row — rotate with herbs or flowers to prevent soilborne disease buildup. Replace the mix entirely every 3 years.
What color bucket is best for tomatoes?
Light-colored buckets (white, tan, light gray) are best because they reflect heat and keep roots cooler. Dark buckets absorb sunlight and can heat the soil to root-damaging temperatures on hot days. If you only have dark buckets, wrap them in burlap or place them where the bucket is shaded but the plant gets sun.
How often should I water tomatoes in a 5-gallon bucket?
Once daily in normal weather, twice daily during heat waves above 90°F. Water until it flows freely from the drainage holes. Check by sticking your finger 1 inch into the soil — if it’s dry, water. Consistent moisture is more important than the exact frequency.
Do I need to prune tomatoes in containers?
Determinate varieties need minimal pruning — just remove suckers below the first flower cluster. Indeterminate varieties benefit from removing suckers regularly to keep the plant manageable in a container. Always remove yellowed or diseased lower leaves for better air circulation.
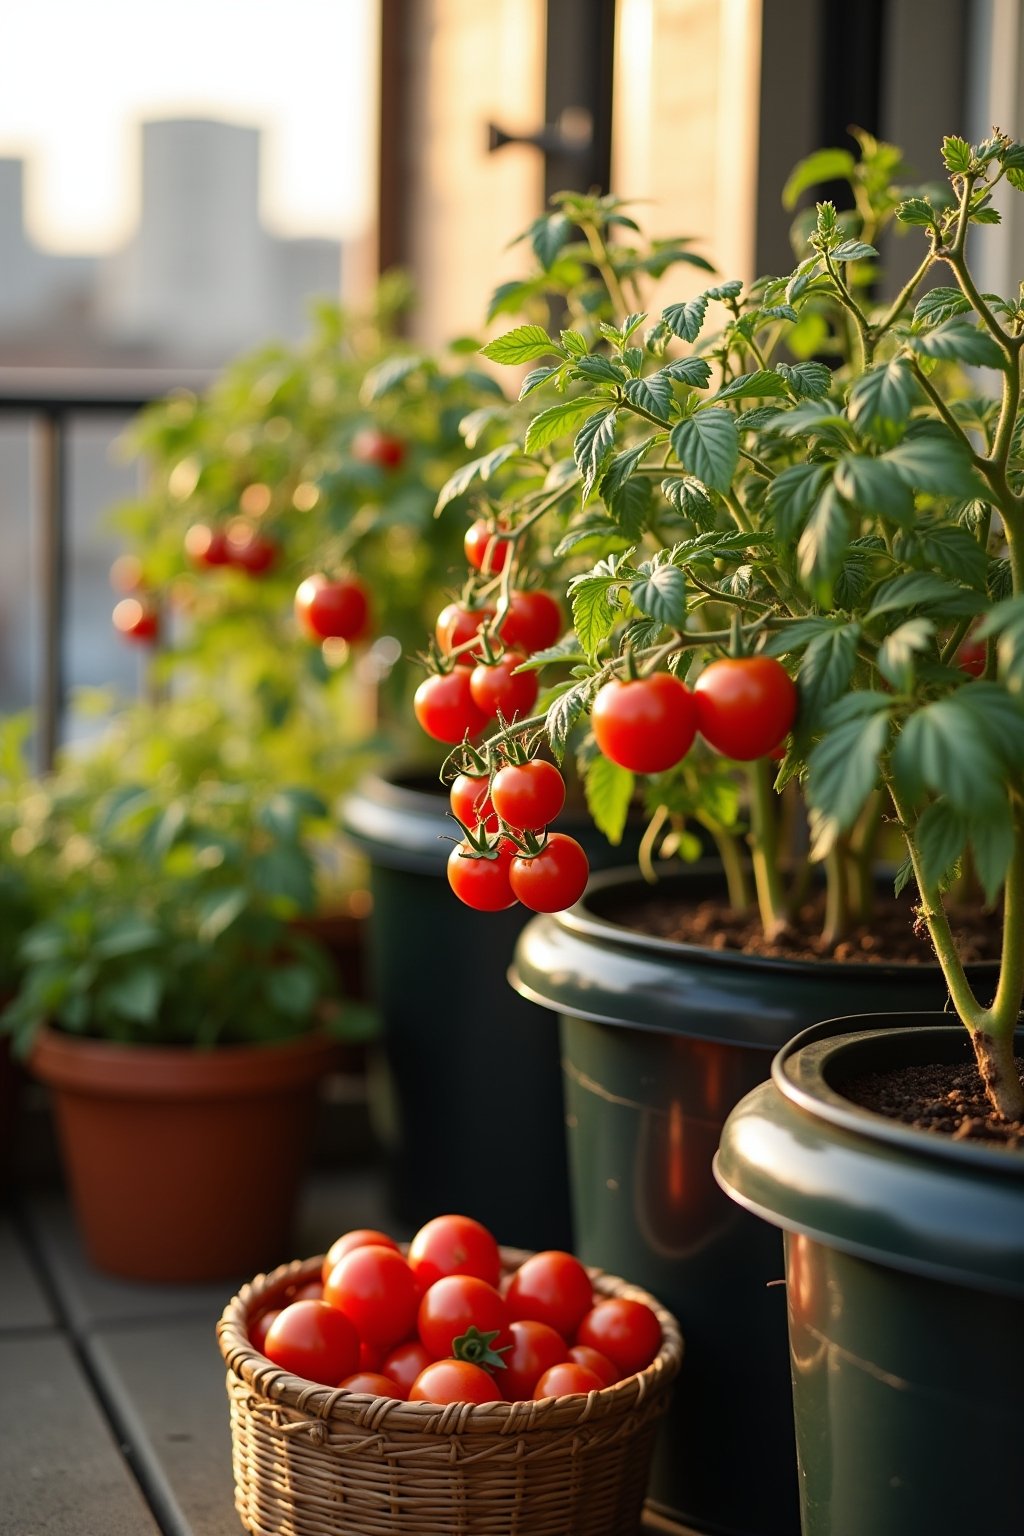
Can I grow tomatoes on a balcony?
Absolutely — balcony growing is one of the best uses for bucket tomatoes. You need at least 6 hours of direct sun (south or west-facing balconies are ideal). Wind on high floors can stress plants, so position buckets against a wall and use a sturdy cage. Compact determinate varieties handle balconies best.