My first strawberry tower was a disaster. I had stacked five terracotta pots on a tiny apartment balcony, convinced I was about to become one of those people who posts dreamy harvest baskets on Instagram. Six weeks in, the top tier was bone dry, the bottom tier was drowning, and half the plants were yellow and sulking. I pulled the whole thing apart in July and swore off vertical growing forever.
Then I met a woman at a community garden who was pulling pound after pound of berries out of a single five-tier tower that took up two square feet of patio. She watched me eyeing it and said, quietly, “You are watering wrong.” That one sentence changed how I garden. Three seasons later I have three towers producing more strawberries than a family of four can eat, on a footprint smaller than a bath mat. This is the exact setup, the cultivars that actually work, and the watering trick nobody tells you about.
Quick Facts
| Sun | Full Sun (6-8 hours minimum) |
| Difficulty | Beginner-friendly |
| Season | Plant March-May (spring) or September (fall) |
| Zone | Works in all USDA zones 3-10 |
| Time to Harvest | 60-90 days for first berries from bare-root plants |
Stock Up On
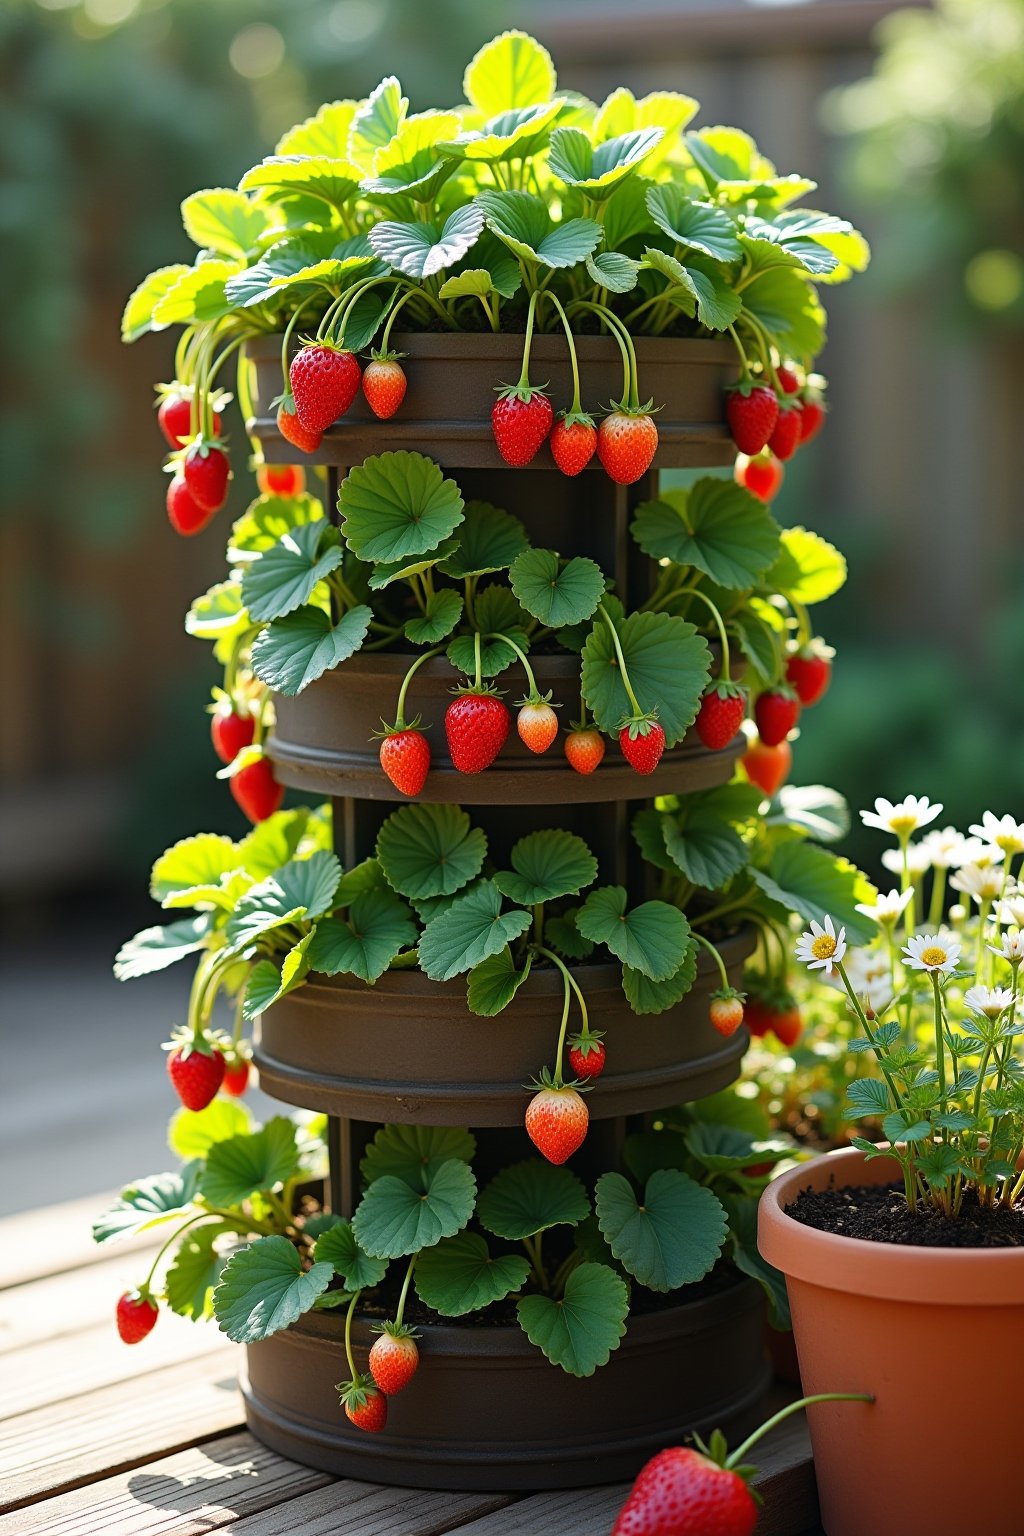
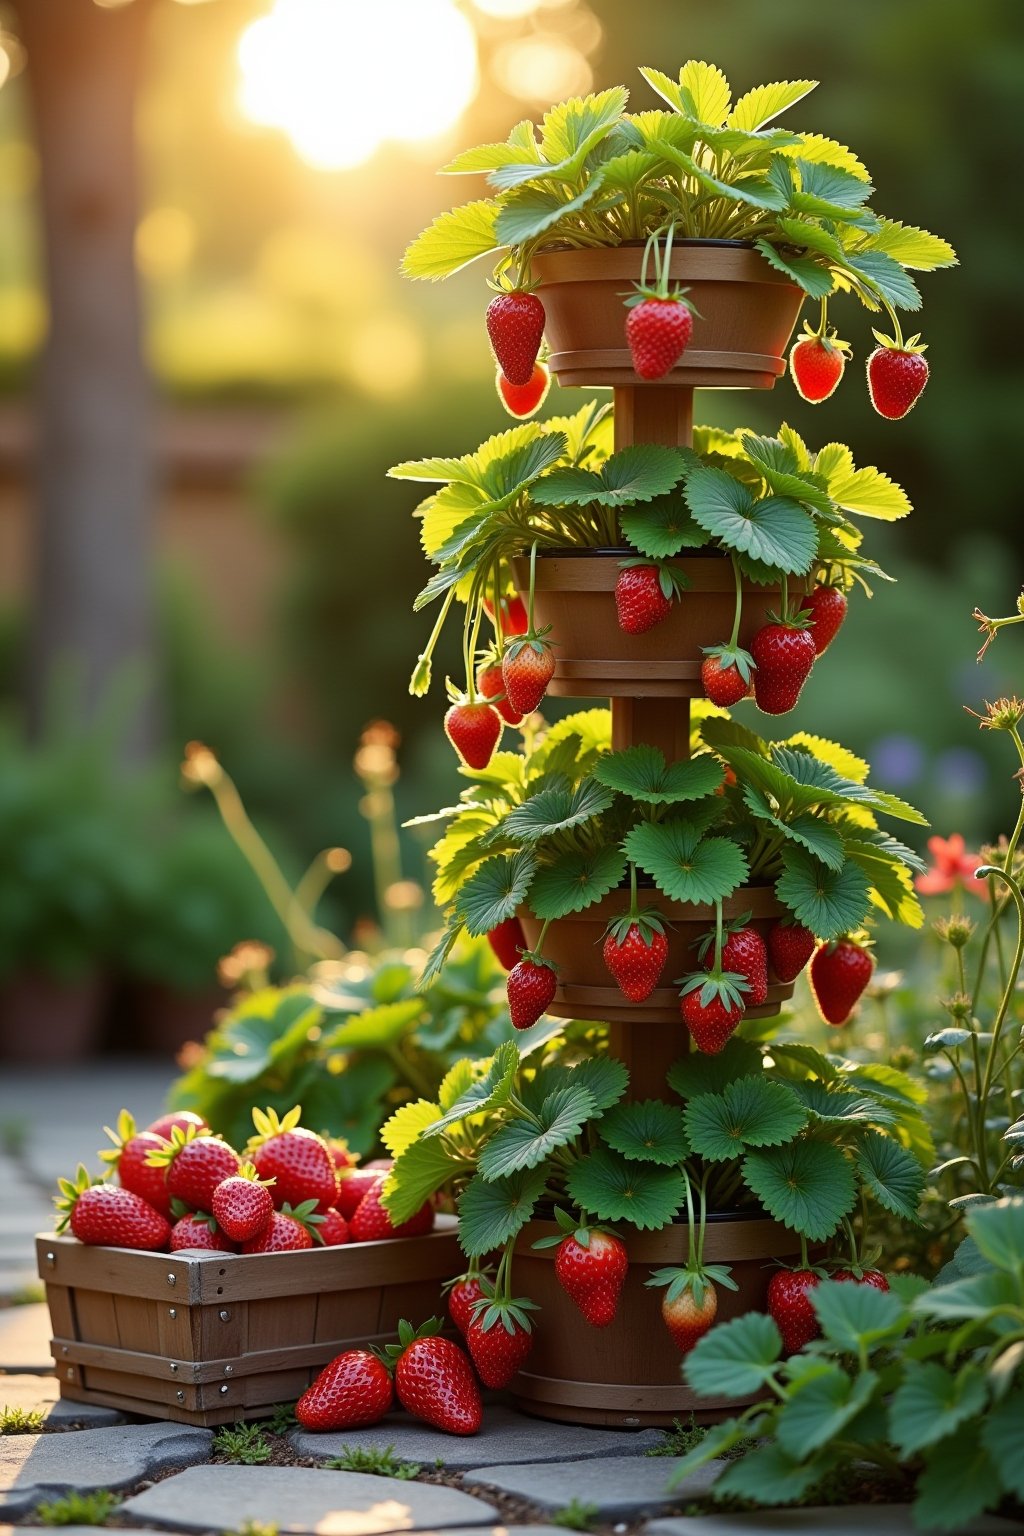
- Vertical tower planter (GreenStalk 5-tier, DIY stacked buckets, or stacked pot design)
- 15-20 bare-root strawberry plants (day-neutral or everbearing varieties work best)
- High-quality potting mix — NOT garden soil (about 4 cubic feet for a 5-tier tower)
- Slow-release organic fertilizer (5-5-5 or tomato-specific)
- Perforated PVC center pipe (for DIY bucket towers — optional for GreenStalk)
- Mulch: pine bark fines or straw for the top layer
- Drip irrigation or soaker attachment (life-changing, not optional)
- Plant saucers or a gravel tray underneath (catches runoff on patios)
- Netting or mesh sleeve (birds will find your tower by week three)
Skip garden soil entirely. I know it feels wasteful to buy bags of potting mix when you have soil in the yard, but garden soil compacts inside a tower and suffocates the roots. A good peat-based or coco-coir potting mix with perlite drains properly and stays light. Expect to pay $40-60 for enough mix to fill a 5-tier GreenStalk. Cheap “topsoil” from a big box store is the single most common reason beginner towers fail.
A GreenStalk tower runs about $150 in 2025 and holds 30 plants. DIY bucket towers cost around $25 in 5-gallon buckets and PVC but require drilling and caulk work. Stacked terracotta pots look the prettiest but dry out fastest and are the hardest to water evenly. Pick based on how much patience you have for fiddling — I use GreenStalks now because they pay for themselves in berries by year two.
Step 1: Pick the Right Strawberry Variety for a Tower
This is where most tower growers mess up before they even open a bag of soil. June-bearing strawberries, the kind you see at farm stands, produce one massive flush and then sulk for the rest of the season. In a tower, that is a waste of vertical space. You want day-neutral or everbearing varieties that flower and fruit from May through October.
Seascape is my desert-island pick — productive, heat-tolerant, huge berries, and the plants stay tidy. Albion is close behind with sweeter fruit but slightly lower yields. Mara des Bois tastes like wild strawberries and woodland perfume — you pay for it in lower productivity but it is worth one tier of your tower.
If you can get your hands on the new UC Golden Gate or UC Keystone cultivars from UC Davis (released to U.S. retailers in 2025), grab them. They were bred specifically for day-neutral productivity with better disease resistance than anything on the shelf. A few online nurseries had them in stock last spring for around $3 per plug.
Step 2: Fill and Plant the Tower Correctly
Start with potting mix pre-moistened to the texture of a wrung-out sponge. If you dump dry mix into the tower it creates dry pockets that water cannot reach later — it runs down the outside of the root ball instead of soaking in. Mix a handful of slow-release fertilizer into every tier.
Trim bare-root plant roots to about 4 inches if they are longer. Spread the roots out in a fan shape. The single most important planting rule: the crown (where the roots meet the leaves) must sit right at soil level. Plant too deep and the crown rots. Plant too high and the roots dry out. This catches nearly every beginner — I have killed more strawberries by planting the crown wrong than by any other mistake.
Space plants roughly 6-8 inches apart per tier. A 5-tier tower holds 25-30 plants comfortably. Water each tier thoroughly after planting — you want water to run out the bottom of every level.
Step 3: Solve the Watering Problem (This Is Where Towers Live or Die)
The top tier dries out twice as fast as the bottom tier. Period. No amount of careful hand-watering fixes this reliably, because water takes the path of least resistance — straight down through the center — instead of soaking evenly into each level.
The fix that changed everything for me: a drip irrigation ring or soaker hose coil placed on each tier. GreenStalk sells a simple watering can attachment that distributes water evenly down the core. If you run a DIY tower, a perforated PVC pipe through the center with holes drilled at each tier height works almost as well. Water the core, let it seep outward. Never water from the top and hope it reaches the bottom.
Water deeply every other day in spring and early fall. In July and August, daily watering is normal for a tower in full sun — check the top tier by sticking a finger two inches into the soil. If it feels dry, water. This is the real reason most towers fail: inconsistent water is worse than too little water.
Step 4: Place the Tower for Maximum Sun and Airflow
Strawberries want six to eight hours of direct sun, and a tower gives you a huge advantage — you can rotate it a quarter turn every three or four days so every tier gets equal sun. If you leave a tower fixed in one spot, the shady side will be noticeably less productive by July.
Avoid hot south-facing brick walls that radiate heat. Yes, strawberries love sun, but potting mix in dark containers can hit 110°F on a 90°F day and roots cook. A spot with morning sun through early afternoon is ideal, with a little protection from scorching late-afternoon western exposure.
Airflow matters more than you think. Strawberries are prone to gray mold and powdery mildew, and a tower crammed against a fence with no air movement is an invitation for both. Leave at least 18 inches of space on all sides. I lost half my tower once to gray mold before I figured this out.
Step 5: Feed, Mulch, and Protect the Tower
Container strawberries are hungry. Potting mix nutrients run out in 4-6 weeks no matter what the bag says. Start feeding with a half-strength liquid fertilizer (fish emulsion or kelp) every two weeks once plants are established. Through peak fruiting in June-August, bump it to weekly — I use a dilute solution every time I water during summer.
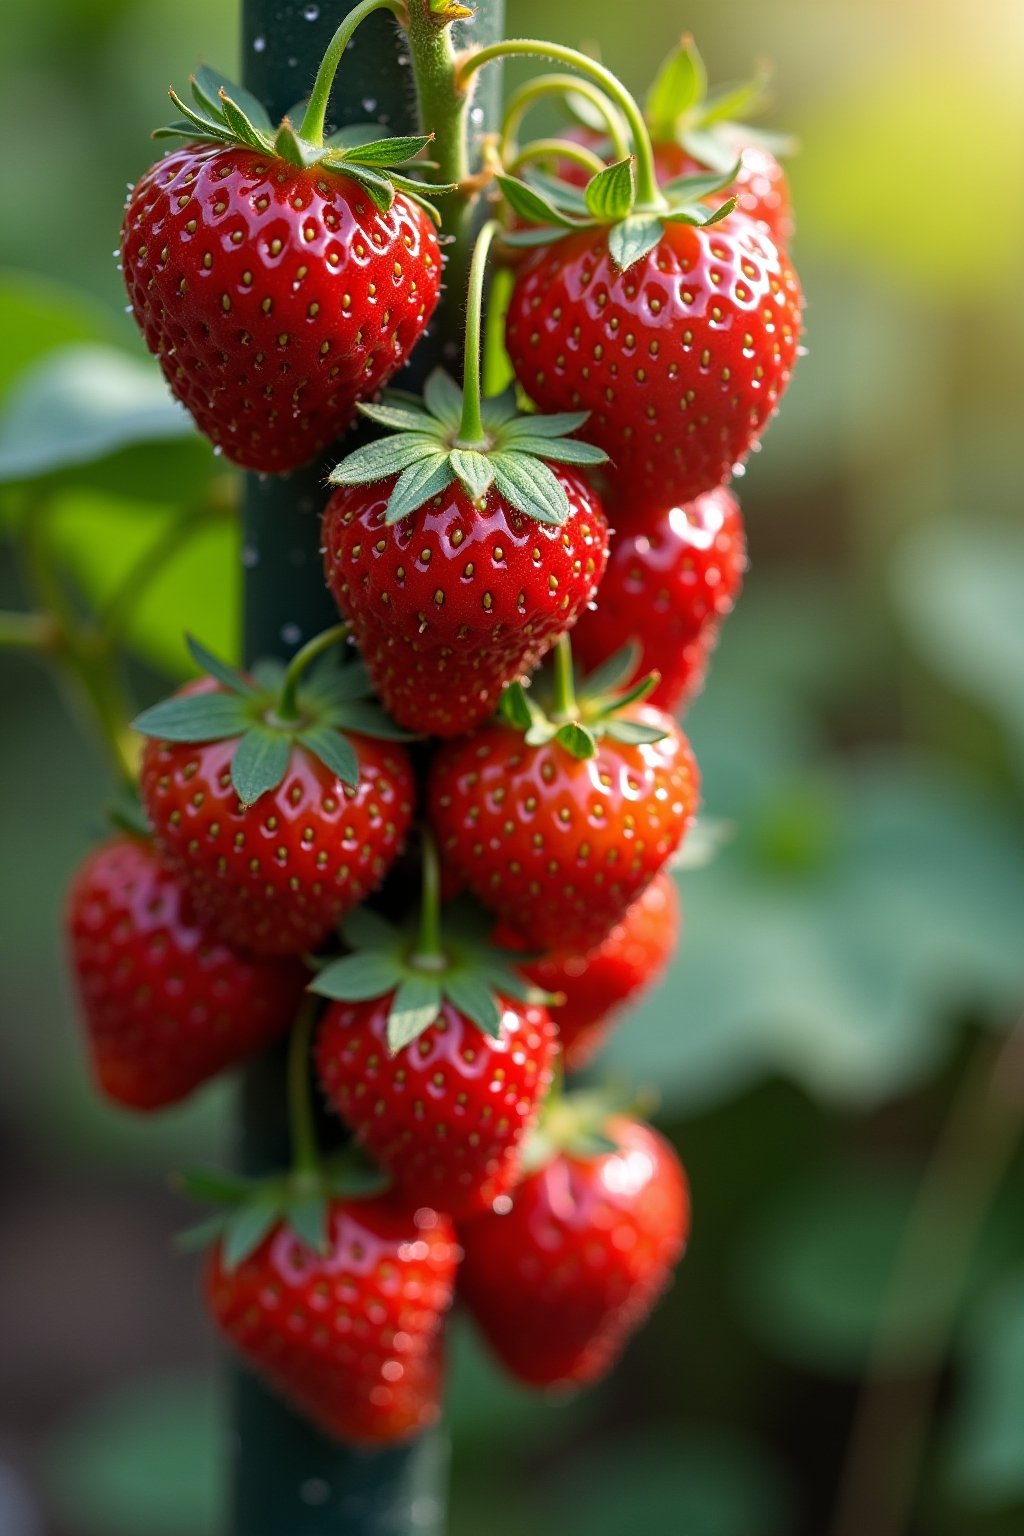
Top each tier with a half-inch of pine bark fines or clean straw mulch. This does three things: keeps moisture in, suppresses any weed seeds that blow in, and — crucially — keeps berries from sitting on wet soil. Dirty soggy berries rot in 48 hours. Mulched berries stay clean.
Birds find towers by week three. I use a simple mesh sleeve over the whole tower once fruit starts turning white. A $12 bird mesh bag saves pounds of berries. Netting with 1-inch mesh works but be sure it is pulled tight or birds get tangled.
Step 6: Winter Care and Year-Two Setup
In zones 3-6, move the tower into an unheated garage or against a sheltered wall after the first hard frost. Strawberry roots survive down to about 22°F soil temperature, but a container can get much colder than the ground around it. Water once a month through winter if the soil dries out.
In zones 7-10, leave the tower outside but add a 2-inch straw mulch over the top tier. In zones 9-10 with no freeze, strawberries often try to fruit through winter — let them, but remove flowers on new plants during the first 6 weeks so roots can establish.
Strawberry plants produce their biggest harvests in year two. By year three, production drops and it is time to replace with fresh plugs. I rotate one tier per season so I always have a mix of first- and second-year plants producing.
Diagnosing the Issue
Top tier is wilting while bottom is wet: Classic vertical tower problem. You are watering from the top and it is running through without soaking in. Switch to center-core watering with a soaker attachment or PVC pipe. Water lower tiers first, then the middle, then the top.
Small berries or no berries at all: Usually a fertilizer issue. Container plants eat through nutrients fast. Start a weekly half-strength liquid feed. Also check that you picked day-neutral or everbearing varieties — June-bearing in a tower will disappoint you.
Yellow leaves with green veins: Iron chlorosis, usually from overwatering or cold soil. Let the tower dry out slightly, move to a sunnier warmer spot, and apply a liquid iron supplement. New leaves should come in green within 10 days.
Fuzzy gray mold on berries: Poor airflow or berries touching wet soil. Pick off affected fruit and throw away — do not compost. Add mulch so berries stay off the soil, increase spacing around the tower, and water in the morning so leaves dry before evening.
Plants look fine but hardly fruit: Too much nitrogen (all leaf, no flower), not enough sun (less than 6 hours), or plants are June-bearing and it is the wrong season. Switch to a tomato-specific fertilizer with higher phosphorus to push flowering.
What Each Season Brings
Spring (March-May): Plant bare-root strawberries as soon as nighttime temps stay above 25°F. Pinch off all flowers for the first 4-6 weeks to force plants to build roots before fruiting. This doubles your season-two harvest.
Summer (June-August): Peak harvest for day-neutral and everbearing varieties. Water daily, fertilize weekly with dilute liquid feed. Pick berries every other day — ripe strawberries attract birds, slugs, and mold fast.
Fall (September-October): A second smaller flush of berries in day-neutral varieties. Plant new plugs now in zones 7-10 for a head start on next spring. Remove dead leaves and any runners you do not plan to keep.
Winter (November-February): Move towers to sheltered spots in zones 3-6. Water monthly if soil dries out. In warm zones, light mulch over the top tier protects crowns from brief cold snaps. Order replacement plugs by February for spring shipments — best varieties sell out fast.
Small Plays
- Pinch off first-year flowers for 4-6 weeks — the plant pours energy into roots and runners instead of fruit, which means a massive second-year harvest. This feels counterintuitive but doubles long-term production.
- Rotate the tower every 3-4 days — a quarter turn keeps all sides of the tower equally productive. Fixed towers always develop a shady back-side that fruits half as much.
- Water the core, not the top — use a PVC pipe with drilled holes or a soaker attachment. Water poured on the top tier runs straight down and leaves middle tiers dry. This is the number one reason towers fail.
- Day-neutral beats everbearing beats June-bearing for towers — you want steady production from May to October, not one big crop. Seascape and Albion are the most reliable. UC Golden Gate (new for 2025) is the variety to watch.
- Replace plants by year three — strawberry productivity drops sharply after the second fruiting season. Rotate in fresh plugs to one tier per year so you always have mixed-age plants producing.
- Mulch every tier with pine bark fines — keeps moisture in, suppresses weeds, and prevents berries from rotting on wet soil. A $10 bag covers a 5-tier tower twice.
- Net the tower before berries turn red — birds find ripening fruit faster than you will believe. A simple mesh bag over the whole tower costs $12 and saves pounds of berries.
Frequently Asked Questions
How many strawberry plants fit in a vertical tower?
A standard 5-tier GreenStalk holds about 30 plants (6 pockets per tier). DIY stacked-bucket towers hold 15-20 depending on bucket size. Stacked terracotta pots typically hold 12-15. Day-neutral and everbearing varieties will produce about 1-1.5 pounds of berries per plant per season in a tower, so a full tower can easily yield 30+ pounds in a good year.
What is the best strawberry variety for vertical towers?
Seascape and Albion are the most reliable day-neutral varieties for towers. Mara des Bois has smaller berries but incredible flavor. For 2025 and beyond, the new UC Golden Gate and UC Keystone cultivars released by UC Davis show the best disease resistance and productivity. Avoid June-bearing varieties like Earliglow for towers because they only produce one flush.
How often should I water a strawberry tower?
Every other day in spring and fall, and daily in summer heat. More importantly, water from the core of the tower rather than from the top. Water poured on the top tier runs straight down through the center without soaking into middle tiers. A perforated PVC pipe through the core or a GreenStalk watering attachment solves this completely.
Can I grow strawberries in a tower year-round?
In USDA zones 7-10 yes, with light mulch over the top tier in winter. In zones 3-6 move the tower into an unheated garage or sheltered spot after the first hard frost. Container roots freeze at higher temperatures than in-ground roots because the soil has no insulation from surrounding earth.
Do strawberry towers really work or are they just a Pinterest trend?
They absolutely work when set up correctly. The two things that make or break a tower are watering method (core watering, not top watering) and variety choice (day-neutral or everbearing, not June-bearing). Towers that fail almost always fail for these two reasons, not because vertical growing is flawed.
How long does a strawberry tower produce before plants need replacing?
Strawberry plants produce their best harvests in year one and year two. Production drops significantly by year three and plants are often spent by year four. The best strategy is rotating one tier of fresh plugs into the tower each year so you always have a mix of first-, second-, and third-year plants producing simultaneously.