If you have been scrolling design content at all in the past few months, you have probably seen rooms where the wall color extends all the way up onto the ceiling — and wondered why it looks so ridiculously good. That technique has a name, and it is called color capping. It is basically color drenching’s cooler, more sophisticated sibling.
I color-capped my bedroom on a dare from a friend who is an interior designer, and I genuinely gasped when I finished. The room went from a standard white box with a pretty wall color to feeling like a cocoon — immersive, enveloping, and ten times more expensive-looking than before. The ceiling is the fifth wall that most people ignore, and painting it the same color as your walls or a tonal shade is the single fastest way to make any room feel intentionally designed.
Real-Use Observations
- Creates an immersive, cocoon-like feeling — when the color wraps from walls onto the ceiling, the room feels enveloping and cozy rather than boxy and disconnected
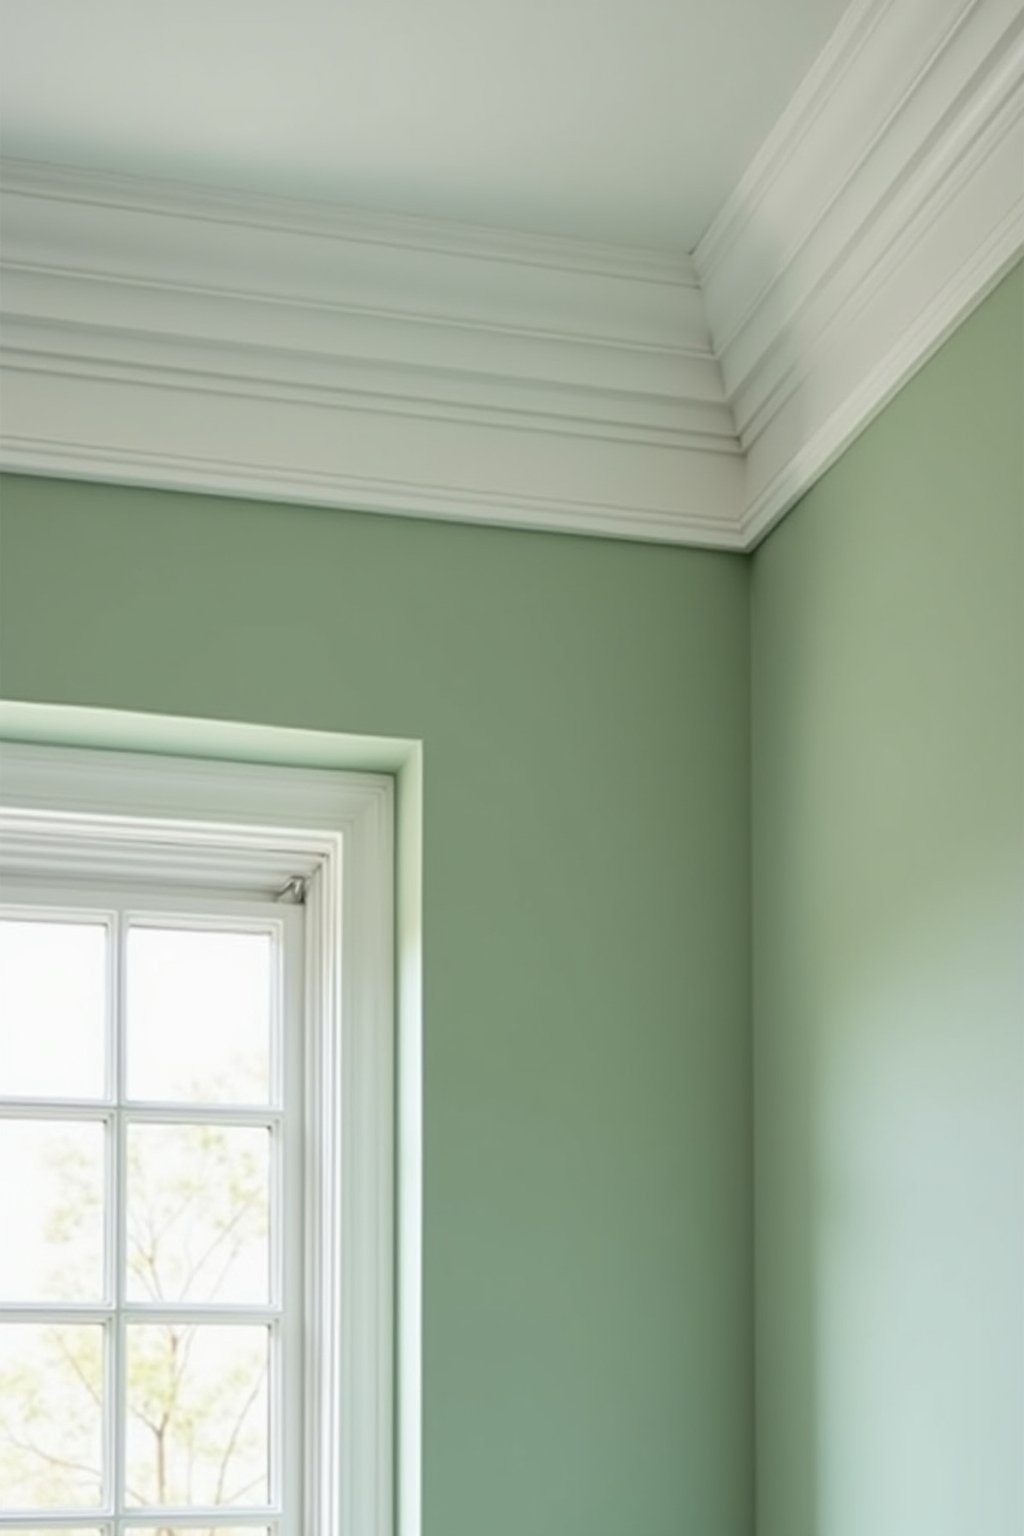
- Eliminates the choppy ceiling line — the harsh line where colored walls meet a white ceiling is one of the biggest visual disruptions in most rooms. Color capping removes it entirely for a seamless look
- Top paint trend of 2026 — color capping and color drenching searches have surged dramatically, with designers and homeowners both embracing the technique across Pinterest, Instagram, and TikTok
- Makes rooms feel more expensive — this technique reads as intentional and sophisticated. It is the kind of detail that makes people think you hired a designer, even though it costs the same as any paint job
- Works with any color — soft neutrals for a subtle effect, deep moody tones for drama, or warm mid-tones for cozy spaces. Every color benefits from being extended to the ceiling
- Same cost as regular painting — you are using the same paint, same tools, and same technique. The only difference is painting one additional surface. Zero extra investment for a dramatically different result
The Lineup
Everything you need is identical to a regular paint job:
- Paint: Enough for walls plus ceiling — calculate square footage of your ceiling and add to your wall estimate. Same color or a lighter tint of the same color
- Ceiling paint or flat finish: Use the same color in a flat or matte finish for the ceiling. Eggshell or satin on walls with flat on the ceiling is the standard approach
- Roller and brush: A nine-inch roller for large surfaces and a two-inch angled brush for cutting in edges. Use a roller with an extension pole for the ceiling
- Painter’s tape: For clean edges around trim, windows, and crown molding if applicable
- Drop cloths: Ceiling painting drips more than wall painting. Cover floors and furniture thoroughly
The Working Pattern
Choose Your Color and Sheen Strategy
You have two options for color capping: same color on walls and ceiling, or a lighter tint of the wall color on the ceiling. Same color creates the most dramatic, immersive effect. A lighter tint (ask the paint store for a fifty percent tint of your wall color) creates a subtle cohesion that is less intense but still eliminates the jarring white ceiling line.
For sheen, use eggshell or satin on the walls and flat or matte on the ceiling. The flat ceiling sheen prevents light from bouncing off imperfections overhead (every ceiling has them) while the subtle wall sheen adds depth and is easier to clean. This sheen contrast is invisible to the eye but makes a real difference in how polished the room looks.
Prep the Room Properly
Ceiling painting requires more prep than walls because gravity is working against you. Move as much furniture as possible out of the room, or cluster it in the center and cover with drop cloths. Cover the entire floor — ceiling roller drips are inevitable and land everywhere.
Tape off crown molding, light fixtures, and any trim where walls meet ceiling. If you do not have crown molding (most modern homes do not), you do not need tape at the wall-ceiling junction since you are painting both surfaces the same color. This actually makes the job easier than a standard two-color approach.
Paint the Ceiling First
Always start with the ceiling and work down. Use a roller on an extension pole and work in long, overlapping passes in one direction. Start near the window and roll away from the natural light source so you can see your wet edge and avoid lap marks.
Apply two thin coats rather than one thick coat. Let the first coat dry completely (usually two to four hours) before the second. Ceiling paint dries differently than wall paint because heat rises — in warmer rooms, it dries faster. Check for missed spots by looking at the ceiling from an angle with a work light.
Continue Down the Walls
Once the ceiling is dry, paint the walls as you normally would. Cut in around trim, windows, and doors with a brush, then roll the large surfaces. The beautiful thing about color capping is that the wall-ceiling junction requires no cutting in — the color is the same, so any overlap is invisible.
If you chose a lighter tint for the ceiling, you will need to cut in carefully where the wall meets the ceiling. Use a steady hand with an angled brush and go slowly. A slight overlap is actually fine here since the two colors are so close in tone that minor imperfections are undetectable.
Finish With Details and Lighting
After the paint is fully dry, remove all tape and replace light fixture plates and switch covers. Look at the room at different times of day to check for missed spots or visible brush marks on the ceiling. Touch up as needed with a small brush.
Lighting is critical in a color-capped room. Warm-toned bulbs (2700K) enhance warm wall colors, while cool-toned bulbs can wash them out. Replace any cool white bulbs with warm ones. Consider adding a dimmer switch — the ability to adjust light levels in an immersive, color-drenched room transforms the atmosphere from energetic during the day to cozy and intimate at night.
Catch It Early
- Choosing too dark a color for a small room — deep colors on walls and ceiling in a tiny room can feel like a cave. In small spaces, use a lighter shade and save the drama for larger rooms with more natural light
- Using the wrong sheen on the ceiling — any sheen above flat will highlight every ceiling imperfection, bump, and patch job overhead. Always use flat or dead matte on ceilings, even if your walls are satin or eggshell
- Skipping the second coat — ceilings are the most visible surface because light hits them from every angle. One coat almost always shows roller marks and thin spots. Two thin coats are non-negotiable
- Not testing the color first — a color that looks great as a wall swatch can feel overwhelming when it covers every surface. Paint a large test patch on both wall and ceiling and live with it for a day before committing
- Forgetting about the ceiling when calculating paint — most people underestimate how much paint a ceiling needs. Measure ceiling square footage separately and add it to your wall estimate. Running out mid-project means color mismatches
Tight-Budget Tweaks
Same amount of paint, bigger impact: Color capping costs the same as any paint job — the only difference is buying enough paint for the ceiling too. Calculate ceiling square footage (length times width) and add it to your wall estimate. One extra gallon usually covers a standard bedroom ceiling.
Use one color to save: Buying one color for walls and ceiling means no extra cans, no special ceiling paint, and no waste. You can also buy in larger, more cost-effective quantities since you need more of the same color.
Sample pots for testing: Most paint brands sell small sample sizes for four to eight dollars. Buy one and paint a large swatch on both wall and ceiling before investing in full gallons. This prevents costly color regret.
Behr Marquee or Benjamin Moore Regal: Self-priming paints with excellent coverage in one to two coats save time and money by eliminating the need for separate primer. Worth the slight premium over budget paint.
Finishing Touches
- Best rooms for color capping — bedrooms and dining rooms respond best to this technique because they benefit from the cozy, immersive feeling. Living rooms work too if they have good natural light
- Start with soft colors — if you are nervous, start with a warm white, soft sage, or dusty blue. These create a subtle cohesion without the intensity of a deep color
- Go bold in the bedroom — the bedroom is the ideal room for a dramatic color cap. Deep greens, rich blues, warm terracotta — colors that feel too intense in a living room are perfect in a sleeping space
- Add white trim for contrast — white baseboards, door frames, and window trim pop beautifully against color-capped walls and ceiling, providing visual relief and architectural detail
- Warm bulbs only — cool-toned light in a color-capped room washes out the color and looks clinical. Swap all bulbs to 2700K warm white for the coziest effect
- Layer textures to prevent flatness — a monochrome room needs textural variety. Mix linen, wood, ceramics, and metallics to create depth within the single-color envelope
Where to Use It in the Home
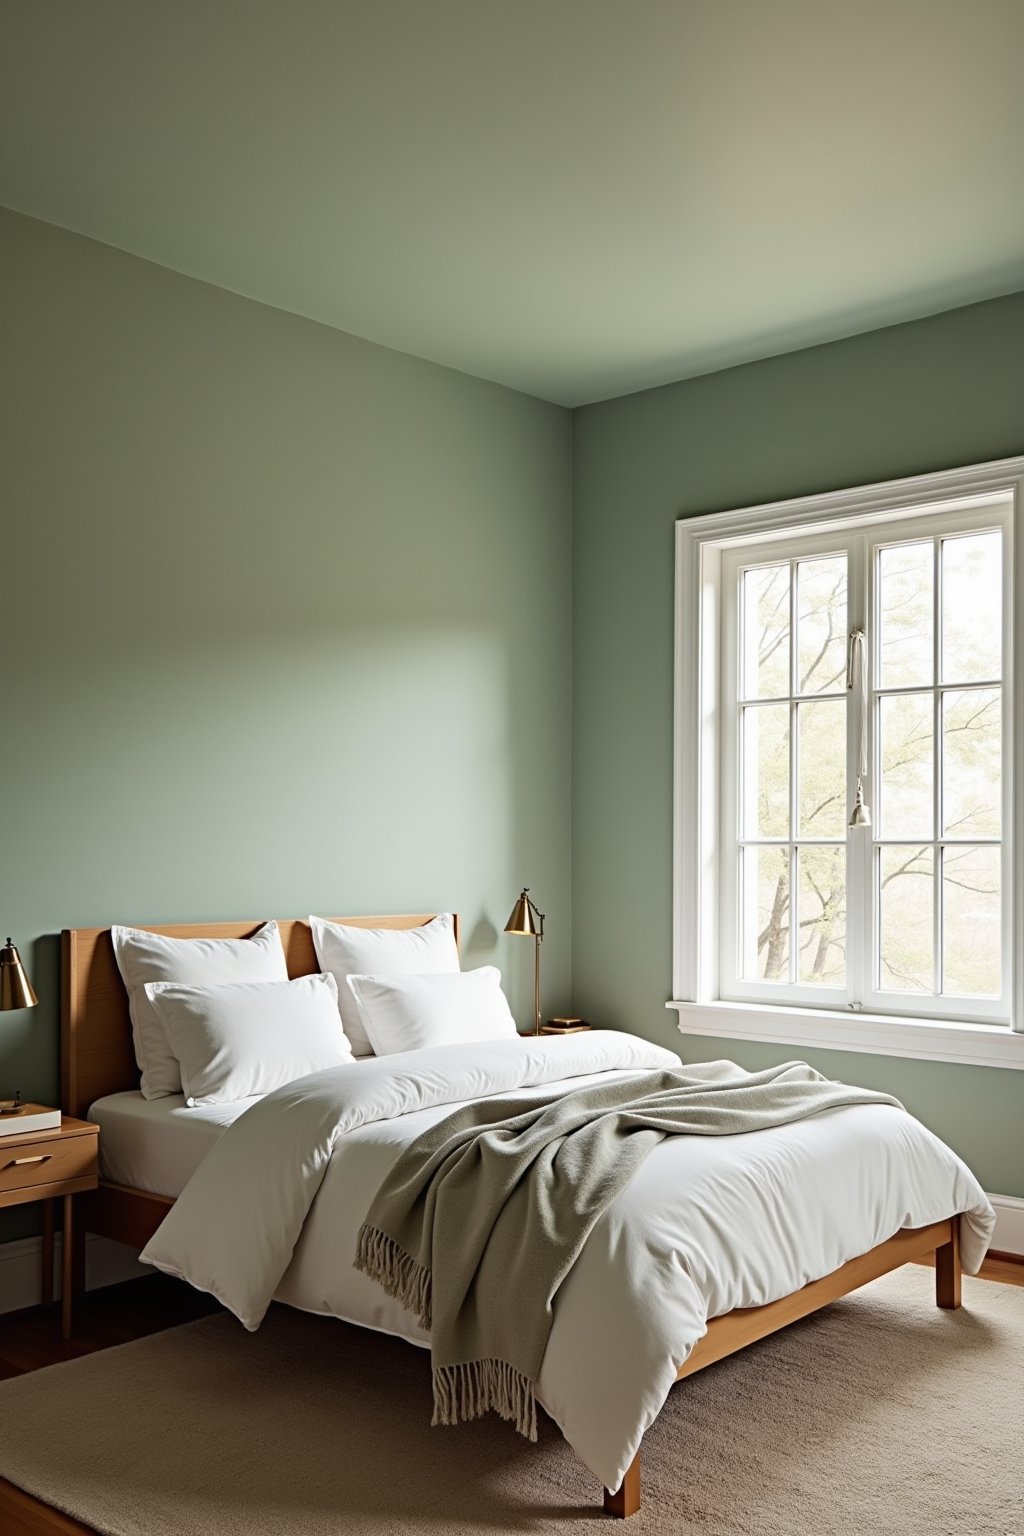
Sage Green Bedroom
Walls and ceiling painted in a soft sage green with white trim, white linen bedding, warm wood nightstands, and brass accents. The sage wraps the entire room in calm, and the white bedding and trim provide breathing room. A few terracotta accents and a natural jute rug ground the palette. This is the bedroom that gets saved thousands of times on Pinterest.
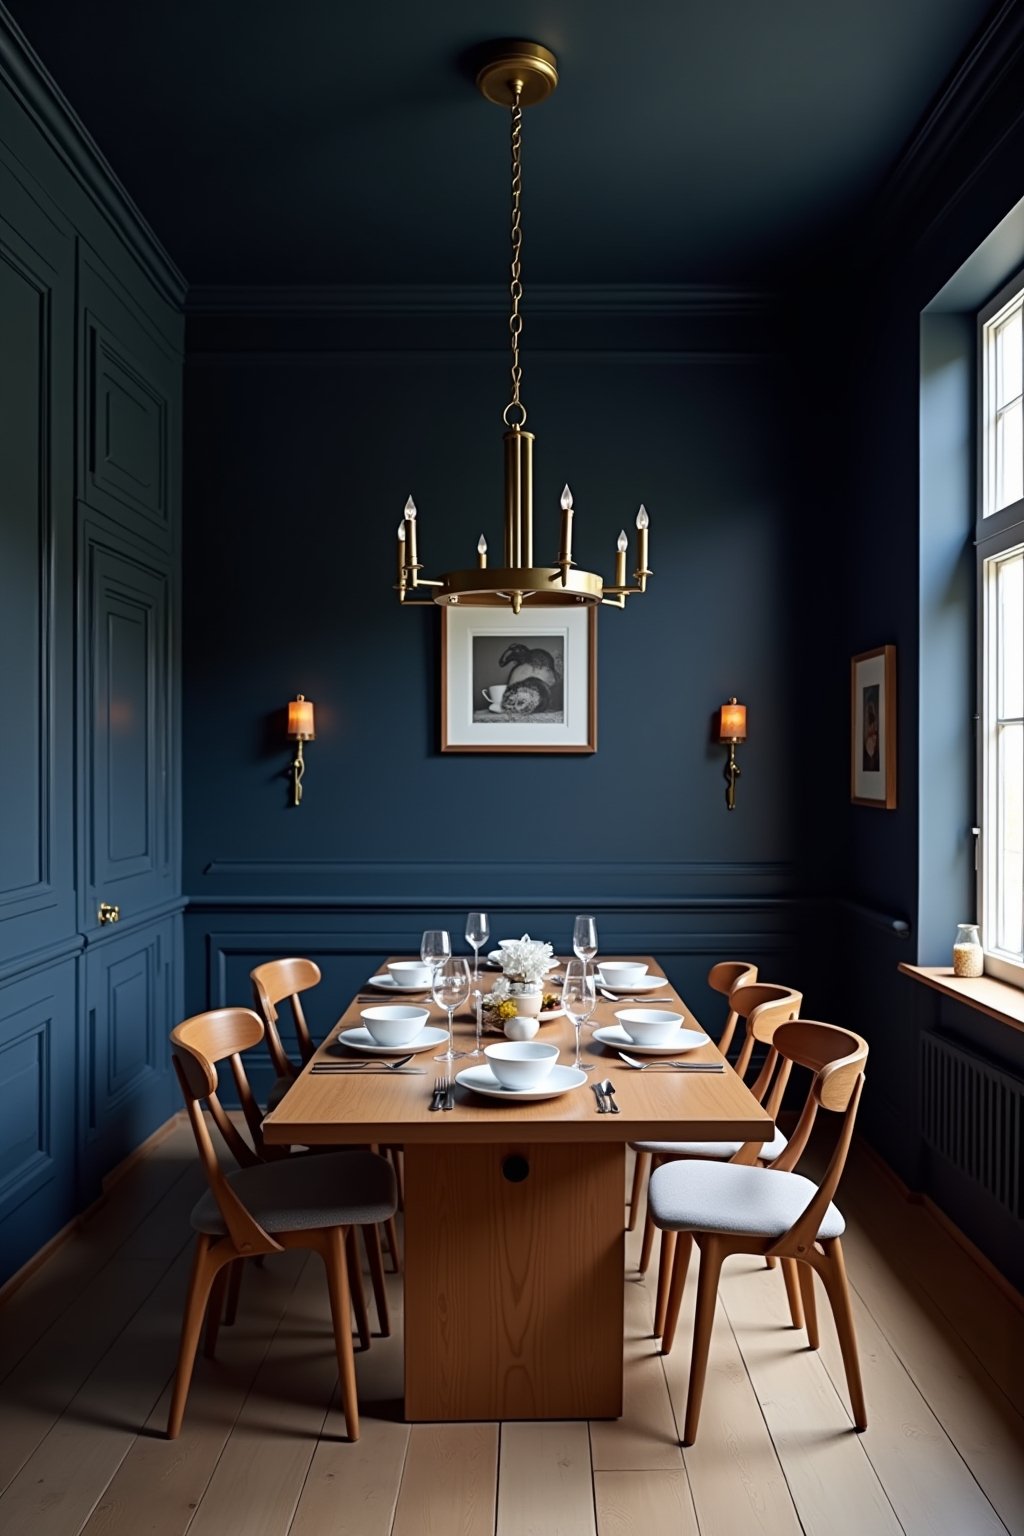
Deep Navy Dining Room
A dramatic deep navy on walls and ceiling in a formal dining room with a warm wood table, brass chandelier, and white dishware. The navy creates an intimate, restaurant-like atmosphere that makes dinner parties feel special. Candlelight bounces off the dark surfaces and creates a moody, sophisticated glow.
Warm White Living Room
For a subtle introduction, a warm white (not bright white) on walls and ceiling creates a seamless, airy envelope that makes the room feel larger and more cohesive. Add texture through linen curtains, a jute rug, warm wood furniture, and ceramics. The white-on-white creates a gallery-like backdrop that lets your furniture and decor become the focal points.
Quick Answers
What is the difference between color capping and color drenching?
Color capping extends the wall color onto the ceiling. Color drenching takes it further by also painting trim, doors, and sometimes furniture in the same color. Color capping is the more accessible, less intense version that still creates a dramatic impact.
Will painting the ceiling a dark color make the room feel smaller?
In small rooms with low ceilings, dark colors can feel heavy. But in rooms with standard eight-foot or higher ceilings, dark colors on the ceiling actually create a cozy, intentional feeling rather than making the room feel cramped. Test with a sample first.
What finish should I use on a color-capped ceiling?
Always use flat or matte finish on the ceiling, even if your walls are eggshell or satin. Flat hides imperfections that higher sheens would highlight. The slight difference in sheen between walls and ceiling is invisible to the eye.
Can I color cap in a rental?
If your lease allows painting, yes. The great news is that color capping is just as easy to paint over when you move as a standard paint job. Many renters negotiate painting rights, especially for longer leases.
What colors work best for color capping?
Almost any color works. Soft sage green, warm terracotta, dusty blue, deep navy, mushroom taupe, and warm white are all popular choices. Lighter colors create a subtle effect while darker colors create drama. Start with the mood you want and choose accordingly.
Do I need to prime the ceiling before color capping?
If your ceiling is currently white and you are going to a darker color, yes — one coat of tinted primer helps with coverage and prevents multiple paint coats. If going from white to a light color, a self-priming paint like Behr Marquee usually covers in two coats without separate primer.