The most expensive-looking piece of furniture in my house cost me twelve dollars. It is a solid wood side table I found at Goodwill with ugly orange varnish and a wobbly leg. I tightened the leg, sanded the top, painted the base in matte black, and left the natural wood top exposed. Now it sits next to my sofa looking like something from a boutique home store, and literally every guest asks where I got it.
The thrift flip is not just a budget hack anymore — it is a legitimate design movement. The collected home look, where rooms feel like they were curated over years rather than bought in one shopping trip, is the most-wanted aesthetic of 2026. And the fastest way to achieve it is by mixing vintage and upcycled pieces with your existing furniture. Nobody’s living room should look like a showroom floor — it should look like a life well-lived.
The Real Trick
- Unbeatable value — solid wood furniture at thrift stores costs five to thirty dollars. The same piece from a vintage boutique after cleaning up runs two hundred to five hundred dollars. You are doing the same work for a massive discount
- The collected home aesthetic — the most-pinned interiors of 2026 all have one thing in common: rooms that feel gathered over time. Thrift flipped pieces add that authentic, one-of-a-kind quality that mass-produced furniture cannot replicate
- Sustainability wins — keeping furniture out of landfills while creating something beautiful is genuinely good for the planet. Vintage furniture was also typically made with better materials than modern flat-pack alternatives
- Built to last — most thrift store furniture from the mid-century to the 1990s was made with real wood, dovetail joints, and quality hardware that modern budget furniture cannot match
- TikTok and Pinterest obsession — thrift flip content is consistently among the most-viewed home DIY content online. Millions of people are doing this and sharing their transformations
- Completely customizable — unlike buying retail where you take what is available, thrift flipping lets you choose the exact color, finish, and style for every piece. Your furniture, your rules
Prep Notes
Basic thrift flip supplies (most projects need only a few of these):
- Sandpaper: 120-grit for rough sanding, 220-grit for smooth finishing. A sanding block or orbital sander for larger pieces
- Paint: Chalk paint (Annie Sloan, Rust-Oleum Chalked) for a matte, vintage finish, or spray paint for hardware and smaller pieces
- Primer: Shellac-based primer (like Zinsser BIN) to seal wood and prevent bleed-through. Essential for dark wood pieces
- Sealer: Polycrylic or furniture wax to protect your finished piece. Matte finish looks most natural
- Basic tools: Screwdriver, wood glue for loose joints, replacement hardware (knobs and pulls) from Amazon or Anthropologie
- Cleaning supplies: TSP cleaner or warm soapy water to remove grime before painting
Each Stage
Learn What to Look for at the Thrift Store
Not everything at the thrift store is worth saving. Look for pieces with solid wood construction, interesting shapes, and good bones. Open drawers and check for dovetail joints — these indicate quality construction. Avoid particle board, severe water damage, or pieces with structural cracks that compromise the joints.
The best thrift flip candidates are nightstands, side tables, dressers, console tables, bookshelves, and chairs. These are common in thrift stores and transform dramatically with minimal work. Ignore the current finish — ugly stain, bad paint, or outdated color is exactly what you want because it keeps the price low and the potential high.
Clean and Prep Thoroughly
Before any paint or sanding, clean the entire piece with TSP cleaner or warm soapy water. Thrift store furniture carries years of grime, cooking grease, and old polish that prevents paint from adhering properly. Let it dry completely — at least overnight for porous wood.
Tighten any loose screws, reglue wobbly joints with wood glue and clamp overnight, and fill small dents or scratches with wood filler. Prep work is eighty percent of a great result. Rushing this step is the number one reason thrift flips look amateur instead of professional.
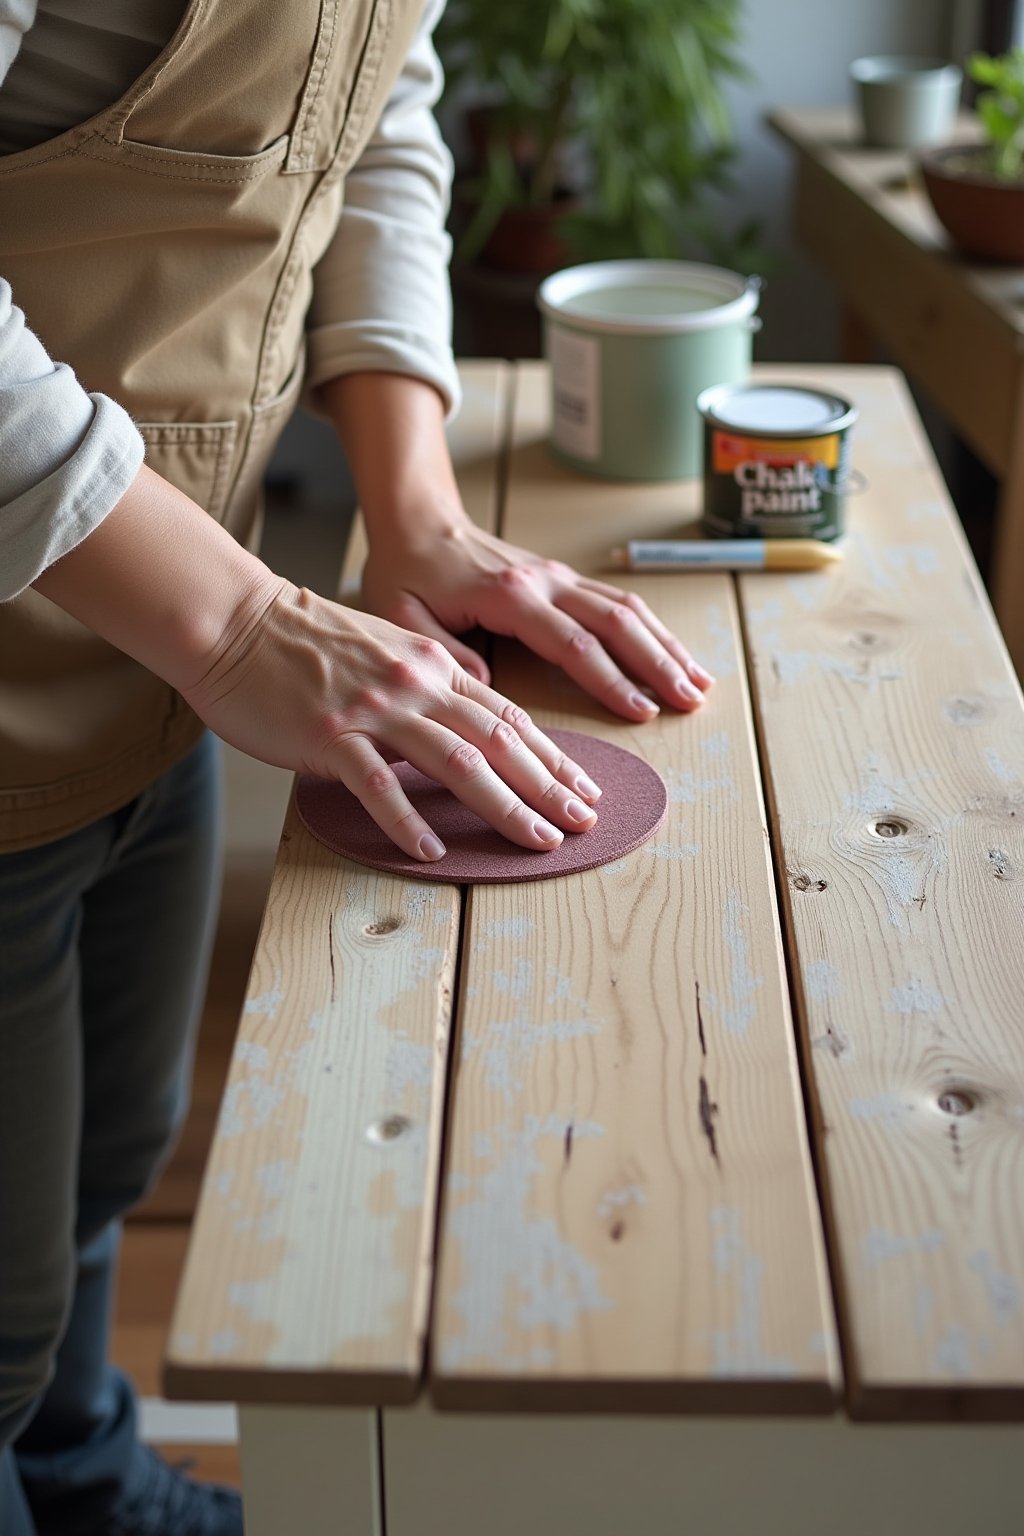
Sand and Prime for a Professional Finish
Sand the entire surface with 120-grit sandpaper to create tooth for the paint to grip. You do not need to strip the old finish completely — just scuff it enough that it feels rough to the touch. Wipe away all sanding dust with a tack cloth.
Apply one coat of shellac-based primer (Zinsser BIN is the industry standard). This is not optional — primer prevents dark wood stains from bleeding through your paint, blocks old odors, and creates a uniform base. Skip primer and you will see orange or brown blotches appearing through your paint within weeks.
Paint With the Right Technique
For most thrift flips, chalk paint is the go-to choice. It goes on smoothly, requires minimal prep, dries quickly, and gives that soft, matte finish that looks natural on furniture. Apply two thin coats with a quality brush, letting each coat dry completely before the next.
The trending colors for furniture in 2026: matte black, sage green, warm white, navy blue, and mushroom taupe. For a modern look, paint the body and leave the top in natural wood (sanded and sealed). This two-tone approach is extremely popular right now and highlights the wood grain while giving the piece a fresh, updated feel.
Swap Hardware and Style Your Piece
New hardware is the finishing touch that takes a thrift flip from nice to stunning. Brass pulls, matte black knobs, leather strap handles, or ceramic knobs all cost three to eight dollars each and completely transform a piece. Check that the new hardware fits the existing screw holes, or fill old holes with wood filler and drill new ones.
Once your piece is finished, style it in its new home. A thrift-flipped nightstand with a lamp, a small plant, and a stack of books looks like a curated designer piece. A refinished console table with a mirror above, a vase with fresh stems, and a tray creates an entryway moment. Context is everything.
Reading What’s Wrong
- Skipping primer — this is the number one beginner mistake. Without primer, dark wood bleeds through paint and creates ugly orange or brown stains that appear days or weeks after painting
- Painting particle board — particle board does not hold paint well and is not worth the effort. Focus on solid wood pieces that will last decades after refinishing
- Applying thick coats — thick paint drips, takes forever to dry, and looks lumpy. Two thin coats always look better than one thick coat. Patience is everything
- Forgetting to seal — unsealed chalk paint absorbs water and stains instantly. Always apply a sealer (polycrylic or furniture wax) as the final step to protect your work
- Buying based on price alone — a five-dollar dresser is not a deal if it is particle board with water damage. Buy based on construction quality and shape, not price. A well-made piece at fifteen dollars beats a cheap piece at three dollars every time
Half the Money Approach
Chalk paint samples: Rust-Oleum Chalked paint in small trial sizes costs under eight dollars and is enough for a nightstand or side table. No need to buy a full quart for small projects.
Anthropologie knobs on sale: Anthropologie’s decorative knobs go on sale regularly and add instant designer flair to any piece. Stock up during sales for three to five dollars each instead of full price.
Shop estate sales, not just thrift stores: Estate sales often have higher-quality furniture at lower prices because everything must go. Arrive on the last day for the best discounts — most items are half price or less.
Free furniture: Check Facebook Marketplace, Craigslist free section, and curb alerts. People give away solid wood furniture constantly. Your best thrift flip might cost literally nothing to acquire.
Styling It
- Two-tone everything — paint the body, keep the top natural wood. This is the most-pinned furniture flip technique right now and works on dressers, desks, tables, and nightstands
- Go matte, not glossy — matte and satin finishes look more modern and natural than high-gloss paint. Chalk paint or matte polycrylic gives the perfect subtle sheen
- Mix flipped pieces with retail — one or two thrift-flipped pieces mixed with modern retail furniture creates the collected, layered look that defines great design. Do not make everything thrifted
- Keep the original patina sometimes — not every piece needs paint. Sometimes a good cleaning, new hardware, and a fresh coat of wood oil is all a beautiful old piece needs
- Document the process — before and after photos of your thrift flips are incredibly satisfying and make great social media content. The transformation is always more dramatic than you expect
- Swap hardware first, paint second — sometimes just changing the knobs and pulls on a piece is enough to transform it. Try hardware before committing to a full paint job
Choosing the Room
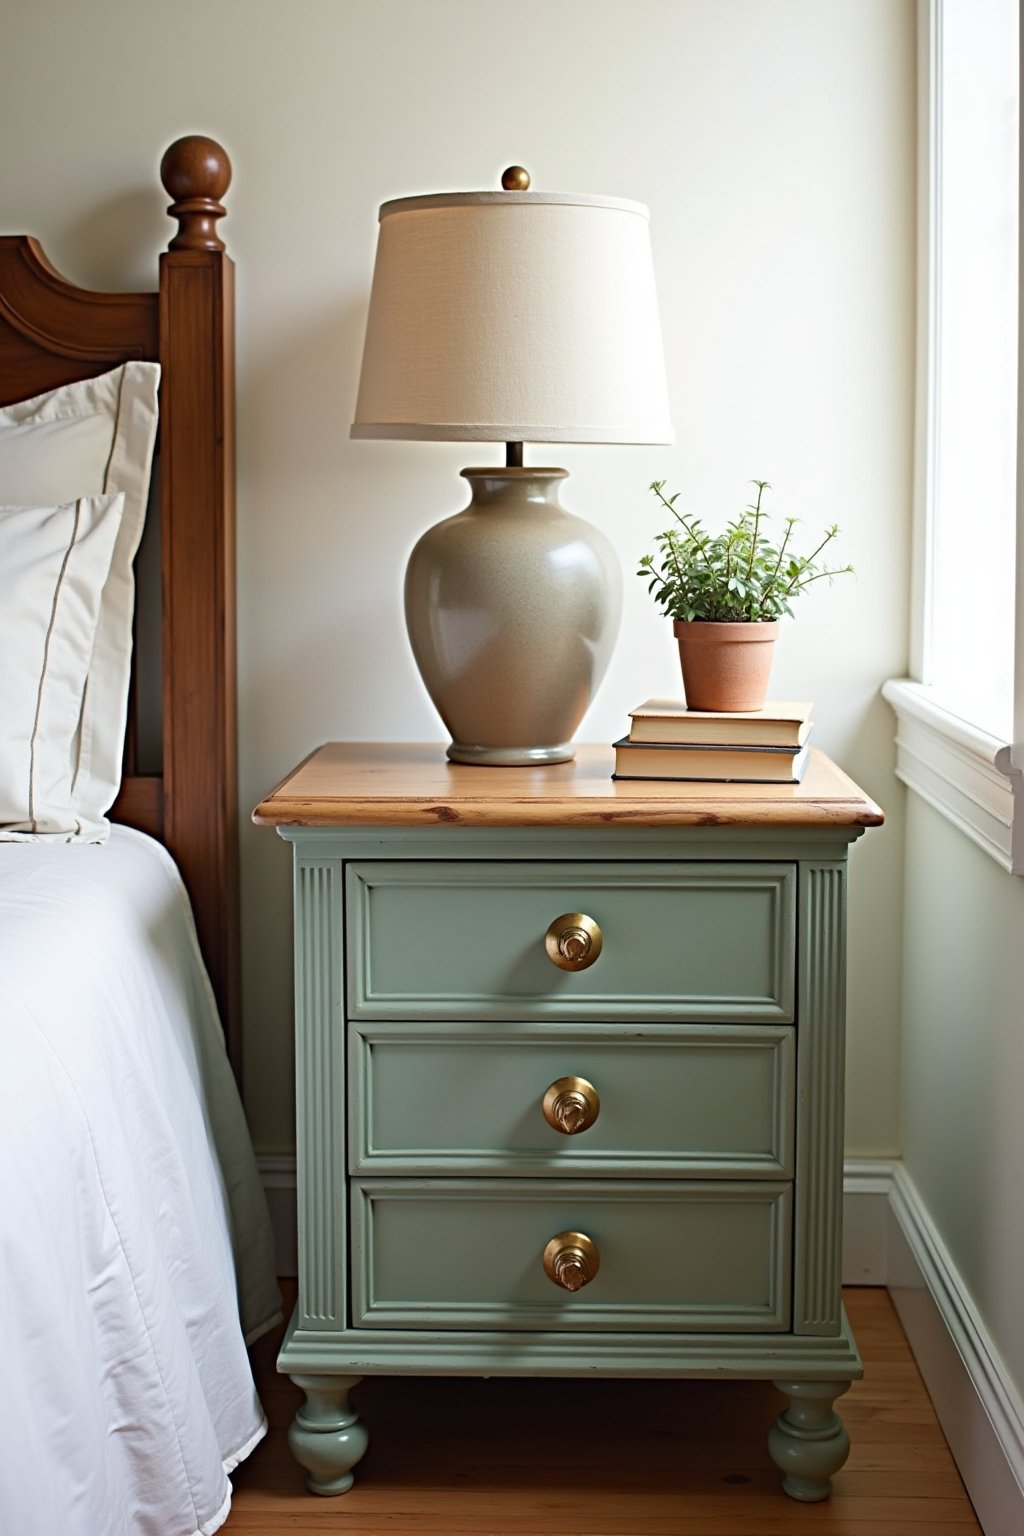
Bedroom
A thrift-flipped nightstand in sage green with a natural wood top and brass knobs flanking each side of the bed. Ceramic lamp with a linen shade on one, a small plant and stack of books on the other. The sage green pairs beautifully with white bedding and warm wood tones, and the vintage character of the piece makes the room feel collected and personal.
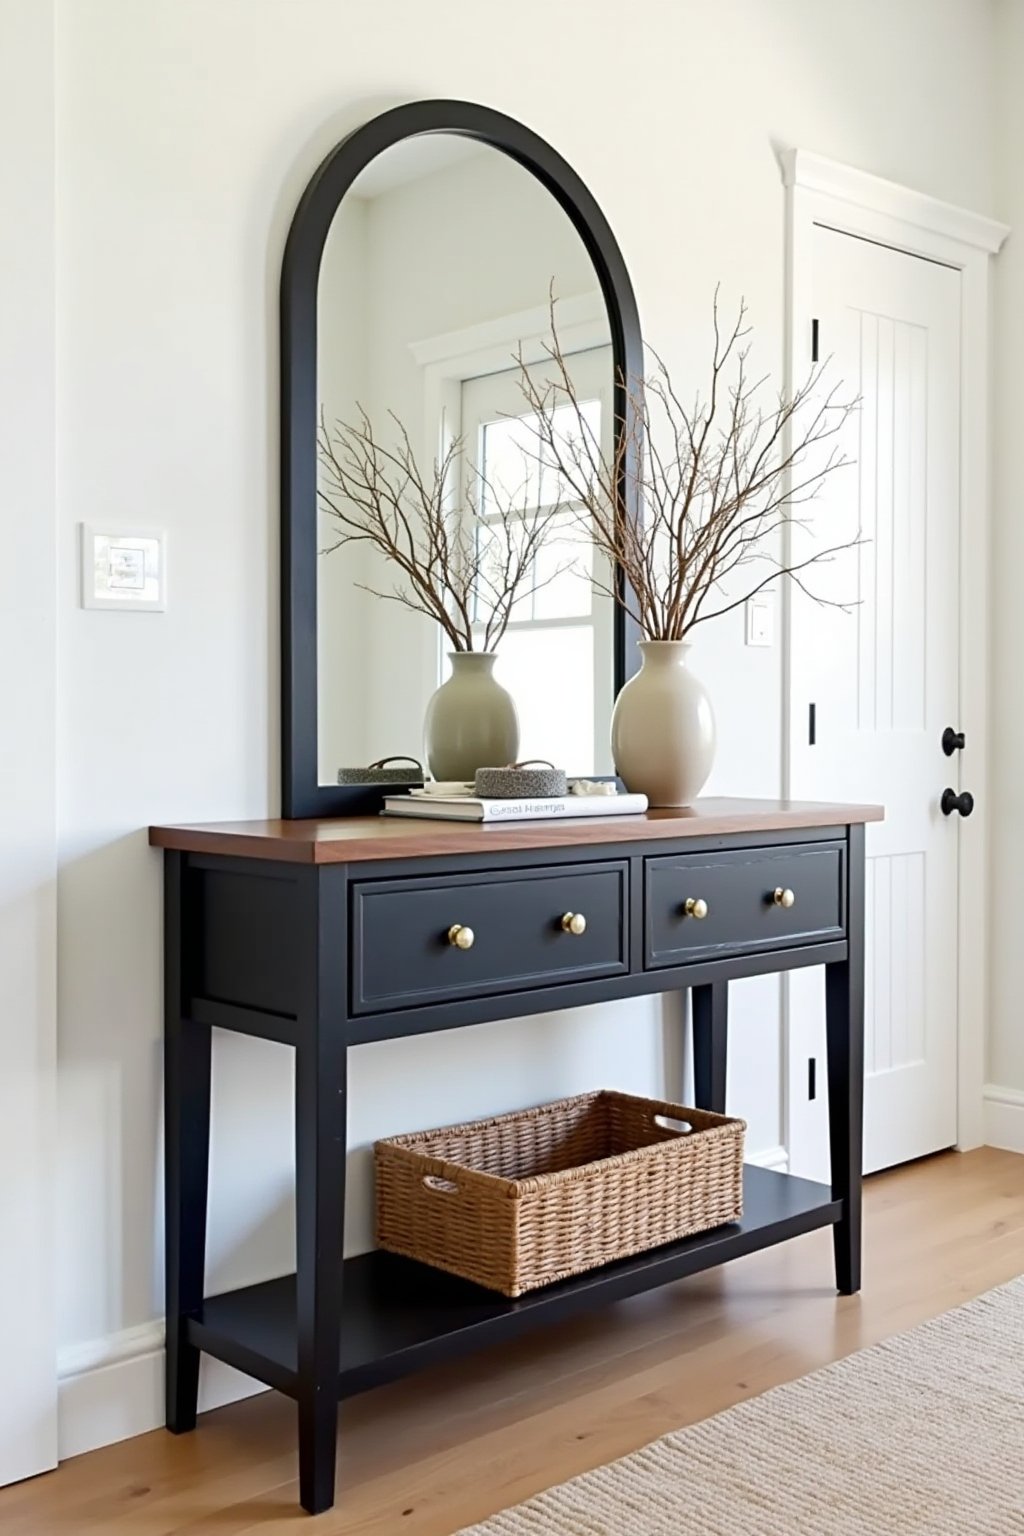
Living Room
A refinished console table in matte black with the original walnut top exposed, styled with an arched mirror above, fresh stems in a ceramic vase, and a woven basket underneath. New brass drawer pulls replace the original dated hardware. The piece anchors the entryway and sets the tone for the entire home with its mix of modern paint and vintage character.
Bathroom
A small thrift-flipped wooden cabinet or shelf unit painted warm white and mounted on the wall above the toilet. New ceramic knobs, styled with folded towels, a candle, and a small plant inside. This twelve-dollar project adds more storage and character than any hundred-dollar bathroom organizer from a retail store.
FAQ
What should I look for when buying thrift store furniture?
Solid wood construction, dovetail joints in drawers, stable structure with no major cracks, and interesting shapes or proportions. Ignore the current finish — ugly color or outdated stain is fine because you are going to change it anyway.
Do I always need to sand before painting?
Yes, for the best results. Sanding creates tooth for primer and paint to grip. You do not need to strip the old finish — just scuff it with 120-grit sandpaper until it feels rough. Skip sanding and your paint is more likely to chip and peel.
What paint is best for furniture flips?
Chalk paint (Rust-Oleum Chalked or Annie Sloan) is the most popular choice for its easy application, matte finish, and forgiving nature. For high-traffic pieces like dining tables, use a more durable option like Benjamin Moore Advance and always seal with polycrylic.
How do I prevent paint from chipping on furniture?
Three steps: sand the surface, apply shellac-based primer, and seal with polycrylic or furniture wax after painting. Skipping any of these steps significantly increases the chance of chipping. Also avoid thick coats — thin, even layers adhere better.
Is thrift-flipped furniture actually durable?
When done correctly with proper prep, primer, and sealer, thrift-flipped furniture is extremely durable. Most vintage solid wood pieces are inherently stronger than modern particle board furniture, so you are starting with a better foundation.
Where are the best places to find furniture for thrift flips?
Goodwill, Salvation Army, estate sales, Facebook Marketplace free section, garage sales, and curb alerts. Estate sales typically have the highest-quality pieces. Check multiple locations regularly — great finds come and go quickly.