I lived with my builder-grade beige kitchen backsplash for three years before I finally did something about it. Not because I did not care — I just could not justify spending two thousand dollars on real tile and a professional installer for a rental kitchen. Then a friend showed me her peel-and-stick backsplash and I genuinely could not tell it was not real tile until she told me.
I ordered peel-and-stick subway tile online for sixty dollars, installed the entire backsplash on a Saturday afternoon while watching a show, and the kitchen looked like it had been professionally renovated. No grout, no special tools, no mess, completely removable when I move. This is hands down the single biggest bang-for-your-buck kitchen upgrade that exists right now.
Why It Sticks Around
- Dramatic transformation for under a hundred dollars — peel-and-stick tile costs a fraction of real tile and installation, but the visual impact is nearly identical from normal viewing distance
- Completely renter-friendly — quality peel-and-stick tile adheres firmly during use but peels off cleanly without damaging walls when you move, making it the ultimate rental upgrade
- No special tools or skills needed — if you can measure, cut with scissors, and peel a sticker, you can install a backsplash. No wet saw, no grout, no tile spacers, no experience required
- Trending huge on TikTok and Pinterest — kitchen peel-and-stick transformations are some of the most-viewed and most-saved home DIY content right now, with new styles constantly releasing
- Massive variety of styles — subway tile, zellige, herringbone, marble look, terracotta look, Moroccan patterns. Whatever real tile you love, there is a peel-and-stick version of it
- Reversible decision — hate it? Peel it off and try a different style. This removes the commitment anxiety that comes with permanent tile and makes experimenting with bold choices risk-free
Gather These
Everything you need for a complete kitchen backsplash installation:
- Peel-and-stick tiles: Measure your backsplash area and order ten to fifteen percent extra for cuts and mistakes. Smart Tiles, Tic Tac Tiles, and Art3d are popular brands
- Measuring tape and level: For straight, even rows — the most important tools for a professional-looking result
- Scissors or utility knife: For cutting tiles around outlets, edges, and corners
- Rubbing alcohol and clean cloth: For cleaning the wall surface before installation. Grease and dust prevent proper adhesion
- Pencil and straight edge: For marking your starting line and keeping rows aligned
- Outlet cover removal tool or screwdriver: Remove outlet covers before tiling for a clean, professional edge
The Walk From A to Z
Prep Your Wall Surface
The single most important step for a lasting result is wall preparation. Clean the entire backsplash area with rubbing alcohol to remove grease, dust, and cooking residue. Peel-and-stick tiles bond best to clean, smooth, dry surfaces. If your walls are textured, lightly sand the area first.
Remove all outlet covers and switch plates with a screwdriver. This takes five minutes and gives you clean edges around electrical outlets rather than trying to awkwardly cut around the covers. You will reinstall them on top of the tiles when finished for a seamless look.
Plan Your Layout and Mark Your Starting Line
Use a level and pencil to draw a straight horizontal line where your first row of tiles will go, typically just above the countertop. This starting line is crucial — if the first row is crooked, every subsequent row will be off. Do not trust your countertop to be level; it probably is not.
Dry-fit a few tiles against the wall without peeling the backing to plan your layout. Figure out where you will need to make cuts and how the pattern will align at corners and edges. Five minutes of planning prevents twenty minutes of frustration during installation.
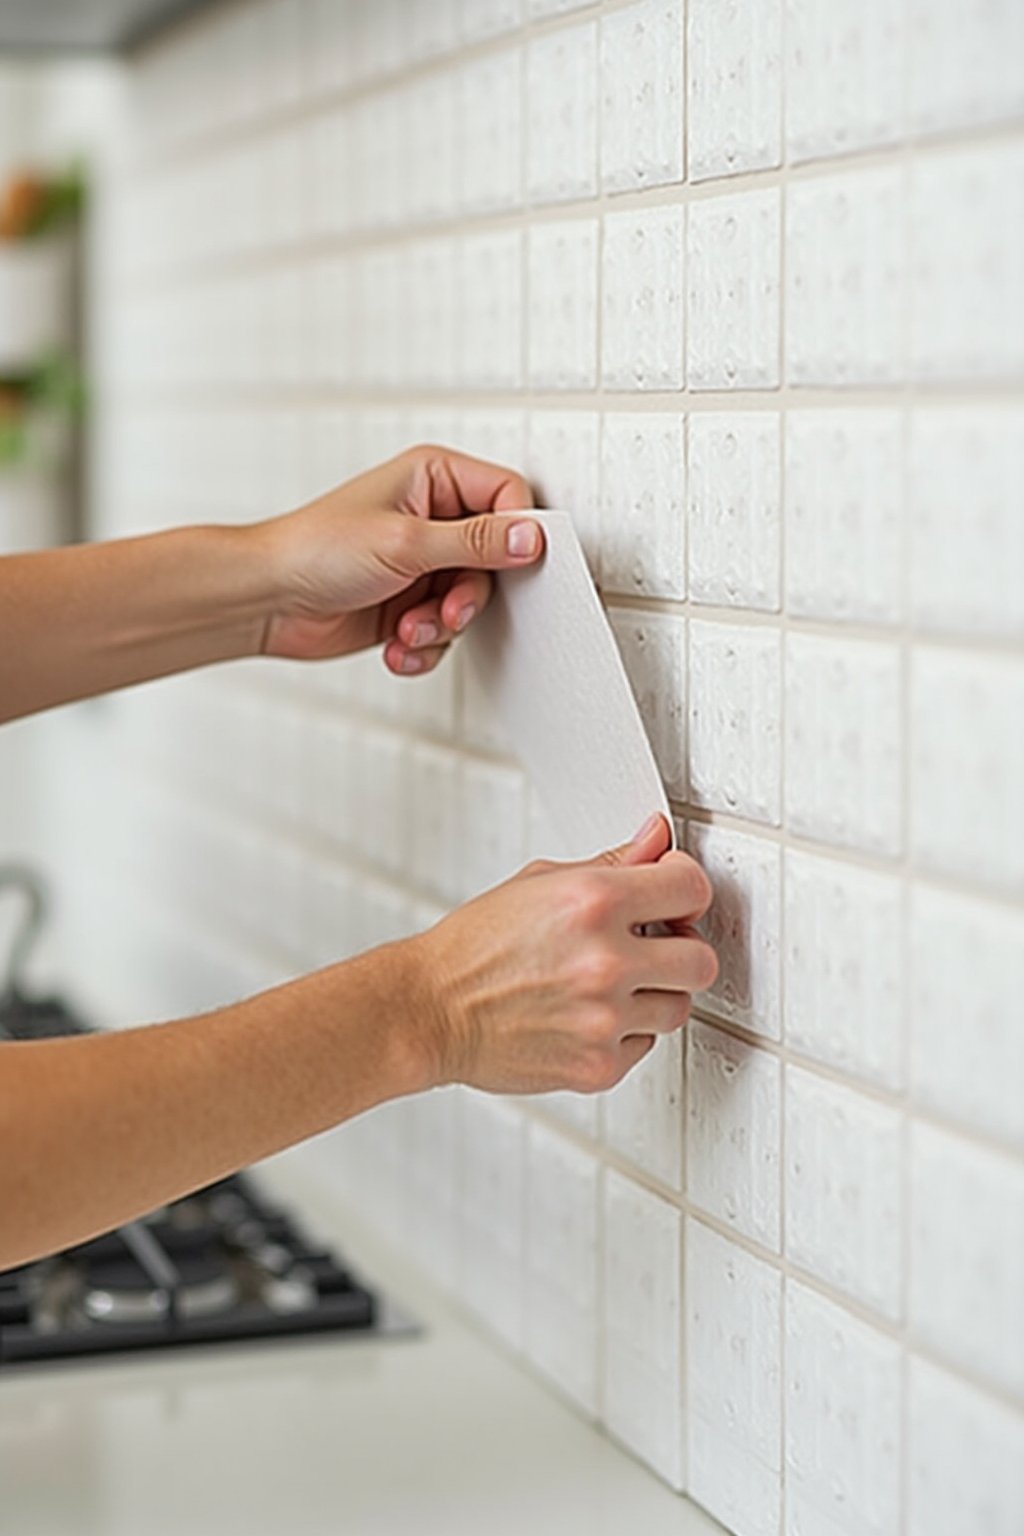
Install From the Bottom Up
Peel the backing off your first tile and press it firmly against the wall, aligning the bottom edge with your pencil line. Use firm, even pressure across the entire surface and smooth out any air bubbles by pressing from the center outward. Work from the center of the wall toward the edges so your cuts end up in the corners where they are less visible.
Each tile should butt snugly against the previous one. Most peel-and-stick tiles are designed to interlock or overlap slightly for a seamless grout line effect. Work one row at a time, completing each row before starting the next. Press firmly on seams between tiles for the strongest bond.
Cut Tiles for Edges and Outlets
For edges and corners, measure the remaining space, mark the tile with a pencil, and cut with sharp scissors or a utility knife. Most peel-and-stick tiles cut easily — much easier than real tile. For outlet openings, hold the tile up to the outlet, mark the cutout area, and cut carefully.
Pro tip: for curved or detailed cuts around outlets, use a hair dryer on low heat to warm the tile slightly. This makes the material more pliable and easier to cut cleanly. Take your time on cuts around outlets — this is the one area where sloppy work is most visible.
Finish and Seal the Edges
Once all tiles are installed, press firmly over every tile and every seam one more time. Use a credit card or plastic smoother to ensure full contact with the wall. Reinstall your outlet covers over the tiles — they should fit perfectly over the tile edges.
For the top edge where tiles meet the wall, and along the countertop edge, apply a thin bead of clear silicone caulk for a finished, waterproof seal. This prevents moisture from getting behind the tiles near the sink and gives the installation a professional, polished look. Smooth the caulk with a wet finger.
Watch For These
- Skipping wall prep — grease and dust prevent adhesion. A backsplash that peels off in a month is almost always because the wall was not properly cleaned first. Rubbing alcohol is essential
- Not using a level — eyeballing the first row leads to increasingly crooked rows. Spend two minutes drawing a level line and your entire backsplash will look straight and professional
- Buying the cheapest option — very cheap peel-and-stick tiles look obviously fake with thin, flat surfaces. Invest in tiles with dimensional texture that mimics real tile. Smart Tiles and Tic Tac Tiles are reliable brands
- Rushing the cuts — sloppy cuts around outlets and edges ruin an otherwise great installation. Take your time, measure twice, and use sharp tools for clean lines
- Applying to textured walls without sanding — heavy orange peel or knockdown texture prevents full contact. Lightly sand textured areas for a better bond, or use a skim coat for the smoothest surface
Stretching the Dollar
Measure carefully before ordering: Calculate your exact square footage and add fifteen percent for cuts and mistakes. Over-ordering by too much wastes money, while under-ordering means a second shipment and potentially mismatched dye lots.
Amazon and Walmart have the best prices: Big box store prices for peel-and-stick tiles are significantly lower than specialty tile shops. Look for multipacks that reduce the per-tile cost. A typical kitchen backsplash runs forty to eighty dollars total.
Skip the trim pieces: Instead of buying expensive trim strips for edges, a clean silicone caulk line in matching color gives a seamless, professional finish for under five dollars.
Watch for sales: Amazon Prime Day and Black Friday consistently have the best prices on peel-and-stick tiles. If your project is not urgent, waiting for a sale can save twenty to thirty percent.
How I Style at Home
- Subway tile is the safest bet — classic white or off-white subway tile in peel-and-stick is the most versatile choice and will not look dated as trends change
- Go bold in a small area — a Moroccan pattern or zellige-look tile behind the stove creates a statement without overwhelming the kitchen. Smaller areas are great for pattern experimentation
- Match the grout color — most peel-and-stick tiles come with built-in grout lines. White grout with white tile is classic, but gray grout with white tile looks more modern and hides kitchen grime better
- Extend to the ceiling — running tile all the way to the ceiling instead of stopping partway makes the kitchen feel taller and more custom. This also eliminates the awkward unfinished edge
- Coordinate with your countertop — if your counters are busy (granite, marble), keep the backsplash simple. If your counters are solid, you have more room to play with pattern on the backsplash
- Add open shelving over the tile — floating shelves mounted over a peel-and-stick backsplash create a custom kitchen look that photographs beautifully
Spot Suggestions
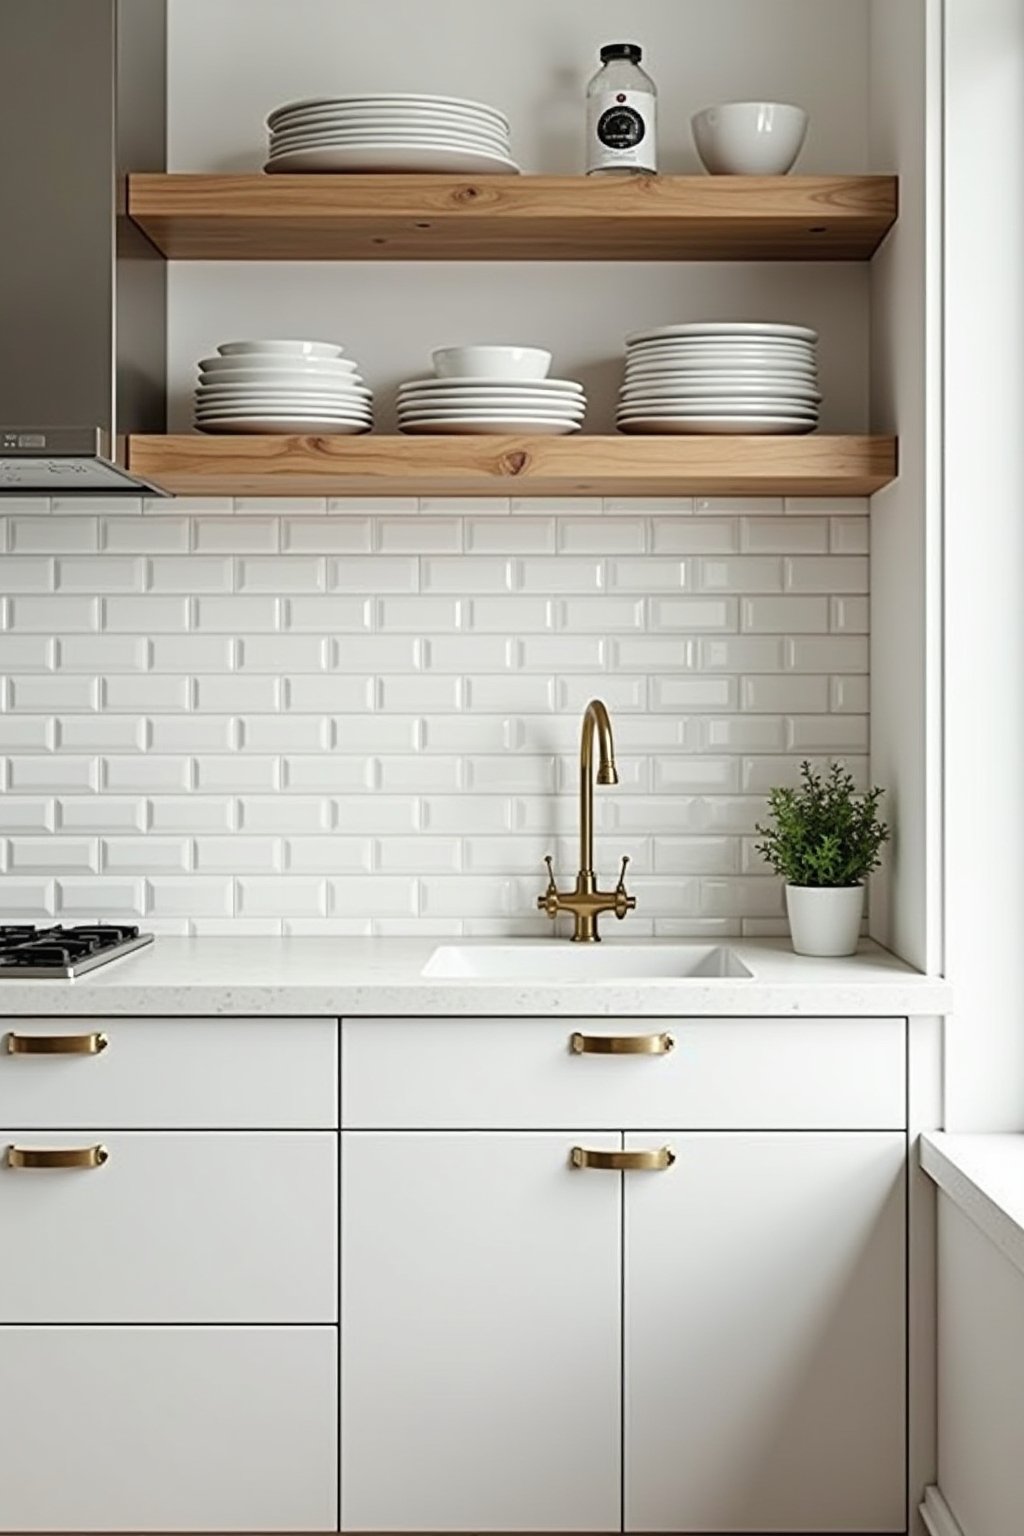
White Subway Tile Kitchen
Classic white subway tile peel-and-stick running from countertop to ceiling behind the stove and sink. Paired with warm wood open shelving, white ceramic dishes, and brass hardware. The clean lines and neutral palette make a builder-grade kitchen look like a custom renovation. Total cost: about fifty dollars and three hours of work.
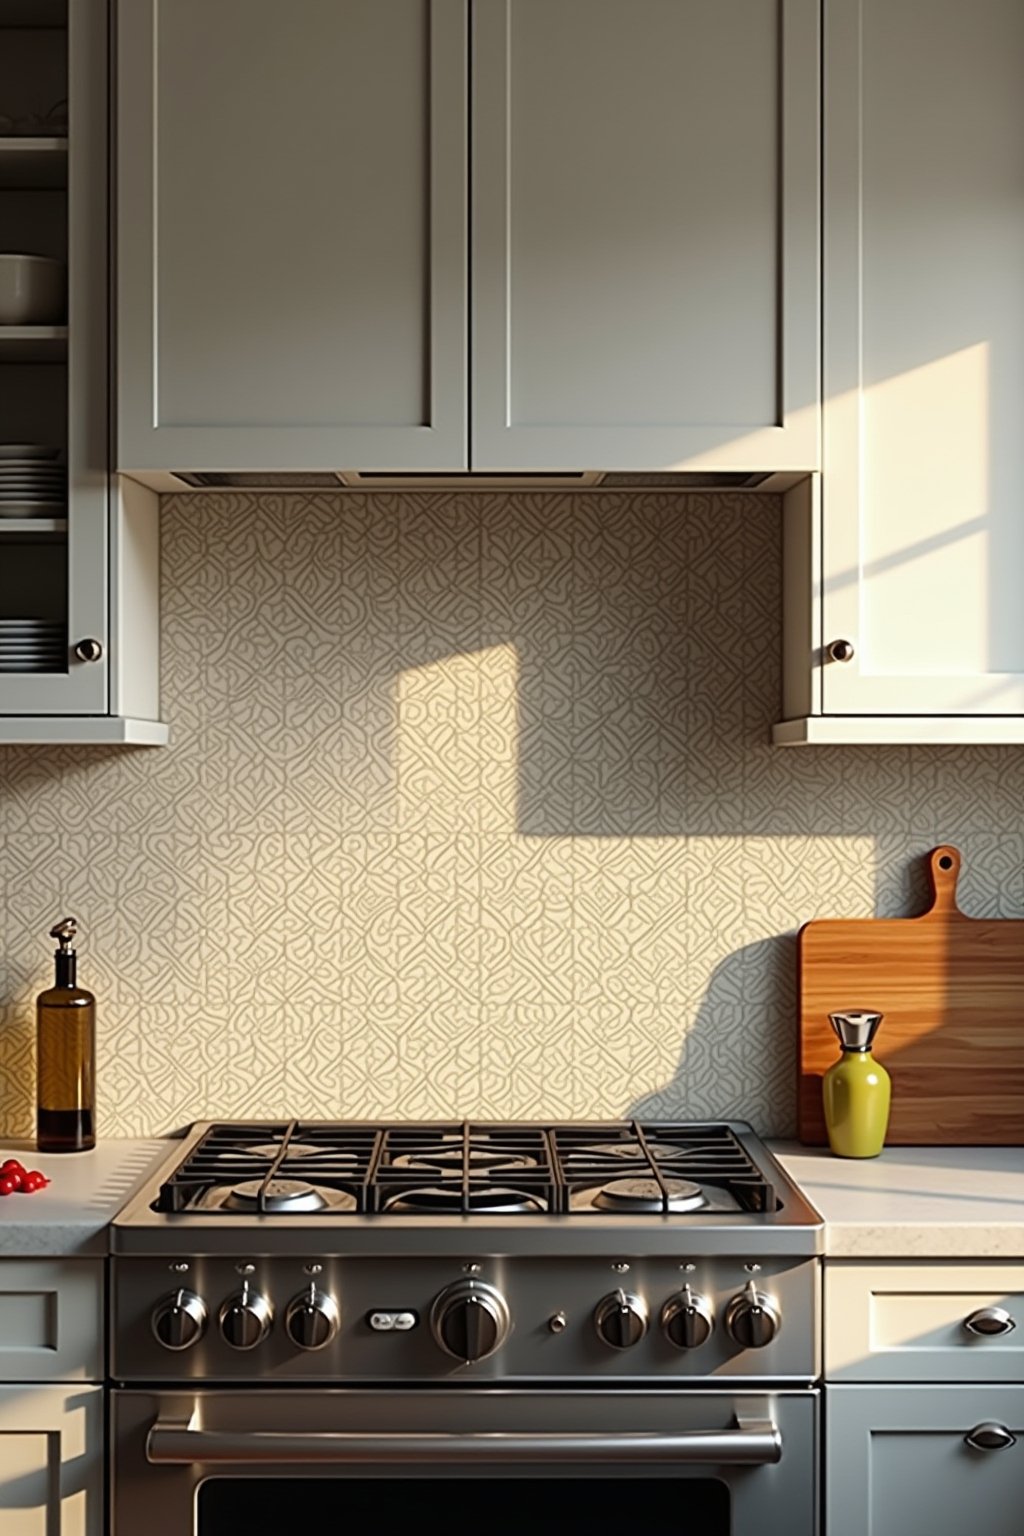
Bold Moroccan Pattern
A statement Moroccan or Mediterranean pattern tile behind the stove area only, with the rest of the kitchen walls in a simple complementary solid. The patterned section becomes the focal point and adds personality and character that makes the kitchen feel one-of-a-kind. Perfect for renters who want impact without permanence.
Herringbone Marble Look
Marble-look peel-and-stick tile in a herringbone pattern on the main backsplash wall. Paired with white or light gray countertops, chrome or brushed nickel hardware, and a few green plants on the counter. The herringbone pattern adds sophistication and movement that standard straight-set tile cannot match.
Common Questions
How long does peel-and-stick backsplash last?
Quality peel-and-stick tiles last three to five years or more with proper wall preparation. In low-moisture areas away from the sink, they can last even longer. Heat and moisture near the stove and sink are the main factors that affect longevity.
Can I put peel-and-stick tile over existing tile?
Yes, as long as the existing tile is clean, smooth, and in good condition. The flat surface of existing tile actually provides an excellent bonding surface. Clean thoroughly with rubbing alcohol before applying.
Will peel-and-stick tile damage my walls when I remove it?
Quality peel-and-stick tiles remove cleanly from painted drywall and existing tile. Warm the tiles with a hair dryer before peeling to soften the adhesive. Some touch-up paint may be needed afterward, but no actual wall damage.
Can I use peel-and-stick tile behind the stove?
Most peel-and-stick tiles are heat-resistant for normal cooking temperatures. However, they should not be placed where they will be in direct contact with a flame or extremely high heat. Maintain the standard clearance recommended for your cooktop.
What is the best peel-and-stick tile brand?
Smart Tiles, Tic Tac Tiles, and Art3d consistently get the best reviews for realistic appearance, strong adhesion, and clean removal. Avoid the cheapest no-name options on Amazon as they tend to look flat and peel prematurely.
Do I need to grout peel-and-stick tile?
No. Most peel-and-stick tiles have built-in grout line details that simulate real grout. This is one of the biggest advantages over real tile — no messy grouting, no grout maintenance, and no grout staining over time.