I used to spend forty minutes every evening hand-watering my raised beds with a hose, trying to remember which bed I had already soaked and which one I had skipped. On vacation weeks I would come home to wilted tomatoes and crispy lettuce. The day I installed drip irrigation was the day gardening stopped feeling like a chore and started feeling like a hobby again.
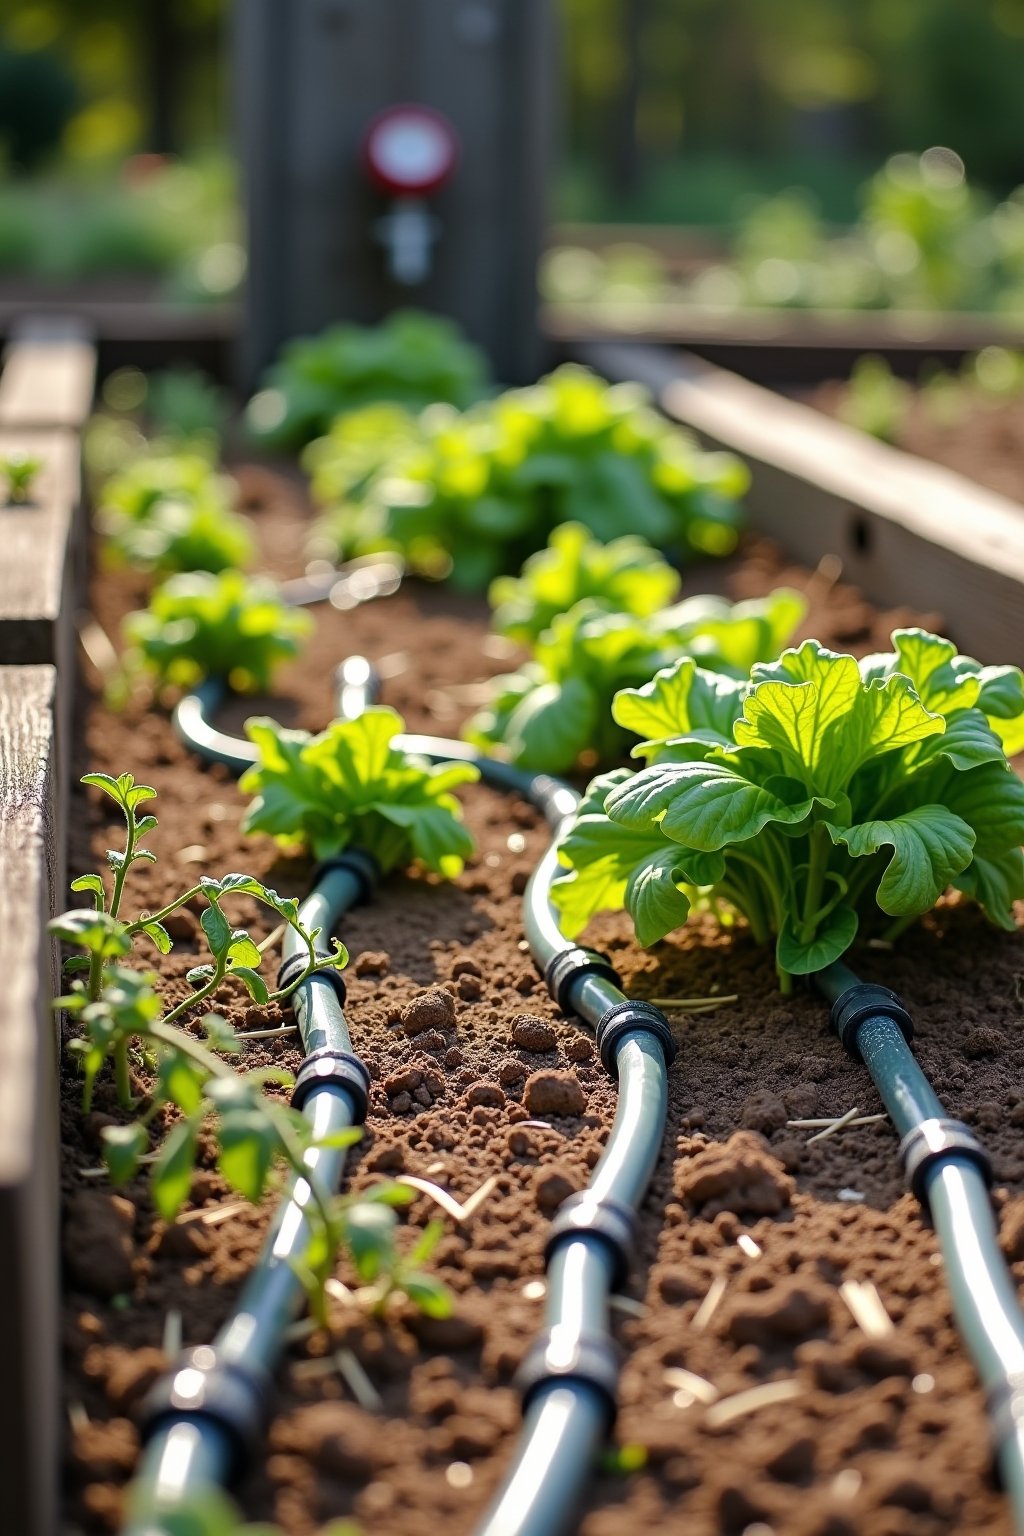
Drip irrigation delivers water slowly and directly to the root zone of each plant through a network of tubing and emitters. It uses 30-50 percent less water than sprinklers or hand watering, virtually eliminates leaf diseases caused by overhead moisture, and runs on a timer so your plants get watered perfectly even when you are not home. The best part is that a basic drip system for raised beds costs under $50 and takes a single afternoon to install. No plumbing skills needed.
Quick Facts
| Sun | N/A (irrigation system, works in all light conditions) |
| Difficulty | Beginner to Intermediate |
| Season | Install in spring before planting |
| Zone | All USDA Zones |
| Time to Harvest | N/A (installation takes 2-4 hours) |
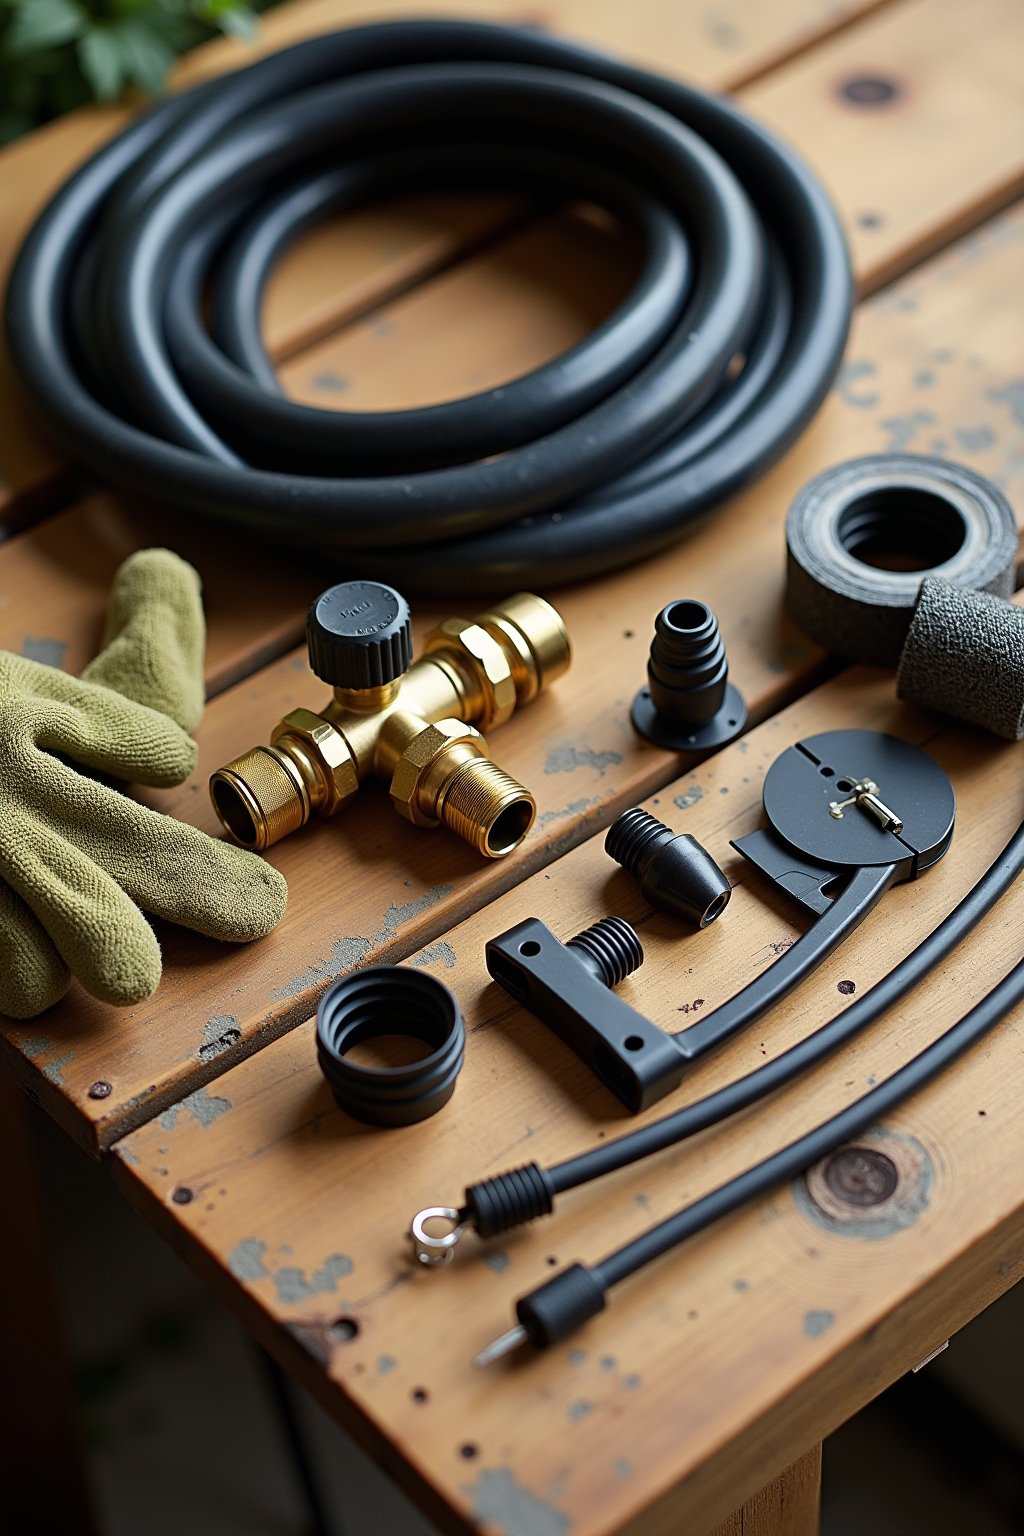
What You’ll Want On Hand
- 1/2-inch mainline poly tubing (enough to reach all beds from spigot)
- 1/4-inch drip tubing or soaker line (for inside each bed)
- Drip emitters (1/2 GPH or 1 GPH, pressure-compensating)
- Barbed connectors, tees, and elbows (1/2-inch and 1/4-inch)
- Hose-thread pressure regulator (25 PSI for drip systems)
- Hose-thread backflow preventer
- Hose-thread inline filter
- Battery-operated hose timer (dual-outlet recommended)
- End caps or figure-8 clamps
- Hole punch tool for 1/4-inch tubing connections
- Garden stakes or tubing hold-down stakes
- Teflon tape for threaded connections
A complete drip irrigation kit for 2-4 raised beds costs $30-$50 at any garden center or hardware store. The essential components are: a pressure regulator (standard hose pressure is way too high for drip — it will blow off connections), a filter (even clean tap water has particles that clog tiny emitters), and a timer (the whole point is automation). For the tubing inside raised beds, you have two options: drip tubing with built-in emitters (easiest — water drips out at regular intervals along the tube) or blank tubing with individual emitters punched in where you want them (more precise control). For beginners, pre-spaced drip tubing at 12-inch emitter spacing is the simplest choice.
Step 1: Plan Your Layout on Paper
Before buying anything, sketch your raised beds and the path from your outdoor spigot to each bed. Measure the distances. The mainline tubing (1/2-inch) runs from the spigot to your beds. Branch lines (1/4-inch drip tubing) run inside each bed in rows spaced 12 inches apart.
Calculate how much tubing you need by measuring the total length of mainline (spigot to beds, plus connections between beds) and the total length of drip tubing inside each bed. For a standard 4×8 foot raised bed with 12-inch spacing between rows, you need about 32 feet of drip tubing. Add 10 percent extra for mistakes and adjustments.
Step 2: Assemble the Head Assembly at the Spigot
The head assembly is the critical group of fittings that connects to your outdoor faucet. Install these components in order, screwing each one onto the previous piece: timer → backflow preventer → filter → pressure regulator. Use Teflon tape on all threaded connections to prevent leaks.
The timer controls when and how long the system runs. A basic battery-operated timer costs $15-$25 and lets you set watering schedules down to the minute. The backflow preventer stops garden water from flowing back into your drinking water supply — many building codes require this. The filter catches particles that would clog emitters. The pressure regulator reduces household water pressure (typically 40-60 PSI) down to the 25 PSI that drip systems need.
Step 3: Run the Mainline to Your Beds
Connect 1/2-inch poly tubing to the output of your pressure regulator using a hose-thread adapter. Run this mainline along the ground from the spigot to your raised beds. Secure it with tubing stakes every 3-4 feet so it does not shift or kink. Bury it under mulch for a cleaner look.
If you have multiple beds, run the mainline past each one and use tee connectors to branch off to each bed. Cut the mainline where you need a tee, push the tee fitting into both cut ends, and connect a short piece of 1/2-inch tubing from the tee to the edge of each raised bed. At the end of the mainline run, cap it with an end cap or figure-8 clamp.
Step 4: Install Drip Tubing Inside Each Raised Bed
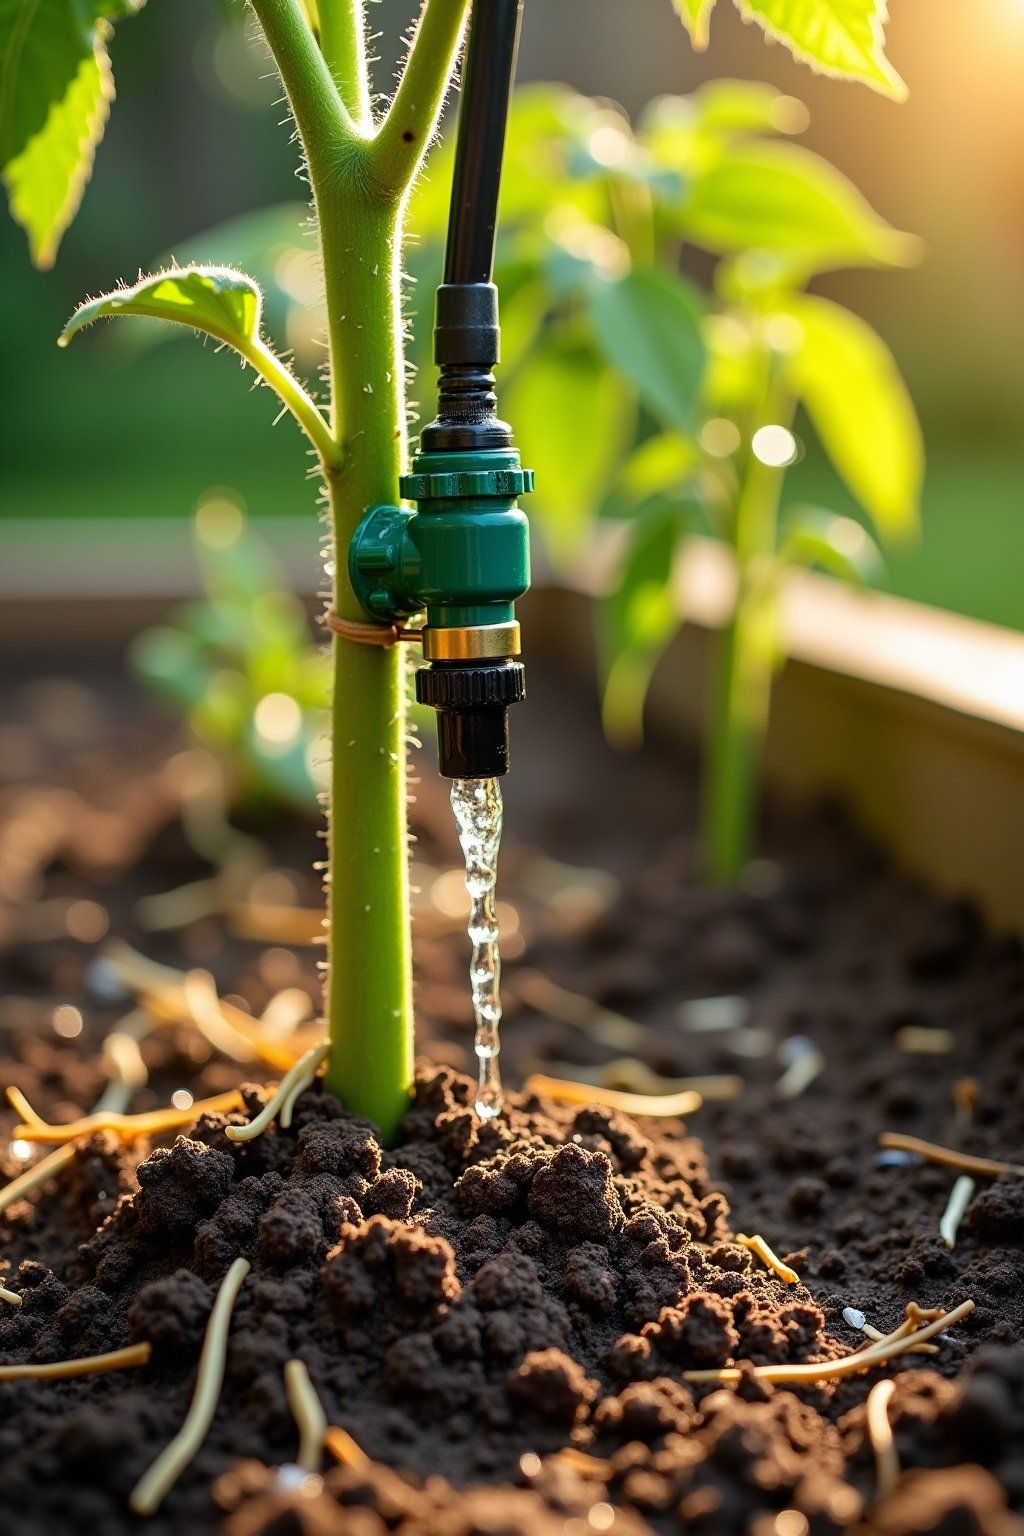
Inside each raised bed, use 1/4-inch drip tubing with built-in emitters spaced every 12 inches. Run the tubing in parallel rows, spaced 12 inches apart, snaking back and forth across the bed. Connect the tubing to the mainline using a 1/4-inch barbed connector punched into the 1/2-inch mainline with a hole punch tool.
Secure the drip tubing to the soil surface with hold-down stakes at every turn and every 2-3 feet along straight runs. The tubing should sit directly on the soil surface, not suspended above it. Cap the end of each row with a 1/4-inch end plug or fold-over clamp. You want a neat, organized grid pattern so that water is distributed evenly across the entire bed.
Step 5: Test the System Before Mulching
Turn on the water and let the system run for 10 minutes. Walk the entire line and check every connection for leaks. Verify that water is dripping from every emitter — a dry emitter usually means a clog or a kink in the tubing upstream. Check that the pressure regulator is working correctly by feeling the flow: water should drip slowly and steadily, not spray or gush.
After confirming everything works, cover the tubing with 2-3 inches of mulch (straw, shredded leaves, or wood chips). Mulch protects the tubing from UV damage, keeps it in place, and helps retain the moisture that the drip system delivers. Covering the tubing also gives your beds a clean, finished look.
Step 6: Set Your Watering Schedule
Program your timer based on your climate, soil type, and what you are growing. A good starting point for raised beds in most climates: water every other day for 30 minutes in spring and fall, and every day for 30-45 minutes in the heat of summer. Sandy soil needs more frequent, shorter runs. Clay soil needs less frequent, longer runs.
Check soil moisture regularly for the first few weeks and adjust your schedule. Stick your finger 2-3 inches into the soil near an emitter: if it feels moist, your schedule is right. If it is soggy, reduce the time or frequency. If it is dry, increase. Once you dial in the right schedule, your system will water perfectly with zero effort from you for the rest of the season.
Catch It Early
Emitters are clogged and not dripping: Remove the end caps and flush the entire system with full water pressure for 30 seconds. For individual clogged emitters, pull them out, soak in vinegar for an hour, and reinstall. Running the filter cleaning as a habit every 4-6 weeks prevents most clogging issues.
Water is spraying instead of dripping: Your pressure is too high. Check that the pressure regulator is installed and set to 25 PSI. If it is already in place, it may be faulty — replace it (they are inexpensive). Also check for splits in the tubing caused by freezing or kinking.
Beds on the far end get less water: This happens when the mainline run is too long or you have too many emitters on one line. Reduce the total line length, use 1/2-inch tubing instead of 1/4-inch for long runs, or split your system into two zones with separate timer outlets.
Connections keep popping off: Drip fittings are push-to-connect and rely on a tight fit. Make sure tubing ends are cut cleanly and straight. Dip the tubing end in hot water for 10 seconds to soften it before pushing onto barbed fittings. Add a hose clamp on any connection that keeps slipping.
A Seasonal Rhythm
Here is a seasonal maintenance schedule for drip irrigation in raised beds:
| Season | Task | Notes |
|---|---|---|
| Early Spring | Reinstall system, check for winter damage | Replace cracked tubing, clean filter, install fresh batteries in timer |
| Spring | Turn on and test, set spring watering schedule | Water every other day for 30 minutes as a starting point |
| Summer | Increase watering frequency, flush lines monthly | Daily watering may be needed in extreme heat, check for clogs |
| Fall | Reduce watering, prepare for winterization | Back to every-other-day schedule, clean filter |
| Late Fall | Winterize: drain lines, remove timer, store head assembly | In freezing climates, blow out lines with compressed air to prevent cracking |
In mild climates (Zones 8-10), you may be able to leave the system installed year-round. In cold climates (Zones 3-7), always drain and winterize before the first hard freeze to prevent cracked tubing and damaged fittings.
Why This Beats the Standard Version
- Buy pressure-compensating emitters — These deliver the same flow rate regardless of water pressure variations, which means even watering from the first bed to the last. They cost slightly more than basic emitters but eliminate the most common drip irrigation problem.
- Use a dual-outlet timer for two watering zones — One outlet can water thirsty vegetables daily while the other waters drought-tolerant herbs every 3 days. This flexibility costs only a few dollars more than a single-outlet timer.
- Flush your lines at the start and end of each season — Remove all end caps, turn on the water, and let it run for 30 seconds. This blasts out mineral deposits and debris that accumulate inside the tubing and prevent clogs before they start.
- Bury mainline tubing under mulch along walkways — Nobody wants to look at black plastic tubing. A 2-inch layer of mulch hides the mainline, protects it from UV damage, and reduces tripping hazards.
- Add a fertilizer injector for liquid feeding — A $15 hose-thread fertilizer siphon between the filter and pressure regulator lets you feed all your plants automatically through the drip system. This is called fertigation and it is the ultimate low-effort gardening upgrade.
- Mark your timer settings with tape — When you find the perfect watering schedule, write it on a piece of tape stuck to the timer. Next spring you will not have to figure it out again from scratch.
Other Pages You’ll Want
Quick Answers
How much does drip irrigation cost for raised beds?
A basic drip irrigation kit for 2-4 raised beds costs $30-$50 and includes tubing, emitters, connectors, and a filter. Add $15-$25 for a hose timer, $10 for a pressure regulator, and $5 for a backflow preventer. Total cost for a complete, automated system is typically $60-$90 — less than many gardeners spend on a single bag of premium potting mix.
How long should I run drip irrigation on raised beds?
Start with 30 minutes every other day in spring and fall, and 30-45 minutes daily in summer heat. Check soil moisture by sticking your finger 2-3 inches deep near an emitter after a watering cycle. Adjust duration up or down based on whether the soil feels evenly moist (correct), soggy (too much), or dry (too little).
Can I use drip irrigation with a rain barrel?
Yes, but rain barrels provide much lower water pressure than a hose spigot. Use a gravity-fed drip kit designed for rain barrels, or elevate the barrel at least 3-4 feet above the beds for adequate pressure. You will not need a pressure regulator with a rain barrel since the pressure is naturally low. Runs may need to be longer to deliver the same amount of water.
Does drip irrigation work in winter?
In freezing climates, drip systems must be winterized in fall. Drain all water from the lines, remove the timer and head assembly, and store them indoors. In mild climates where temperatures stay above freezing, drip systems can run year-round with reduced frequency. Frozen water in tubing will crack fittings and split lines.
How do I know if my plants are getting enough water from drip irrigation?
The finger test is the most reliable method: stick your finger 2-3 inches into the soil near an emitter about an hour after watering. It should feel evenly moist but not muddy. You can also dig a small hole near an emitter to see how deep the moisture penetrates — aim for 6-8 inches of moist soil for most vegetable roots.
What is the difference between drip tape and drip tubing?
Drip tape is flat, thin-walled tubing with laser-cut emitter holes, designed for commercial farms and single-season use. Drip tubing is round, thick-walled, and more durable, lasting 5-10 years in a home garden. For raised beds, drip tubing is the better choice because it handles curves, reconnection, and seasonal installation better than tape.