Something shifted in home design recently and everyone noticed at the same time — sharp corners feel harsh, and curves feel expensive. Arched doorways, rounded plaster walls, curved niches, and sculptural alcoves are showing up everywhere from high-end renovations to clever DIY projects that cost almost nothing.
I added a simple arched detail above my bedroom closet door with a plywood template and joint compound, and the number of people who have assumed I hired an architect is honestly embarrassing. Curves trick the eye into seeing craftsmanship, intention, and luxury — even when the execution is a weekend DIY. If you want your home to look like it cost twice what it did, curves are your secret weapon.
What Brings Me Back
- Signals custom craftsmanship — curved details look intentional and expensive because most builder-grade homes are all straight lines and 90-degree angles
- Softens any room instantly — curves reduce visual tension and create a feeling of flow and calm that sharp corners simply cannot achieve
- Photographs beautifully — curved walls and arches create shadows, depth, and dimension that look stunning in photos, which is why they dominate Pinterest and Instagram
- Works in every style — from Mediterranean arches to modern sculptural curves to Art Deco rounded doorways, curves fit any design aesthetic
- DIY-friendly — many curved wall details can be created with plywood, joint compound, and basic tools for a fraction of what custom architectural work costs
- High impact for low effort — a single arched detail in one room changes the entire character of the space
Your Shopping List
The supplies depend on which curved wall project you choose:
- For a DIY arch over a doorway: 1/4 inch plywood or MDF, jigsaw, joint compound, sandpaper, paint, construction adhesive
- For a curved plaster niche: Drywall, joint compound, corner bead (flexible), sandpaper, paint
- For an arched headboard wall: Plywood template, painter’s tape, contrasting paint color
- For a curved accent shelf: Pre-made arched shelf or bent plywood, wall anchors, level
- General tools: Measuring tape, pencil, level, sandpaper, paint roller and brush
Phase by Phase
Choose Your Curve Style
Not all curves are the same. A Roman arch (perfect semicircle) feels classic and Mediterranean. A soft arch (wider, more subtle curve) feels modern and minimal. A pointed arch feels Gothic or Moroccan. A rounded rectangular cutout feels contemporary and sculptural.
Look at your home’s existing style and choose a curve that complements it. Modern homes look best with soft, subtle curves. Traditional homes can handle more dramatic arches. When in doubt, go with a soft arch — it is the most universally flattering and forgiving to DIY.
Start With a Painted Arch (No Construction Needed)
The easiest curved wall project is a painted arch behind your bed or behind a piece of furniture. Use a pencil tied to a string (like a compass) to draw a large arch shape on the wall. Tape the straight edges with painter’s tape and carefully cut the curve with a small brush.
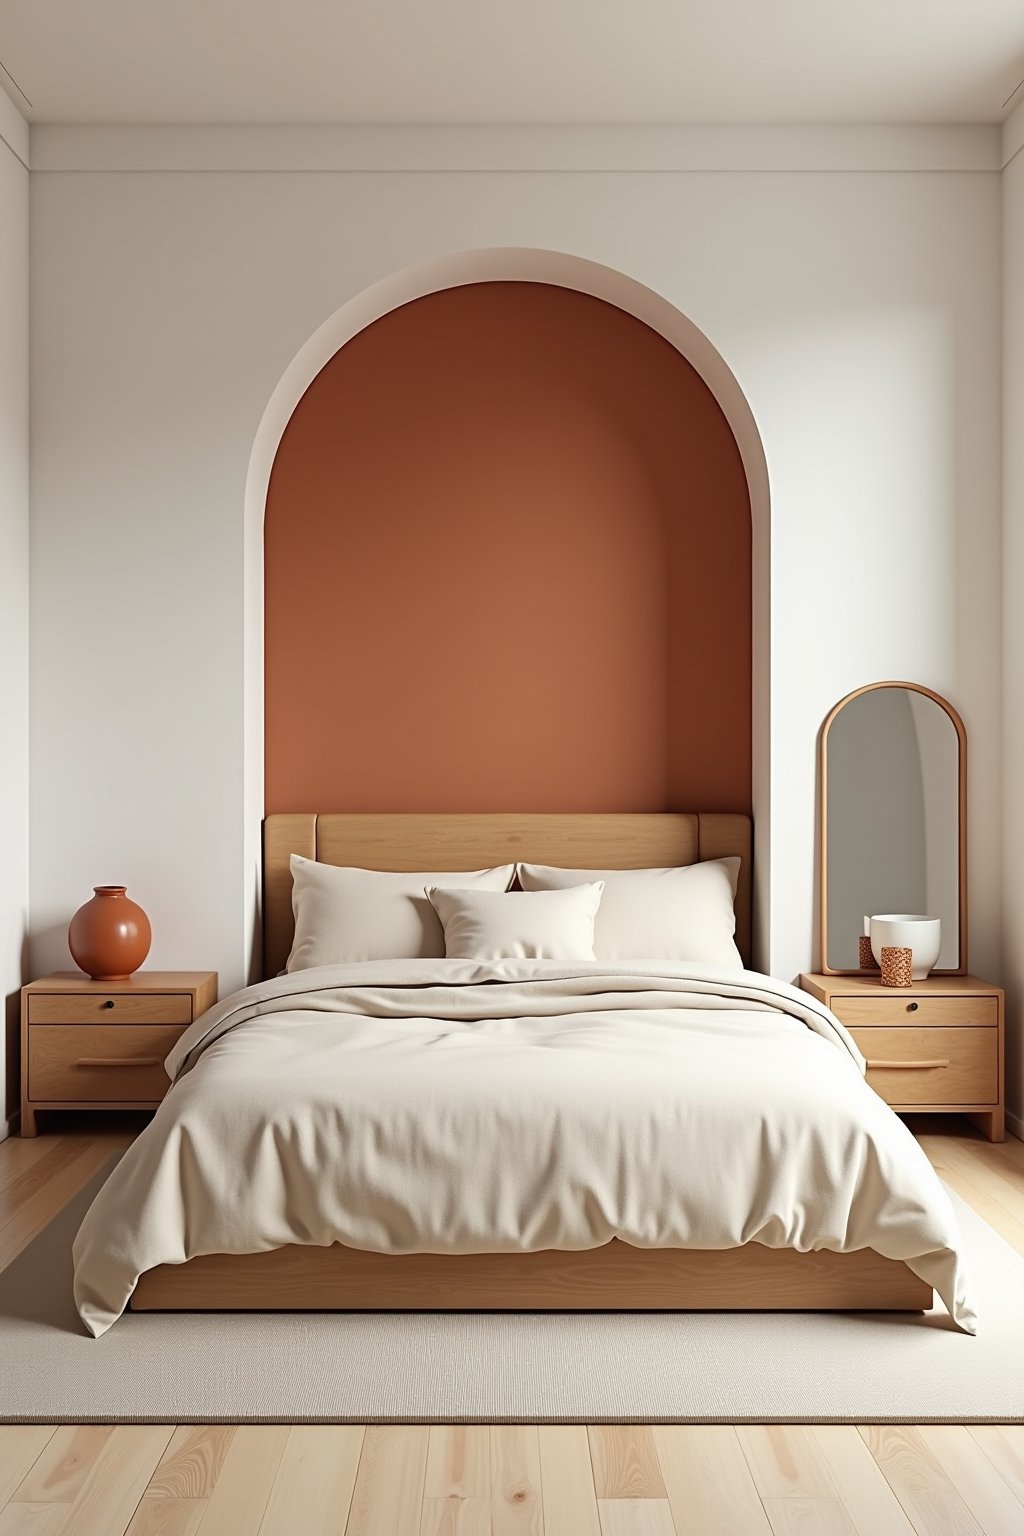
Paint the arch in a contrasting color — a warm terracotta arch behind a bed with white walls, or a sage green arch behind a reading chair. This creates the illusion of an architectural feature without touching a single piece of drywall.
Build a DIY Plywood Arch Over a Doorway
Cut a 1/4 inch plywood or MDF arch to fit the top of a doorway using a jigsaw. Attach it to the wall with construction adhesive and small nails. Cover the seams with joint compound, sand smooth, and paint to match the surrounding wall.
This converts a standard rectangular doorway into a beautiful arched opening. The whole project takes an afternoon and costs very little in materials. The result looks like it was always there — no one will believe it is a plywood overlay.
Create a Curved Plaster Niche
If you have a flat wall that needs dimension, build a shallow curved niche using strips of drywall bent into an arch shape. Frame it out, attach it to the wall, and skim coat with joint compound for a smooth plaster finish. Paint the interior of the niche a contrasting color or add a small shelf inside.
Curved niches are perfect for displaying a single vase, a candle, or a small piece of art. They add architectural interest to blank walls and create that luxury alcove look that dominates high-end design magazines.
Add Curved Furniture and Mirrors to Amplify the Effect
Once you have a curved architectural element, echo the curves throughout the room with an arched mirror, a round coffee table, or a curved sofa. This repetition makes the curved wall feel intentional and part of a cohesive design, not a random addition.
An arched floor mirror leaning against a wall is one of the easiest ways to add curves without any construction at all. Pair it with a round side table and a rounded ceramic vase for a space that feels soft, sculptural, and considered.
Catch It Early
- Making the curve too small or tight — a tiny arch on a large wall looks odd. Scale the curve to the size of the wall and the height of the ceiling
- Leaving visible seams on DIY arches — take time to skim coat, sand, and prime thoroughly. The illusion breaks if you can see where the plywood meets the wall
- Mixing too many curve styles — pick one curve style (soft arch, Roman arch, etc.) and repeat it. Different curve shapes in the same room look chaotic
- Ignoring proportion — an arch should be proportional to the doorway or wall it sits on. Too wide looks squat, too narrow looks pinched. Sketch it first
- Painting before sanding — joint compound must be sanded perfectly smooth before painting, or every bump and ridge will show. Use a bright work light to catch imperfections
Going Cheaper
Painted arch = zero construction: A can of paint and painter’s tape is all you need to create a dramatic arch effect behind a bed or a desk. This is the lowest-cost curved wall project.
MDF is cheaper than plywood: For doorway arches, MDF is smoother, easier to cut, and cheaper than plywood. It takes paint beautifully and hides imperfections better.
Arched mirrors on sale: Retailers like Target, TJ Maxx, and HomeGoods regularly stock arched mirrors that add curves to a room without any wall modification.
Joint compound is your best friend: A bucket of all-purpose joint compound can turn rough DIY construction into a smooth, professional-looking plaster finish. It is cheap and forgiving.
Setting the Scene
- Echo your curves — if you have an arched doorway, add an arched mirror or round accessories to repeat the shape throughout the room
- Use curves as a focal point — one bold curved element per room is usually enough. Let it be the star and keep everything else simple
- Light them well — curved walls and niches look their best when lit from the side or above. A small picture light or LED strip inside a niche adds drama
- Paint the inside of a niche a darker color — this creates depth and shadow that makes the curve feel more architectural and intentional
- Pair curves with natural materials — plaster, wood, stone, and linen complement curved shapes because they share that organic, handmade quality
- Keep wall art minimal around curves — the curve itself is the art. Do not hang busy gallery walls next to an arched feature
Choosing the Room
Bedroom
A painted terracotta arch behind the bed extending from the headboard up and over, framing the bed like an alcove. Cream linen bedding, warm wood nightstands, an arched mirror leaning against the opposite wall, and a rounded ceramic table lamp. Simple, warm, and architecturally stunning.
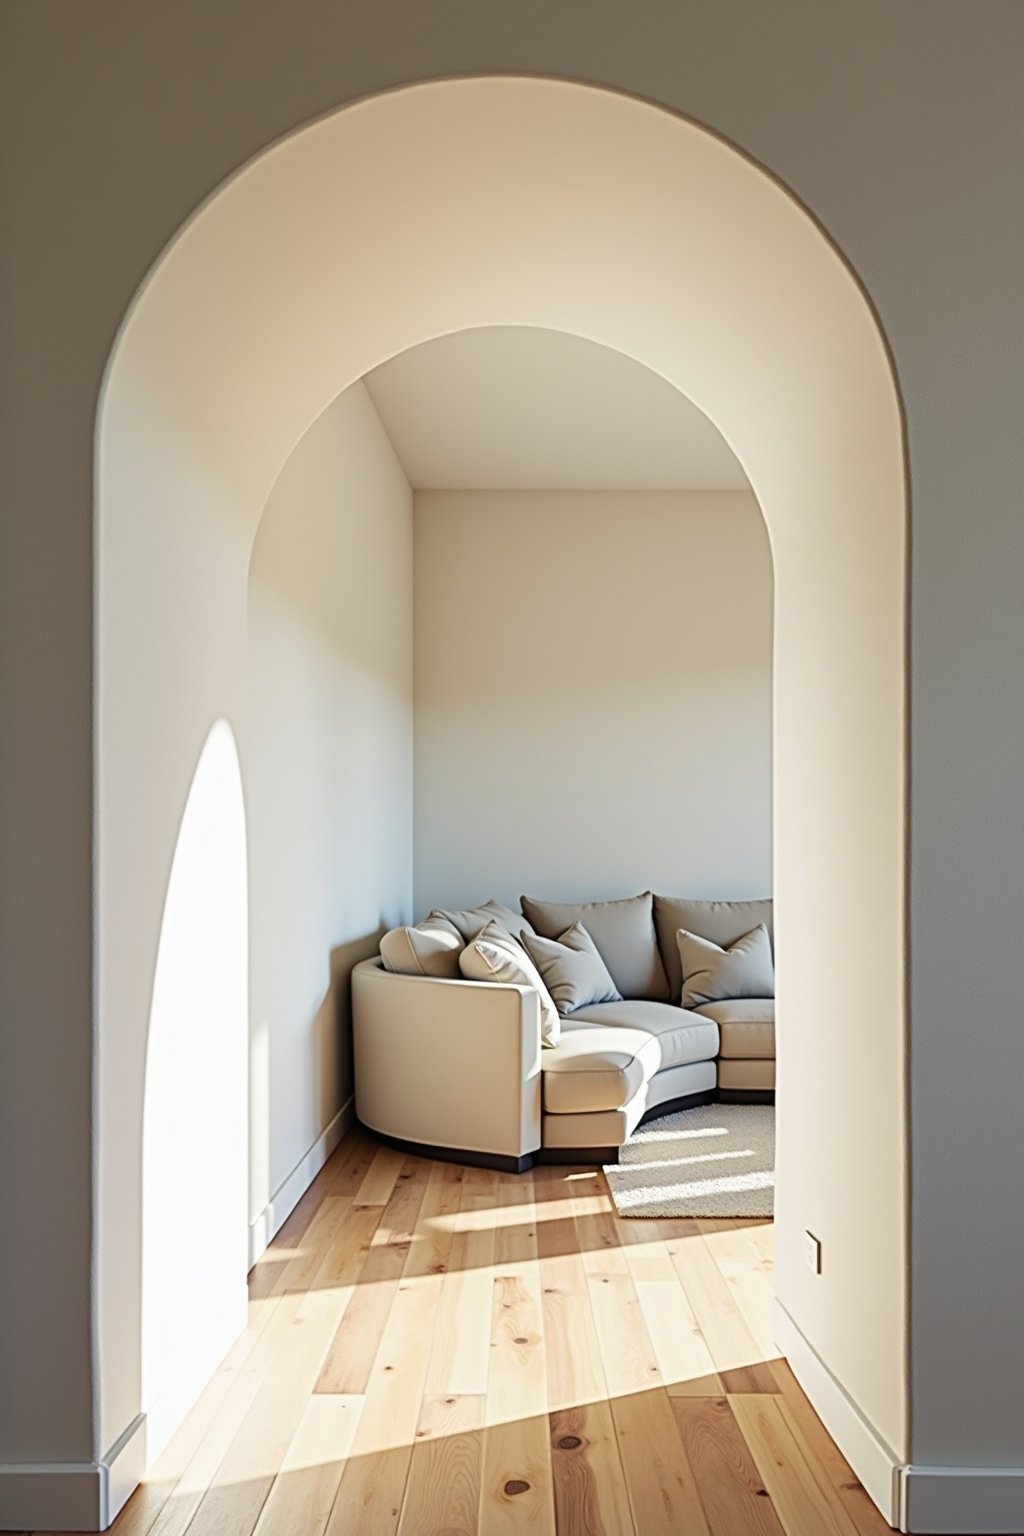
Living Room
A DIY arched doorway between the living room and dining room, skimmed in plaster for a smooth Mediterranean feel. An arched floor mirror on one wall, a curved sofa anchoring the space, and a round marble coffee table in the center. Warm neutrals throughout with textured linen curtains framing the windows.
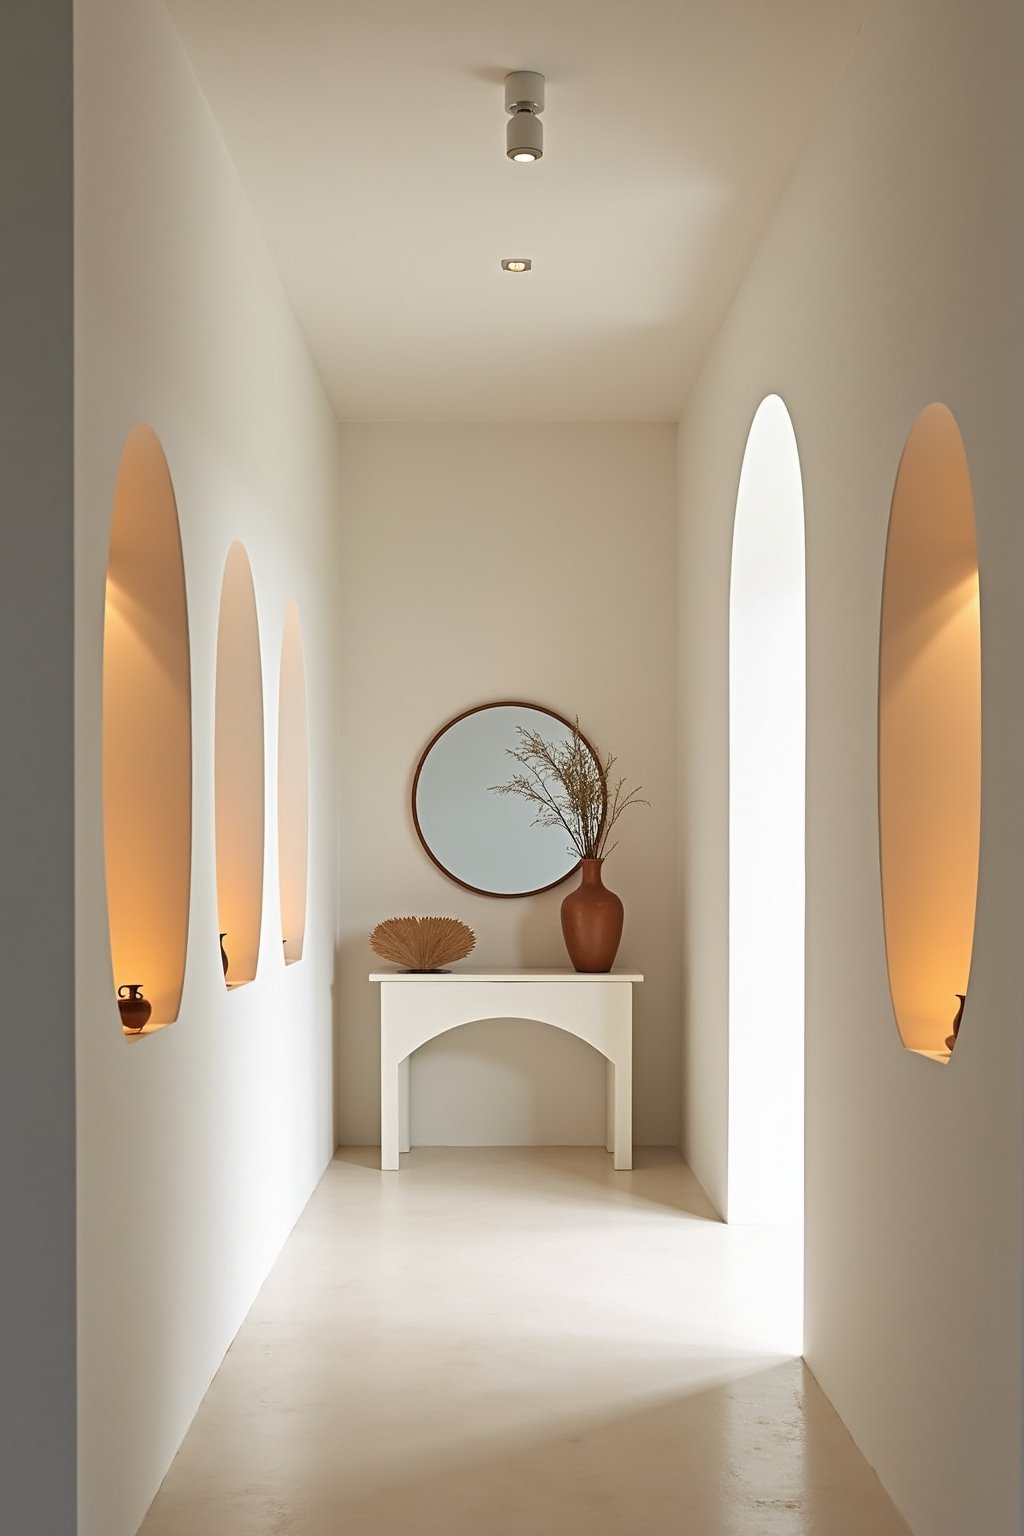
Hallway or Entryway
A series of small curved plaster niches along a hallway wall, each holding a single candle or small plant. Painted in a warm white to match the walls so they look built-in and original. An arched console table at the end of the hallway with a round mirror above it completes the statement.
Quick Answers
Can I add an arch to a doorway without removing the existing frame?
Yes. The easiest method is attaching a plywood or MDF arch overlay on top of the existing frame. Cover with joint compound and paint. No demolition needed.
What is the easiest curved wall project for beginners?
A painted arch on a flat wall. You only need paint, a pencil, string, and painter’s tape. No cutting, no construction, and it takes a couple of hours.
Do curved walls work in modern homes?
Absolutely. Soft, subtle curves are actually more modern than sharp angles right now. Think gentle arches, not ornate Romanesque curves. Clean lines with a gentle radius is the modern sweet spot.
Will a DIY arch look cheap?
Not if you take time to sand and finish it properly. The key is smooth joint compound, thorough sanding, quality primer, and good paint. Done right, it is indistinguishable from original construction.
Can I remove a DIY plywood arch later?
Yes. Since it is attached with construction adhesive and small nails, you can pry it off, fill the nail holes, and repaint. It is a reversible modification.
How much does a DIY doorway arch cost in materials?
A basic plywood arch overlay costs very little in materials — a sheet of MDF, a small bucket of joint compound, sandpaper, and paint. It is one of the cheapest high-impact upgrades you can do.