Why Most People Struggle With Peppers
Peppers are one of those garden plants that seem like they should be easy — and in many ways, they are. But a surprising number of gardeners end up with pepper plants that grow lush, green foliage and then produce barely any fruit. Or they get a handful of small, underwhelming peppers instead of the bountiful harvest they imagined. The frustration is real.
The issue isn’t usually the variety or the soil. It’s timing, temperature, and a few specific growing techniques that make the difference between a plant that survives and one that thrives. Whether you’re growing sweet bell peppers, hot jalapenos, or exotic habaneros, the fundamentals are the same — and once you get them right, peppers become one of the most rewarding and productive plants in your garden.
Choosing the Right Varieties
Pepper varieties fall into two broad categories — sweet and hot — and within each category, there’s enormous diversity in flavor, size, color, and heat level. Choosing the right variety for your climate and growing conditions is the first step toward a productive harvest.
Best sweet peppers for beginners:
- Bell peppers (California Wonder): The classic. Large, blocky fruits that ripen from green to red. Reliable producers in most climates.
- Italian frying peppers (Jimmy Nardello): Long, thin, incredibly sweet peppers that are prolific producers. Excellent sauteed or roasted.
- Mini sweet peppers (Lunchbox): Compact plants that produce dozens of small, snack-able peppers. Great for containers.
Best hot peppers for beginners:
- Jalapeno (Early Jalapeno): Medium heat, extremely reliable, and one of the fastest-maturing hot peppers.
- Cayenne (Long Slim): Prolific producers of long, thin peppers perfect for drying or hot sauce.
- Habanero (Orange Habanero): Serious heat with fruity undertones. Slower to mature but incredibly productive once they start.
A Heirloom Pepper Seed Variety Pack is a great way to try several varieties in one season without buying individual seed packets for each.
Starting Seeds Indoors: The Critical Head Start
Peppers need a long, warm growing season — typically 60-90 days from transplant to first harvest, depending on the variety. In most climates, that means starting seeds indoors 8-10 weeks before your last expected frost date. This indoor head start is essential, especially for hot peppers and bell peppers, which are slower to mature.
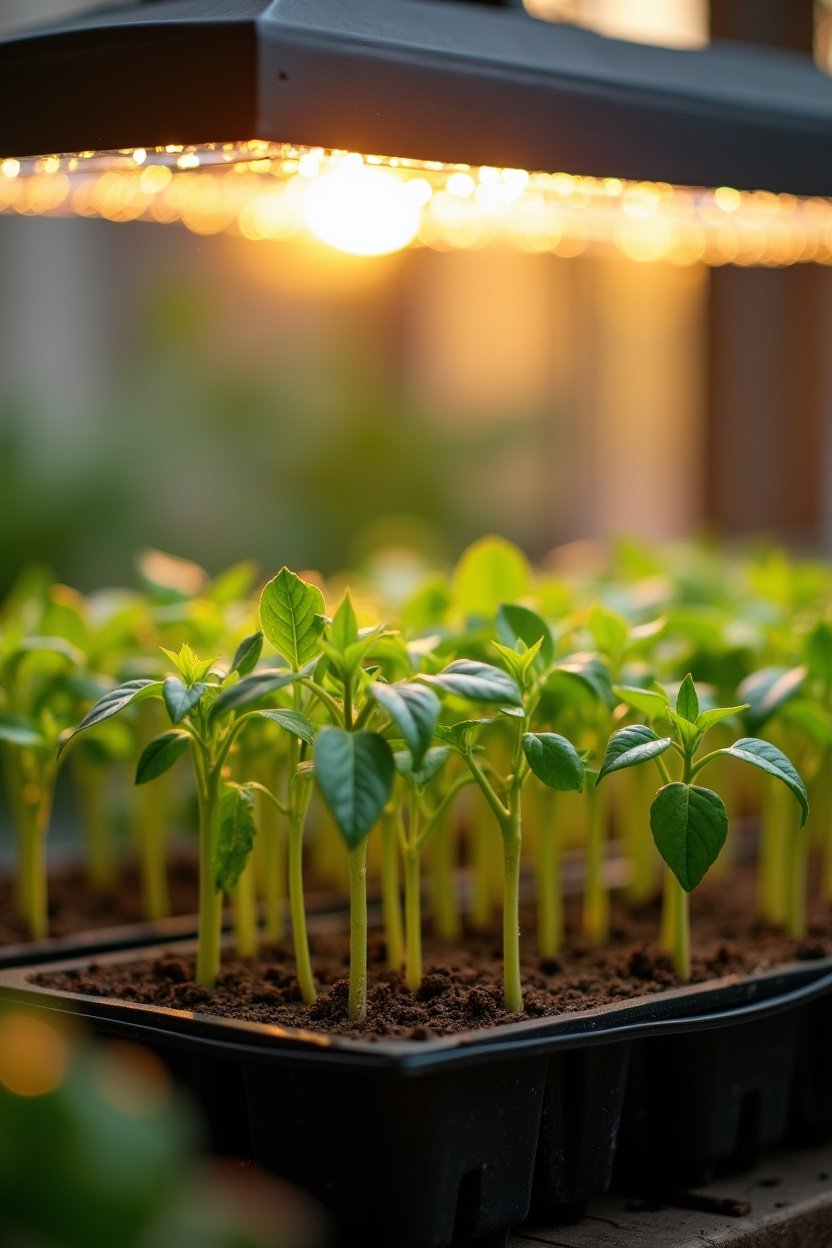
Plant seeds in a quality seed-starting mix, about 1/4 inch deep. Pepper seeds need warmth to germinate — soil temperatures of 80-85°F are ideal. A Seedling Heat Mat with Thermostat placed under your seed trays dramatically improves germination rates and speed. Without bottom heat, pepper seeds can take 2-3 weeks to sprout. With it, most varieties emerge in 7-10 days.
Once seedlings emerge, they need strong light — 14-16 hours per day. A sunny south-facing window works in a pinch, but seedlings under a grow light produce stockier, stronger transplants. Leggy, stretched-out seedlings that didn’t get enough light will struggle outdoors.
Transplanting: Timing Is Everything
This is where most pepper growers go wrong. Peppers are extremely cold-sensitive — far more than tomatoes. They stop growing below 55°F and can be permanently stunted by exposure to temperatures below 50°F, even if they survive. Transplanting too early into cold soil is the number one cause of underperforming pepper plants.
Wait until nighttime temperatures are consistently above 55°F before transplanting. In most zones, this means late May or early June — weeks after your last frost date. Soil temperature should be at least 65°F. If you’re unsure, use a soil thermometer to check.
Before transplanting, harden off your seedlings by gradually exposing them to outdoor conditions over 7-10 days. Start with a few hours of shade, then move to partial sun, then full sun. This prevents transplant shock and sunscald.
When planting, bury the stem slightly deeper than it sat in the pot — peppers can develop roots along the buried stem, just like tomatoes. Space plants 18-24 inches apart for most varieties, or 12-15 inches for compact varieties.
The Three Keys to Heavy Production
Once your peppers are in the ground, three factors determine whether you get a handful of fruit or a bumper crop:
1. Heat. Peppers are tropical plants that adore warmth. They grow fastest and produce most heavily when daytime temperatures are between 70-85°F and nighttime temperatures stay above 60°F. Black plastic mulch or landscape fabric around the base of plants warms the soil and accelerates growth. In cooler climates, row covers or cloches extend the warm season on both ends.
2. Consistent watering. Pepper plants need about 1-2 inches of water per week, delivered consistently. Irregular watering — drought followed by heavy soaking — causes blossom end rot, blossom drop, and cracked fruit. Drip irrigation or soaker hoses are ideal. Mulch around plants with straw or shredded leaves to retain soil moisture and suppress weeds.
3. The right fertilizer at the right time. Peppers need nitrogen early for leaf growth, then phosphorus and potassium for flowering and fruiting. A balanced fertilizer at transplanting, followed by a low-nitrogen, high-phosphorus fertilizer once flowers appear, gives the best results. Too much nitrogen throughout the season produces beautiful green plants with very few peppers — a common mistake.
When the Result Is Off
Blossom drop (flowers fall off without setting fruit): Usually caused by temperature extremes — either too cold (below 55°F) or too hot (above 95°F). Nothing you can do about weather, but ensuring consistent watering and avoiding high-nitrogen fertilizer during flowering helps. Blossoms will resume setting fruit when temperatures moderate.
Blossom end rot (dark, sunken spots on the bottom of fruit): Caused by calcium deficiency, which is almost always triggered by inconsistent watering rather than a lack of calcium in the soil. Maintain even moisture with mulch and regular watering. A layer of crushed eggshells worked into the soil at planting provides supplemental calcium.
Aphids: Pepper plants attract aphids, especially early in the season. A strong blast of water from the hose knocks them off. For persistent infestations, spray with a solution of water and a few drops of dish soap. Attract beneficial insects like ladybugs and lacewings by planting flowers nearby.
Sunscald (white, papery patches on fruit): Caused by direct, intense sun on exposed fruit. The solution is to maintain enough foliage canopy to shade the fruit. Avoid over-pruning pepper plants — unlike tomatoes, peppers benefit from a bushy, full canopy.

Harvesting for Maximum Production
Here’s a secret that experienced pepper growers know: the more you harvest, the more the plant produces. Leaving ripe peppers on the plant signals the plant to slow down production — its reproductive job is done. Picking peppers regularly tells the plant to keep producing more.
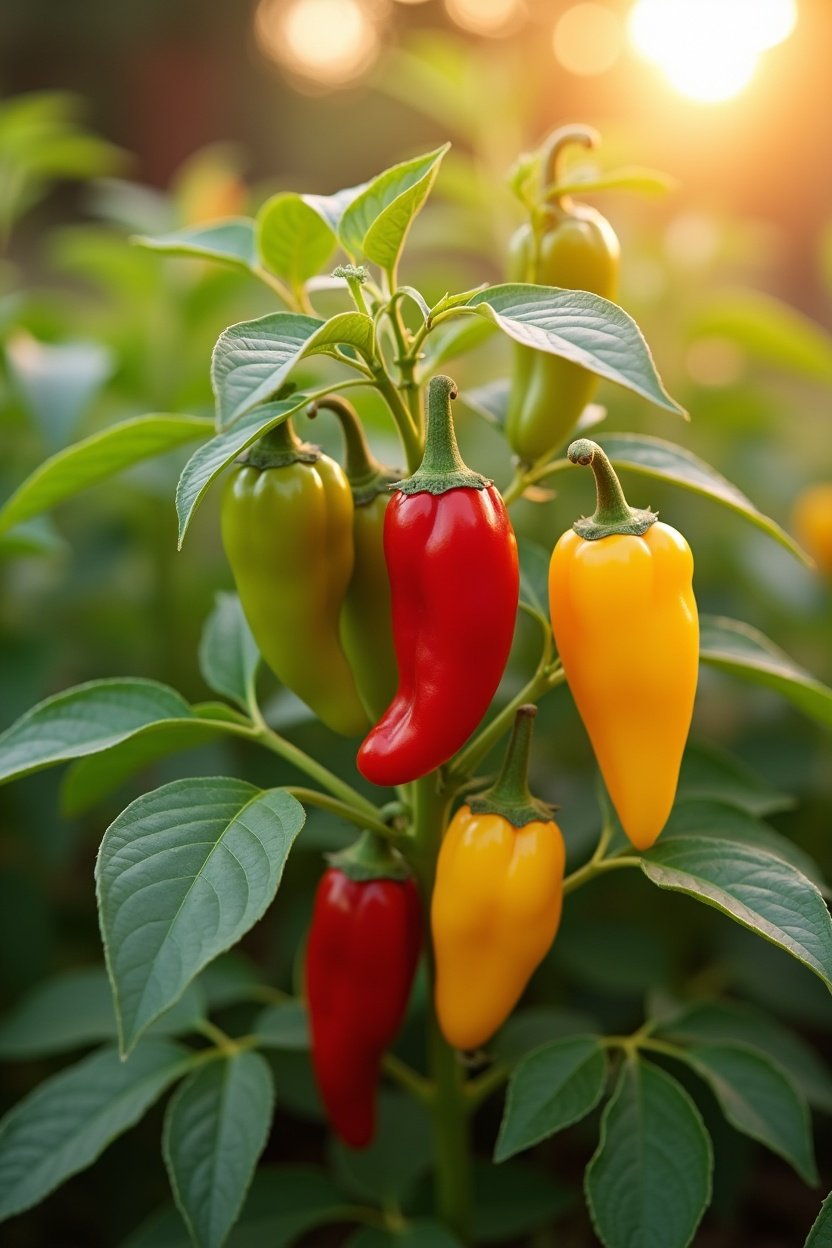
Sweet peppers can be harvested at any color stage. Green bell peppers are simply unripe — they’ll eventually turn red, yellow, or orange if left on the plant. Fully ripe peppers are sweeter and more nutritious, but picking some green encourages the plant to set more fruit.
Hot peppers develop more heat as they mature and change color. A red jalapeno is significantly hotter than a green one. For maximum heat, let hot peppers ripen fully on the plant before picking. Use pruning shears or scissors to cut peppers from the plant — pulling can damage the branch.
At the end of the season, when frost threatens, harvest all remaining peppers regardless of size or ripeness. Green peppers can ripen indoors on a sunny windowsill. Or pull the entire plant and hang it upside down in a warm, dry location — the peppers will continue to ripen on the vine for several weeks.
Container Growing: Peppers in Pots
Peppers are excellent container plants, making them perfect for patios, balconies, and small spaces. Use at least a 5-gallon container per plant (bigger is better), with drainage holes and quality potting mix. Container peppers need more frequent watering since pots dry out faster than garden soil — daily watering in hot weather is often necessary.
Compact varieties like Lunchbox, Shishito, and Thai chilies are ideal for containers. Even full-size bell peppers will produce in large containers, though yields may be slightly lower than in-ground plants.
Peppers are one of the most satisfying edible garden plants because the gap between a struggling plant and a thriving one is usually just a few small adjustments. Get the timing right, keep them warm, water consistently, and harvest often — and you’ll have more peppers than you know what to do with. That’s a good problem to have.