
I will be honest — my kitchen used to be the first room in the house to fall apart. By Wednesday night, the counters had disappeared under a pile of mail, crumbs, and random snack wrappers. The sink was full. The stovetop had mysterious splatters from three different meals. And the idea of cooking dinner felt impossible because I literally had no clean workspace left.
The fix was embarrassingly simple: a 30-minute kitchen reset every single night after dinner. Not a deep clean. Not a full reorganization. Just a targeted 30-minute routine that returns the kitchen to its baseline so I never wake up to a disaster. After six months of doing this, I can say without exaggeration that it is the single most impactful cleaning habit I have ever built. The kitchen stays functional, cooking feels enjoyable again, and my mornings start with coffee instead of anxiety.
| ⏱ Time Required: | 15-20 minutes |
| 📈 Difficulty: | Easy-Medium |
| 💰 Supplies Cost: | Free with what you have |
| 🔄 How Often: | On laundry day |
Why It Earns Its Spot
- Prevents the snowball effect — one dirty dish becomes ten overnight, but a nightly reset stops the pile-up before it starts
- Makes cooking enjoyable again — walking into a clean kitchen with clear counters and an empty sink makes you actually want to cook instead of ordering takeout
- Only 30 minutes is manageable every night — it is short enough that you can do it even when you are tired, and the routine becomes automatic within two weeks
- Keeps pests away — crumbs and food residue left overnight attract ants, fruit flies, and cockroaches, especially in warm climates
- Saves massive time on weekends — nightly resets mean you never face a huge kitchen clean-up on Saturday morning
- Reduces food waste — checking and consolidating leftovers every night means you actually eat them instead of finding them moldy a week later
The Lineup
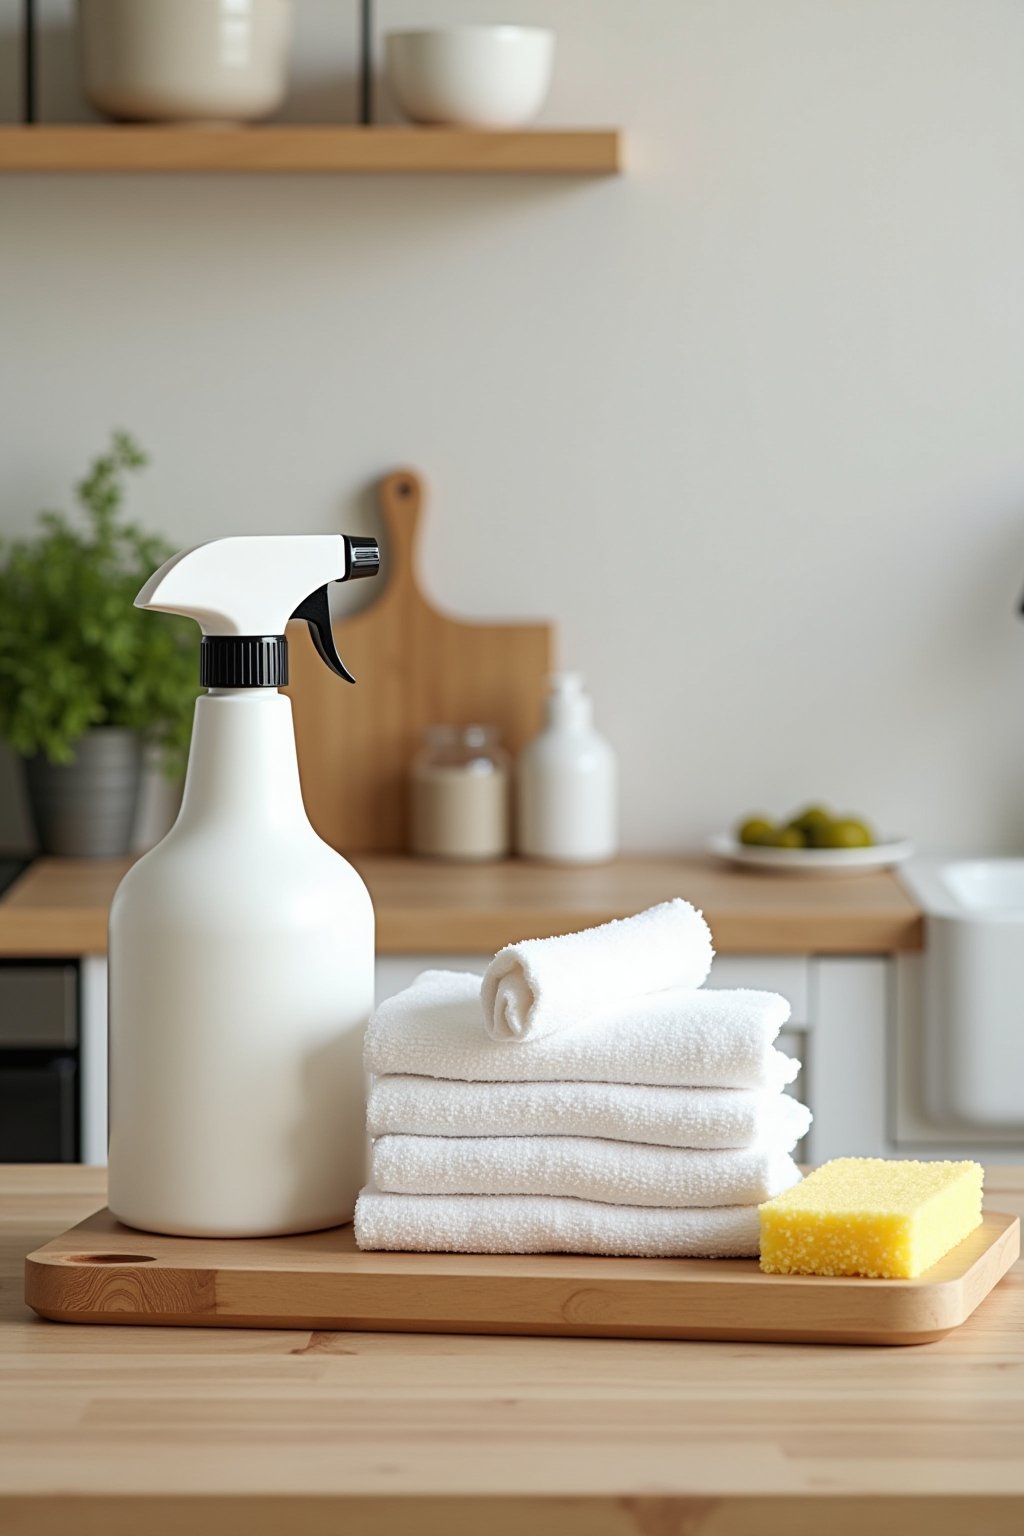
Keep these supplies within reach of your kitchen sink so the reset flows without interruption:
- Dish soap and a clean sponge — for hand-washing anything that cannot go in the dishwasher
- All-purpose spray cleaner — one bottle handles counters, the stovetop, appliance fronts, and the sink itself
- Microfiber cloth or dedicated kitchen towel — for wiping down surfaces after spraying
- Clear food storage containers — clear containers let you see leftovers so you actually remember to eat them
- Small broom and dustpan or a handheld vacuum — for a quick floor sweep under and around the table and stove
- Fresh dish towel — replace the one on the oven handle daily since damp towels harbor bacteria fast
- Trash bags — keep extras under the current bag so replacing is instant
The Steps
Minutes 0–8: Clear Everything Off the Counters
Start by putting away every single item that does not permanently live on the counter. Mail goes to the mail sorting area (a basket, a tray, anywhere designated). Backpacks and lunchboxes go to their spots. Random items get returned to their rooms. The goal is to see the bare counter surface. If you struggle with counter clutter, adopt this rule: the only permanent counter residents are the coffee maker, the knife block, and the paper towel holder. Everything else gets a home in a cabinet or drawer.
While clearing, stack all dirty dishes by the sink. Toss any food scraps in the trash or compost. Empty lunchboxes and rinse them. If you find expired food or produce past its prime on the counter, throw it away now instead of putting it back in the fridge to die a slow death. Pro tip: keep a small “outbox” basket in the kitchen for items that belong in other rooms. Family members can grab their own stuff when they pass through.
Minutes 8–15: Handle Dishes and Load the Dishwasher
If you have a dishwasher, load it efficiently: plates in the back of the bottom rack, bowls on the sides, cups and glasses on the top rack face-down, and silverware in the basket with handles down. Scrape food off but do not pre-rinse — modern dishwashers and detergents are designed to handle food residue, and pre-rinsing wastes water and time. Hand-wash anything that cannot go in the machine: sharp knives, wooden cutting boards, cast iron, and non-stick pans.
If you do not have a dishwasher, wash in this order: glasses first (they show water spots most), then plates and bowls, then silverware, and finally pots and pans. The water stays cleaner longer when you wash the least greasy items first. Dry everything and put it away immediately — a drying rack full of clean dishes is still visual clutter. Pro tip: run the dishwasher every night even if it is not completely full. Waiting for a full load means yesterday’s dishes sit dirty until tomorrow, and the cycle of mess continues.
Minutes 15–20: Wipe Down All Surfaces
Spray all-purpose cleaner on every counter surface, the stovetop, and the sink. Start at one end of the counter and wipe in a continuous motion to the other end, pushing crumbs into your hand or off the edge into the trash. Wipe the stovetop from back to front, lifting burner grates only if there are visible spills. For the sink, spray and wipe the basin and faucet, then rinse with hot water. A clean sink makes the entire kitchen feel cleaner even before you touch anything else.
Wipe the fronts of the microwave, fridge, and oven — these surfaces collect fingerprints, grease splatter, and food drips daily. Hit the handles especially hard since they are touched constantly. If you have a kitchen table or island where you eat, wipe that down too, including the chair backs and seats if they are wipeable. Pro tip: spray the stovetop and let the cleaner sit for 30 seconds before wiping. Cooked-on grease dissolves dramatically better with even a brief soak time.
Minutes 20–24: Deal with Leftovers and the Fridge
Transfer any leftover food from pots and pans into clear storage containers, label them with the date using a piece of masking tape and a marker, and stack them in a designated leftovers zone in the fridge (one shelf works best). Check existing leftovers — anything older than four days gets tossed. This nightly habit prevents the classic problem of finding mystery containers in the back of the fridge two weeks later.
Do a 30-second fridge scan: are there any fruits or vegetables that are about to go bad? Move them to the front so they get eaten tomorrow. Is the milk almost empty? Add it to your grocery list. Wipe any visible spills on shelves with a damp cloth. Pro tip: designate one shelf as “eat first” and put everything with the closest expiration date there. Your family will naturally reach for that shelf and you will cut food waste dramatically.
Minutes 24–27: Take Out the Trash and Replace Liners
If the trash is more than two-thirds full, take it out now. Do not wait until it is overflowing and impossible to pull out without spilling. Tie the bag, pull it out, and immediately replace it with a fresh liner. Check your recycling bin and take that out too if it is getting full. If you compost, empty the countertop compost container into your outdoor bin before it starts smelling.
Wipe the inside rim of the trash can with your spray and cloth — drips accumulate there and create odors even with a fresh bag. If the can itself smells, sprinkle baking soda in the bottom before putting in the new liner. Pro tip: keep five or six extra trash bags at the bottom of the can, under the current bag. When you pull out a full bag, the next liner is already right there waiting. This tiny trick saves you from ever hunting for bags under the sink at the worst possible moment.
Minutes 27–30: Sweep the Floor and Final Reset
Grab your broom or handheld vacuum and sweep the floor around the stove, under the table (or pull chairs out and sweep under them), and in front of the trash can. These three zones catch 90% of kitchen floor debris. You do not need to mop — that is a weekly task. Just remove the visible crumbs and food bits that attract pests and make the floor feel gritty underfoot.
Hang a fresh dish towel on the oven handle. Make sure the dish sponge is squeezed dry and propped up to air out (a damp sponge sitting in the sink breeds bacteria rapidly). Set up the coffee maker for tomorrow morning if you drink coffee. Take one last look around: clear counters, clean sink, fresh towel, empty trash. Done. Pro tip: replace your kitchen sponge every one to two weeks. Microwaving or sanitizing extends life slightly, but sponges are cheap and bacteria accumulates fast in the porous material no matter what you do.
If You’re Stuck
- Leaving the sink full “to soak” — soaking is a valid technique for stuck-on food, but dishes left in a full sink overnight become a bacteria-laden mess and make the whole kitchen smell stale by morning
- Wiping counters without clearing them first — spraying around a cluttered counter means you clean 30% of the surface at best and the areas underneath the clutter stay dirty
- Skipping the stovetop — grease splatter hardens overnight and requires increasingly aggressive scrubbing the longer you wait. A nightly wipe while it is still fresh takes ten seconds
- Not replacing the dish towel — kitchen towels are one of the most bacteria-heavy items in any home. A damp towel used all day should go in the laundry every single night
- Doing the reset hours after dinner — food residue dries and hardens the longer it sits. Start the reset within 30 minutes of finishing dinner for the easiest cleanup
Where It Earns Its Keep
Galley or Small Kitchen
Your reset should take closer to 20 minutes because you have less counter space and fewer appliances. The upside is that a tiny kitchen shows dirt immediately, so the nightly reset makes the biggest visual impact in small spaces. Focus on the sink, one counter, and the stovetop — that is your entire workspace.
Open-Plan Kitchen and Living Area
When your kitchen is visible from the sofa, a messy kitchen ruins the entire living space. Extend your reset by two minutes to include the island or bar area and wipe any stools. The payoff is that a clean open-plan kitchen makes the whole main floor feel put together.
Kitchen with a Big Family
Four or more people generating dishes every night means the reset takes closer to 40 minutes solo. The solution: assign rotating tasks. One kid clears the table and puts away leftovers, another loads the dishwasher, and you handle the wipe-down and floors. Sharing the work gets it done in 15 minutes.
Quick Answers
What is the most important part of the nightly kitchen reset?
Clearing the counters and running the dishwasher. These two tasks alone make the biggest visual impact and give you a functional workspace in the morning. If you only have 10 minutes, do those two things and skip everything else.
How do I convince my family to help with the kitchen reset?
Start with a simple rule: whoever cooks does not clean. This naturally distributes the workload. For kids, assign one specific task per night and rotate weekly. Making it a routine with a set start time (right after dinner) removes the negotiation.
Is it wasteful to run the dishwasher every night if it is not full?
Modern dishwashers use less water and energy than hand-washing the same number of dishes. Running it nightly keeps your kitchen clean and prevents the buildup of dirty dishes. If you are concerned about waste, use the eco or light cycle for smaller loads.
What should I do with pots and pans that are still hot after cooking?
Let them cool on the stove for 10 to 15 minutes while you eat dinner and start the reset. Never put hot pans in cold water as thermal shock can warp them. By the time you reach the dish-washing step, they will be cool enough to handle.
How do I keep my kitchen sponge from getting smelly?
Squeeze it completely dry after every use and store it upright so air circulates. Replace it every one to two weeks regardless. A smelly sponge means bacteria has taken over and sanitizing only helps temporarily. They cost very little, so replacement is the simplest solution.
Should I wipe inside the microwave every night?
Only if there is visible splatter. For a quick fix, microwave a damp cloth or a bowl of water with lemon juice for 60 seconds. The steam loosens any food residue so it wipes off in seconds. A nightly wipe is only necessary if your microwave gets heavy daily use.