Starting seeds indoors is the single best way to get a head start on the growing season — and it costs a fraction of buying transplants at the nursery. A simple setup with a few seed trays, some potting mix, and an inexpensive grow light is all you need to turn a packet of seeds into dozens of healthy seedlings ready for your garden.
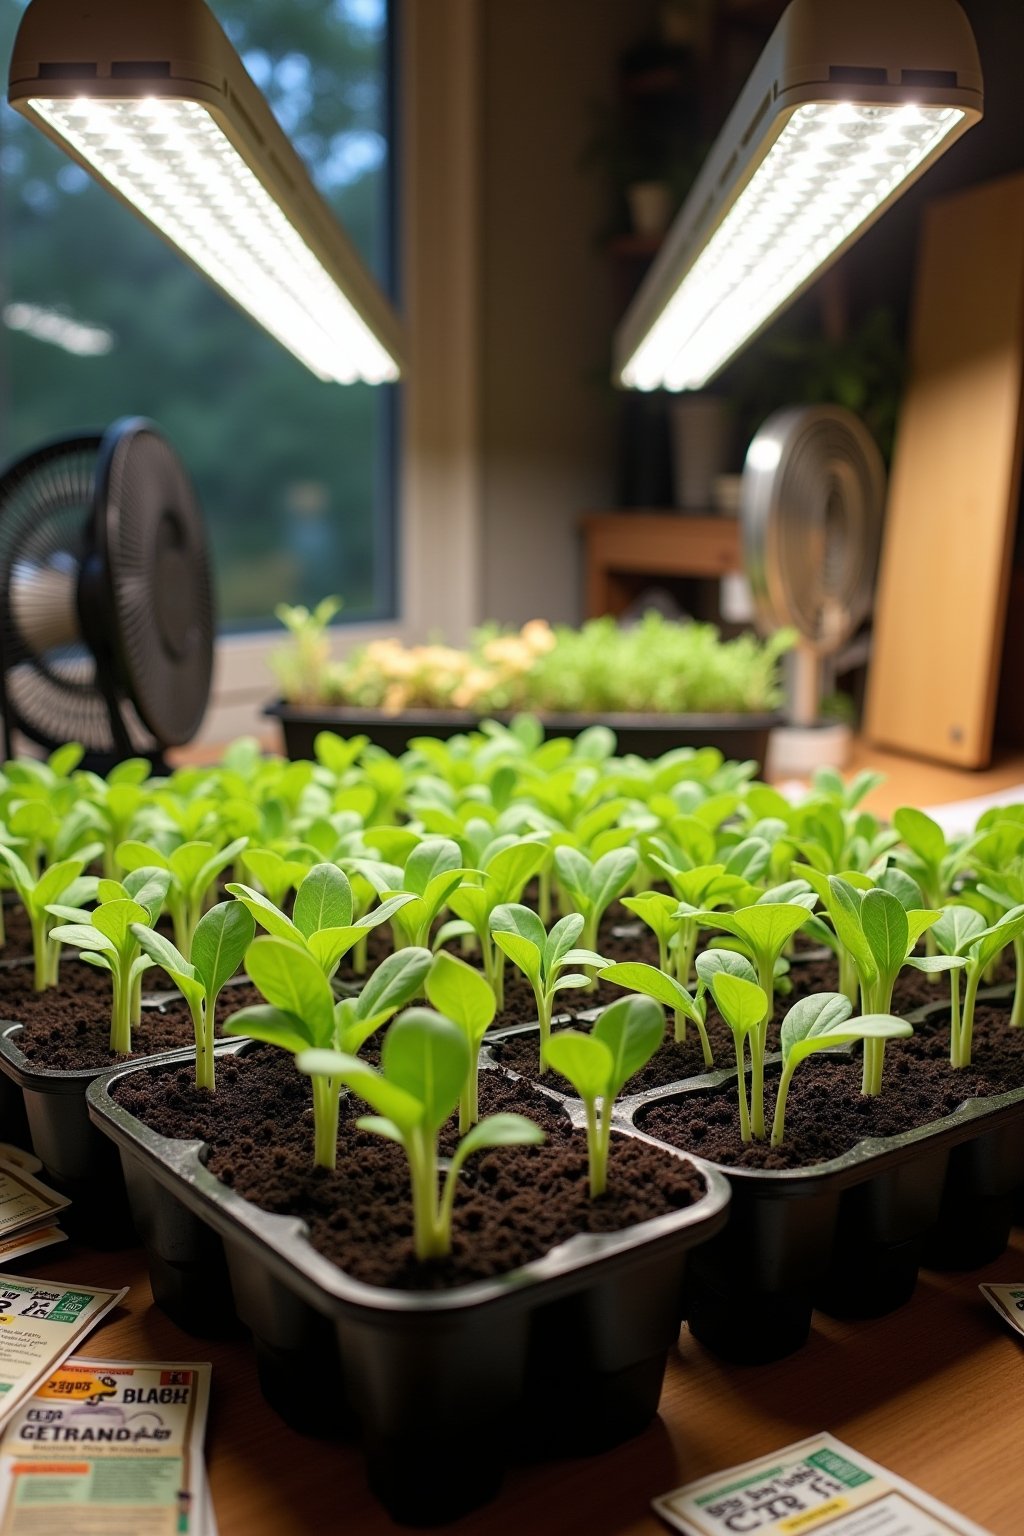
The key that most beginners miss is light. Seeds on a windowsill almost always grow leggy and weak because even a bright south-facing window provides only a fraction of what seedlings need. A basic LED grow light positioned a few inches above your trays changes everything — you get stocky, dark green, vigorous seedlings that transplant like champions. This guide walks you through the entire process from seed to transplant-ready.
Quick Facts
| Sun | Grow lights (14-16 hours/day) |
| Difficulty | Beginner |
| Season | Start 6-8 weeks before last frost |
| Zone | All USDA Zones |
| Time to Harvest | 6-8 weeks from sowing to transplant-ready seedlings |
What You Need for How to Start Seeds Indoors Under Lights (Step-by-Step)
- Seed starting trays with clear humidity domes
- Seed starting mix (sterile, fine-textured)
- LED grow lights (full spectrum, 2-foot or 4-foot shop lights work great)
- Adjustable light stand or chains for hanging
- Timer for the grow lights (set to 14-16 hours on)
- Spray bottle for misting
- Heat mat (optional but speeds germination)
- Small fan for air circulation
- Plant labels and waterproof marker
- Liquid seedling fertilizer (half-strength)
- Seeds (tomatoes, peppers, herbs, flowers — whatever you want to grow)
Grow lights: You do not need expensive fancy grow lights. A basic 2-foot or 4-foot LED shop light from the hardware store works perfectly for seed starting. Look for lights labeled “full spectrum” or “daylight” (5000-6500K color temperature). These cost $15-30 and last for years. Fancy purple/pink grow lights work too but are unnecessary for seed starting.
Seed starting mix: This is NOT the same as potting soil. Seed starting mix is sterile, fine-textured, and lightweight — perfect for tiny seeds and delicate roots. Using garden soil or regular potting mix invites diseases like damping off that kill seedlings overnight.
Heat mats: Optional but highly recommended for warm-season crops like tomatoes, peppers, and eggplant. These plants germinate best at 75-85°F soil temperature. A heat mat placed under the tray provides consistent bottom heat and can cut germination time in half.
Step 1: Calculate Your Start Date
Look up your last spring frost date and count backwards. Most vegetables and flowers should be started 6-8 weeks before the last frost. Tomatoes and peppers need 6-8 weeks, herbs like basil need 4-6 weeks, and fast growers like lettuce only need 3-4 weeks.
Starting too early is actually worse than starting too late — overgrown seedlings become rootbound and stressed before they can go outside. Mark your start dates on a calendar and resist the urge to sow everything in January. Patience pays off with healthier, more productive plants.
Step 2: Set Up Your Light Station
Hang your grow light 2-3 inches above where the tops of the seedlings will be. This distance is critical — too far away and seedlings stretch toward the light and become leggy. Use adjustable chains or a rack so you can raise the light as the plants grow.
Set a timer to keep the lights on for 14-16 hours per day. Seedlings need a dark period too, so don’t leave lights on 24/7. Place a small oscillating fan nearby on low — the gentle breeze strengthens stems and prevents fungal problems from stagnant air.
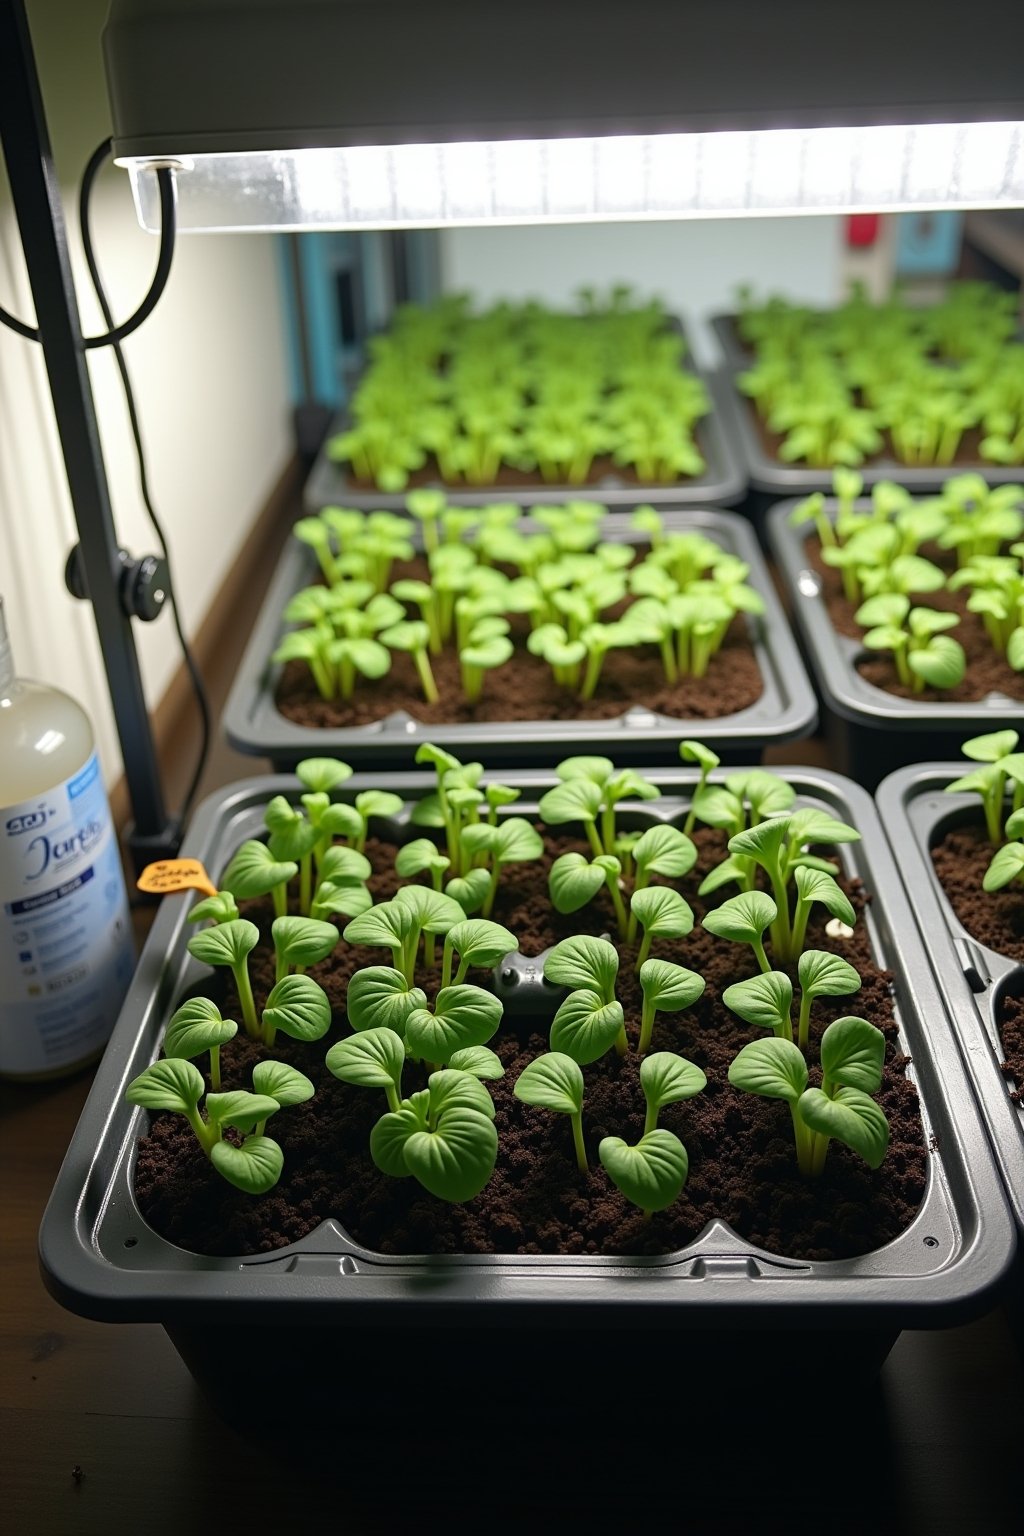
Step 3: Fill Trays and Sow Seeds
Fill seed trays with pre-moistened seed starting mix. The mix should feel like a damp sponge — moist but not dripping wet. Press it gently into the cells but don’t compact it.
Plant seeds at the depth specified on the packet — usually 2-3 times the diameter of the seed. Tiny seeds like basil and lettuce are barely covered. Larger seeds like tomatoes go about 1/4 inch deep. Place 2 seeds per cell as insurance (thin to the strongest seedling later), label everything with the variety name and date, and cover with the humidity dome.
Step 4: Manage Moisture and Temperature
Keep the humidity dome on until seeds germinate — this traps moisture and creates a mini greenhouse effect. Check daily and mist with a spray bottle if the surface looks dry. Never let the mix dry out completely during germination or the seeds will die.
If using a heat mat, keep it on until seeds sprout, then remove it. Most seedlings grow best at 65-70°F room temperature after germination. Remove the humidity dome as soon as you see green — leaving it on too long creates a humid environment that encourages damping off disease.
Step 5: Thin Seedlings and Begin Feeding
Once seedlings develop their first set of true leaves (the second pair, which look different from the initial seed leaves), thin to one seedling per cell by snipping the weaker one at soil level with scissors. Don’t pull it out — you’ll disturb the roots of the keeper.
Start feeding with a half-strength liquid fertilizer once a week after true leaves appear. Seed starting mix contains almost no nutrients, so seedlings will stall without supplemental feeding. A balanced formula like 10-10-10 diluted to half is perfect.
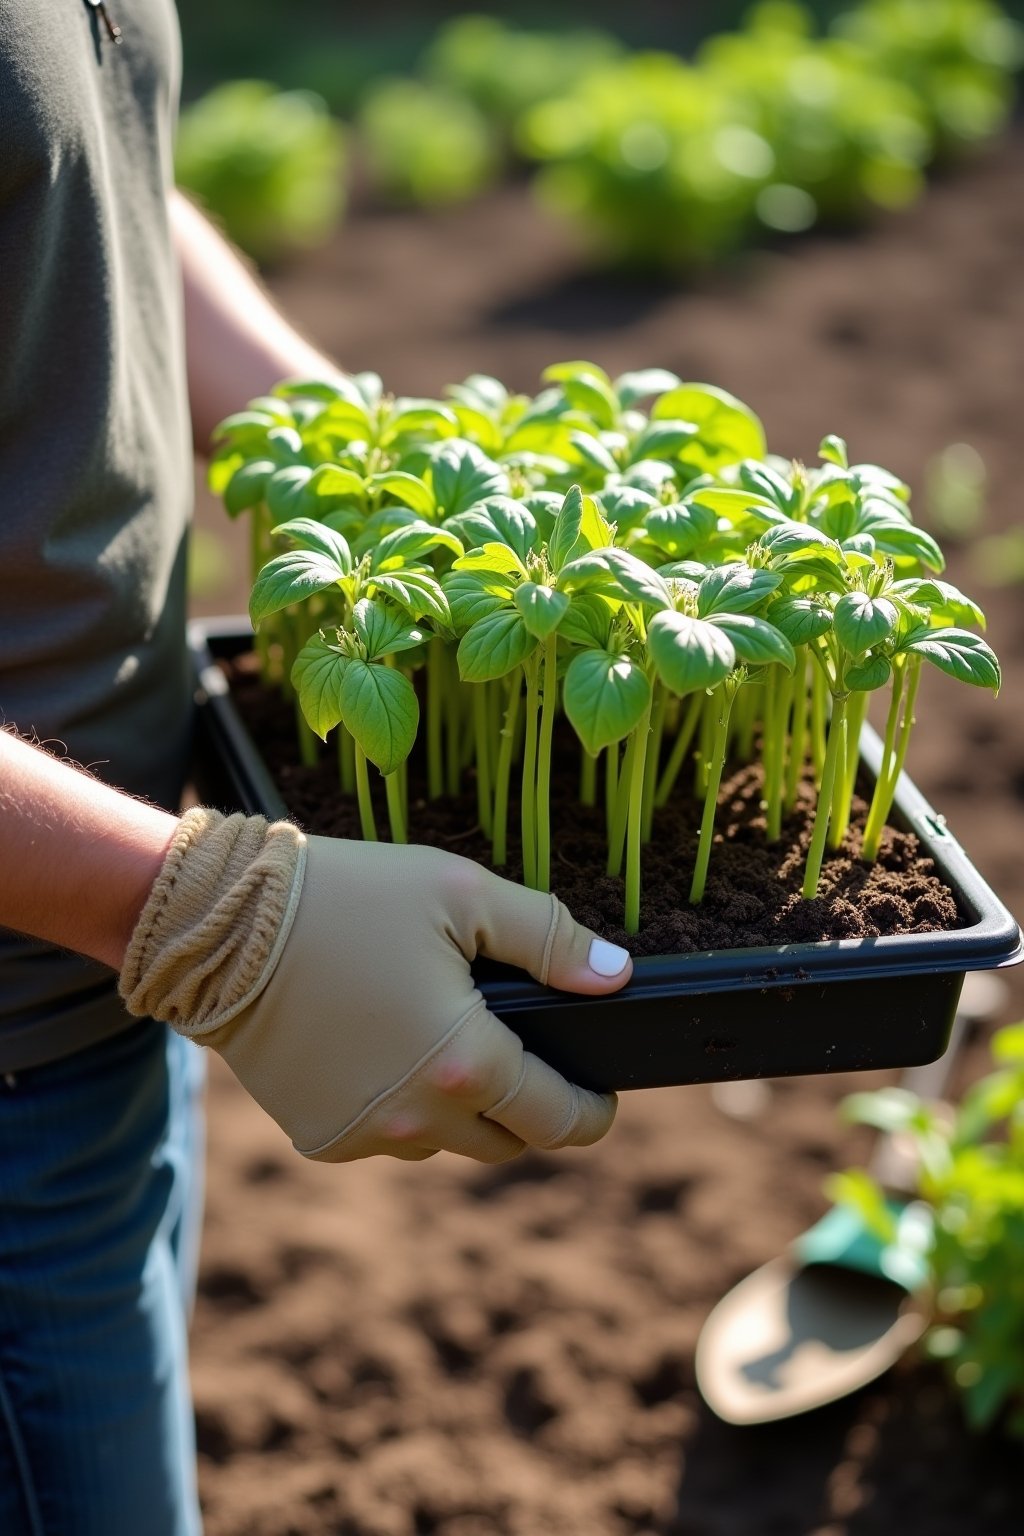
Step 6: Harden Off and Transplant
About 1-2 weeks before your last frost date, begin hardening off your seedlings. This means gradually exposing them to outdoor conditions so they don’t go into shock when transplanted. Start with 1-2 hours in a sheltered, shady spot, increasing outdoor time and sun exposure over 7-10 days.
Transplant on a cloudy day or in the late afternoon to reduce transplant shock. Water seedlings thoroughly in their trays before transplanting, dig a hole slightly larger than the root ball, plant at the same depth (except tomatoes, which can be buried deeper), and water immediately. Protect new transplants from harsh sun and wind for the first few days.
Common Problems and How to Fix Them
Leggy, stretched seedlings: The light is too far away or not on long enough. Lower the grow light to 2-3 inches above the seedlings and make sure it runs 14-16 hours daily. Leggy seedlings can sometimes be saved by burying the stem deeper when transplanting (works great for tomatoes).
Damping off (seedlings collapse at soil level): A fungal disease caused by too much moisture and poor air circulation. Prevent it by removing the humidity dome after germination, running a small fan, using sterile seed starting mix, and not overwatering.
Seeds not germinating: Check soil temperature — many seeds need 65-85°F to germinate. A heat mat solves this. Also check seed age — most vegetable seeds stay viable for 3-5 years if stored properly, but germination rates decline over time.
White mold on soil surface: Usually harmless saprophytic mold from humid conditions. Improve air circulation with a fan, reduce watering slightly, and scrape off the mold. It rarely hurts seedlings.
Seasonal Guide
Here is a timeline for starting seeds indoors based on your last frost date:
| Weeks Before Last Frost | What to Start |
|---|---|
| 10-12 weeks | Peppers, eggplant, leeks, onions |
| 6-8 weeks | Tomatoes, broccoli, cauliflower, kale, herbs (basil, parsley) |
| 4-6 weeks | Lettuce, spinach, chard, annual flowers (marigolds, zinnias) |
| 2-4 weeks | Cucumbers, squash, melons (these grow fast, don’t start too early) |
Direct sow outdoors (don’t start indoors): beans, peas, carrots, radishes, corn, beets. These crops don’t transplant well and grow best when sown directly in the garden after the last frost.
Expert Tips
- Cheap shop lights work just as well as fancy grow lights — a $20 LED shop light from the hardware store in 5000K-6500K color temperature is all you need. Save your money for seeds and soil.
- Keep lights 2-3 inches from seedling tops — this is the most common mistake. Raise the light as plants grow but never let the gap exceed 4 inches or seedlings will stretch.
- A small fan is essential — gentle air movement strengthens stems (like wind does outdoors) and prevents damping off disease. Set it on the lowest speed and aim it near (not directly at) the seedlings.
- Bottom water instead of top water — set trays in a shallow pan of water and let the mix wick up moisture from below. This keeps the soil surface drier and reduces fungal problems.
- Don’t start too early — the most common beginner mistake. Overgrown, rootbound seedlings perform worse than smaller, fresh transplants. Follow the timing chart strictly.
- Label everything with the date — when you have 8 varieties growing, labels are the only way to know what’s what and when each batch should go outside.
Related Articles
Looking for more gardening guides? Check out these favorites:
- Succession Planting: How to Harvest Fresh Vegetables All Season Long
- How to Prepare Your Garden Soil for Spring Planting (Step-by-Step)
Frequently Asked Questions
What kind of grow light do I need for starting seeds?
A basic full-spectrum LED shop light (5000K-6500K color temperature) is all you need. A 2-foot light covers one standard seed tray, a 4-foot light covers two. These cost $15-30 at any hardware store. You don’t need expensive purple/pink grow lights — those are designed for flowering plants, not seedlings.
How many hours of light do seedlings need?
Seedlings need 14-16 hours of light per day, with 8-10 hours of darkness. Use a timer so you don’t have to remember. More light than 16 hours doesn’t help and can stress some plants. The dark period is important for healthy growth.
Why are my seedlings so tall and thin?
They’re not getting enough light. The light is either too far away or not on long enough. Lower the light to 2-3 inches above the seedlings and make sure it runs 14-16 hours. Windowsills alone almost never provide enough light — even a bright south-facing window is only about 30% of what seedlings need.
Do I need a heat mat for starting seeds?
Not for all seeds, but it significantly speeds germination for warm-season crops like tomatoes, peppers, and eggplant. These seeds germinate in 5-7 days with a heat mat versus 10-14 days without. Cool-season crops like lettuce and broccoli don’t need bottom heat. A heat mat costs about $20 and is worth the investment.
When should I start seeds indoors?
Count backwards from your last spring frost date. Most vegetables need 6-8 weeks of indoor growing time. Peppers need 10-12 weeks. Fast growers like squash and cucumbers only need 2-4 weeks. Starting too early is worse than starting late — overgrown seedlings struggle when transplanted.
What is hardening off and why is it important?
Hardening off is the process of gradually exposing indoor-grown seedlings to outdoor conditions over 7-10 days before transplanting. Indoor seedlings are used to stable temperatures, no wind, and artificial light. Without hardening off, they can go into shock from sun, wind, and temperature swings and may die or stall for weeks.