I spent years cooking in a kitchen lit by a single fluorescent ceiling fixture, and I didn’t realize how much it was ruining the entire room until I finally upgraded. Proper kitchen lighting doesn’t just help you see what you’re cooking — it transforms the mood, the functionality, and the overall design of the space.
Pinterest searches for kitchen lighting plans have jumped 165% this year, and it’s because people are finally realizing that lighting is the most underrated element in kitchen design. Here’s how to layer your kitchen lighting like a designer.
Why This Works
- Transforms any kitchen instantly — good lighting makes even outdated kitchens look better
- Three layers of function — ambient, task, and accent lighting each serve a purpose
- Sets the mood — dimmable lighting takes a kitchen from bright work zone to cozy dinner party
- Increases home value — upgraded lighting is one of the top features buyers notice
- Works with any style — from modern pendants to farmhouse fixtures, the principles are universal
What You’ll Need
Components for a well-layered kitchen lighting plan:
- Pendant lights — over island or peninsula (typically 2-3)
- Under-cabinet LED strips — for task lighting on countertops
- Recessed lights or flush mount — for general ambient lighting
- Dimmer switches — essential for flexibility (install on all circuits)
- Warm bulbs — 2700K-3000K for inviting ambiance
- Accent lighting — inside glass cabinets, above cabinets, or toe-kick lighting
Step-by-Step Guide
Start with Ambient (General) Lighting
Ambient lighting is your base layer — it provides overall illumination for the whole room. Recessed ceiling lights (spaced 4-5 feet apart) or a central flush-mount fixture are the most common choices.
For an average kitchen, plan for about 50 lumens per square foot. A 200 sq ft kitchen needs roughly 10,000 lumens of ambient light.
Add Task Lighting Where You Work
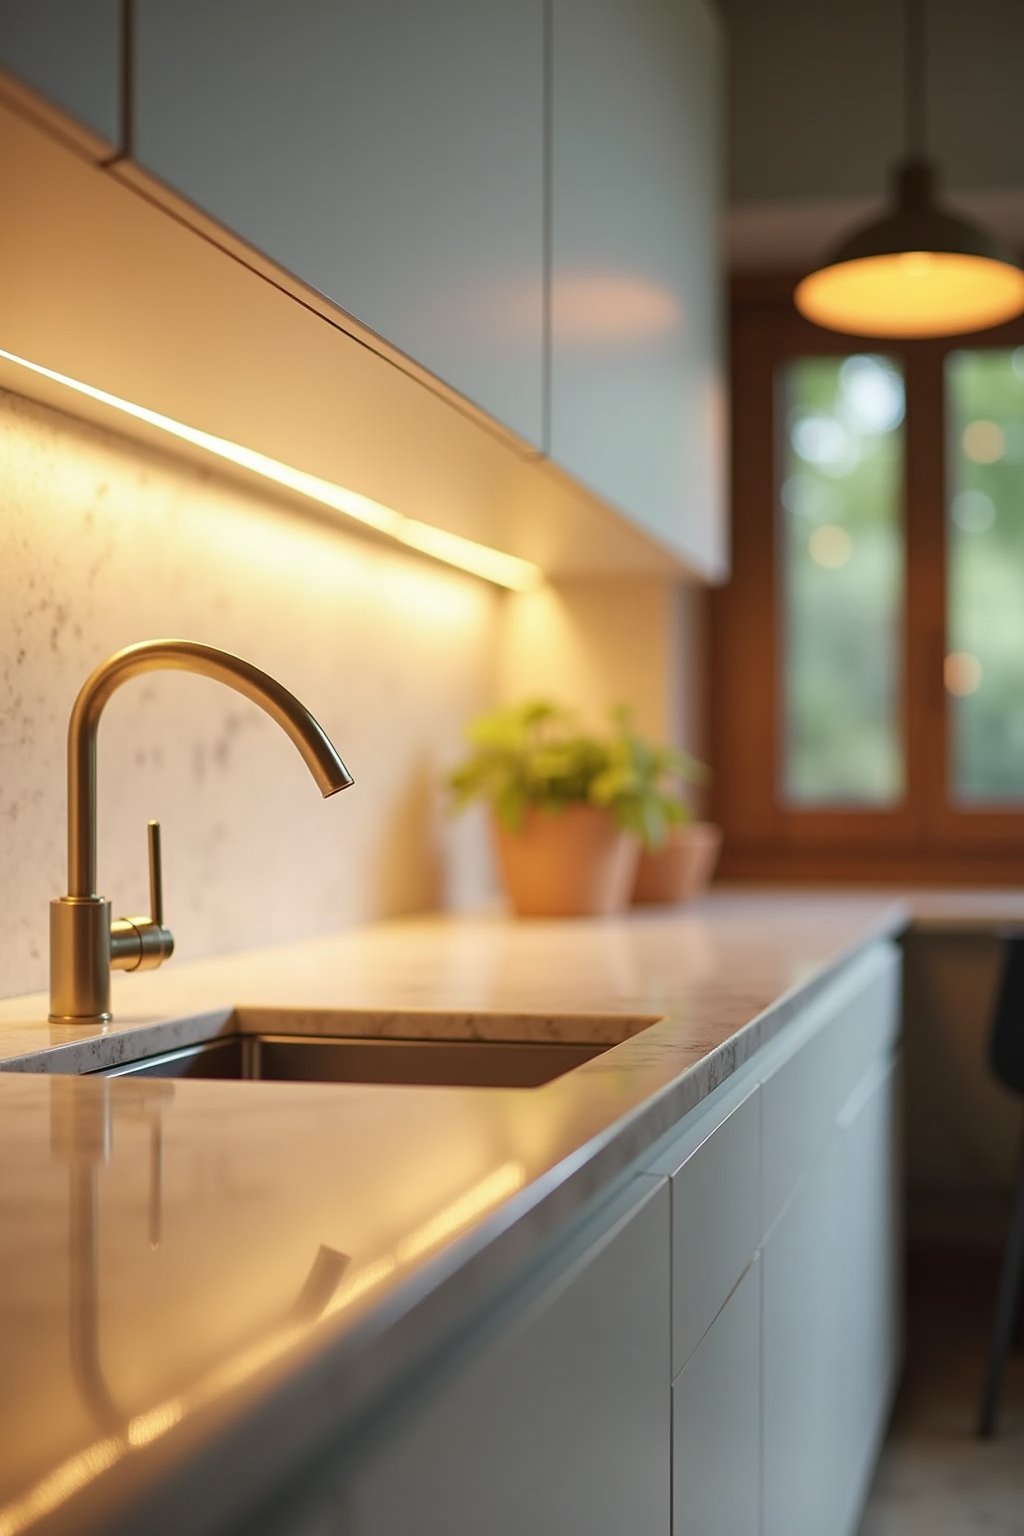
Task lighting illuminates your work surfaces. Under-cabinet LED strips are the gold standard — they light your countertops directly without shadows from overhead lights. Place them toward the front of the cabinet, not against the wall, for the best coverage.
If you have a sink without a window, add a small pendant or recessed light directly above it.
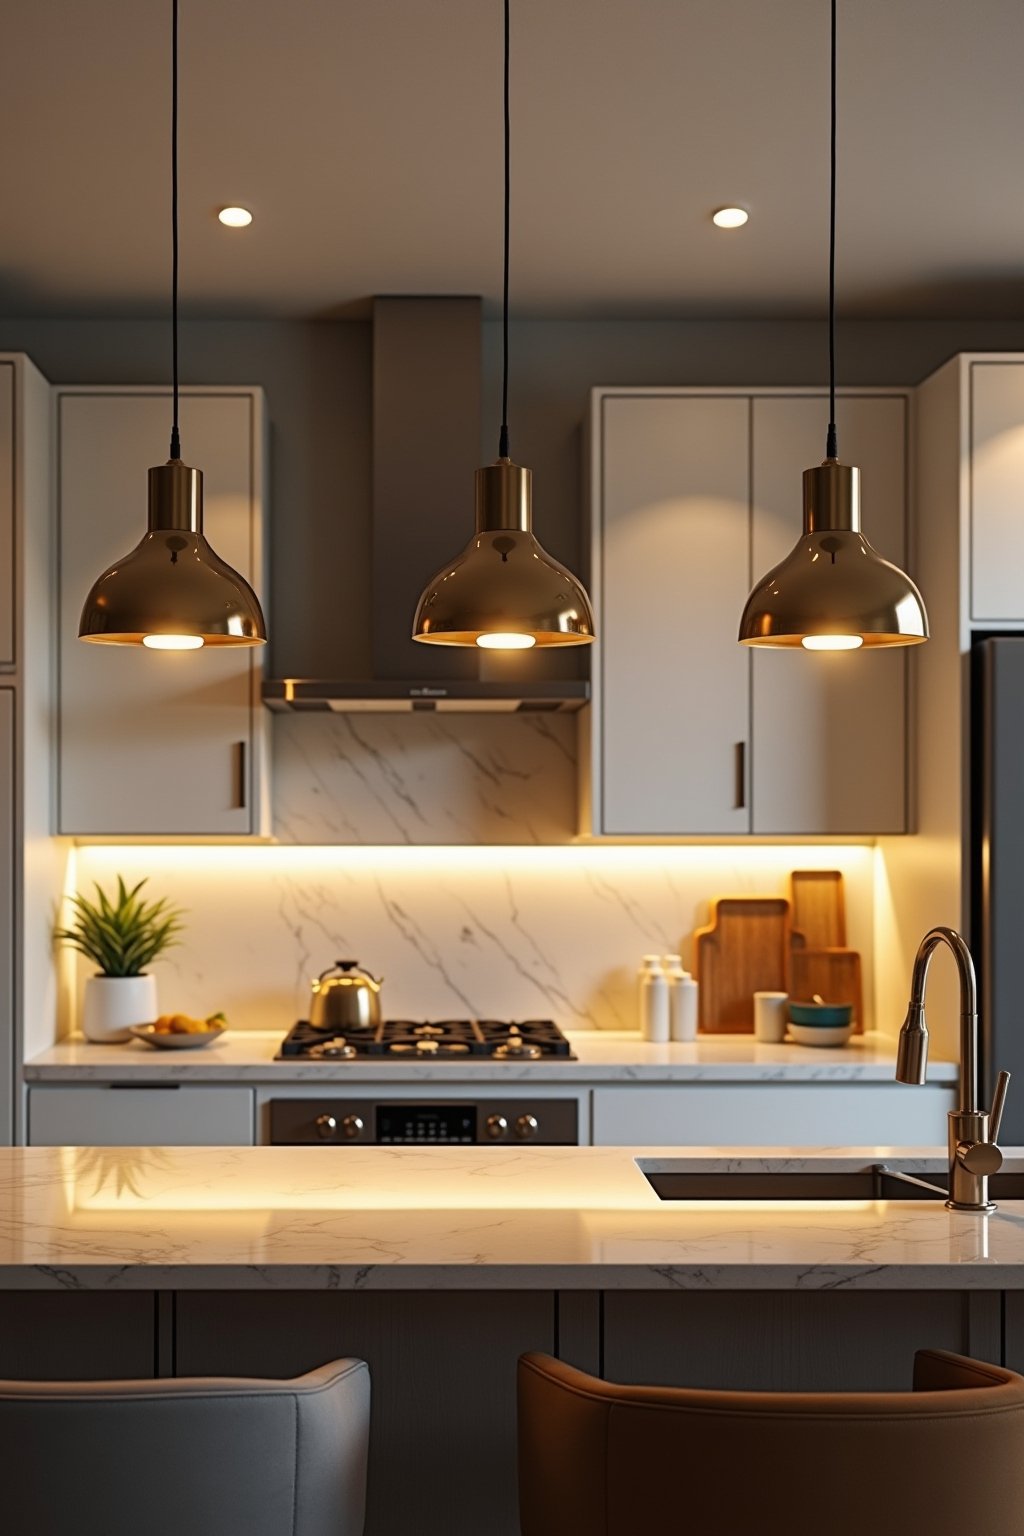
Install Statement Pendants
Pendant lights over an island or peninsula serve both task and decorative purposes. Hang them 30-36 inches above the countertop, spaced 24-30 inches apart. For a standard 6-foot island, three small pendants or two larger ones work perfectly.
Choose pendants that match your kitchen style but add a design moment — this is where you can be bold with material or shape.
Add Accent Lighting for Depth
Accent lighting creates depth and visual interest. Options include: LED strips inside glass-front cabinets, above-cabinet uplighting, toe-kick lights along the base, or picture lights above open shelving.
Accent lighting is especially important in kitchens with dark cabinets or color-drenched walls, where it prevents the space from feeling heavy.
Install Dimmers on Every Circuit
Dimmers are the single most impactful lighting upgrade you can make. They let you go from bright cooking mode to soft dinner-party ambiance with a slide. Install dimmers on all lighting circuits — ambient, pendants, and under-cabinet.
Smart dimmers that work with voice assistants or phone apps add even more flexibility.
Common Mistakes to Avoid
- Relying on a single ceiling light — one fixture creates flat, shadow-heavy lighting that makes the kitchen feel uninviting
- Using cool-white bulbs — bulbs above 4000K make kitchens feel clinical. Stick to 2700K-3000K for warmth
- Hanging pendants too high or too low — 30-36 inches above the countertop is the sweet spot for both function and aesthetics
- Forgetting under-cabinet lighting — your overhead lights cast your own shadow on the counter. Under-cabinet LEDs eliminate this completely
- Skipping dimmers — without dimmers, your kitchen is either fully on or fully off. There’s no in-between for different activities
Budget Tips
Layer your lighting without breaking the bank:
- LED under-cabinet strip lights are $15-30 and make the biggest impact per dollar
- Install dimmer switches yourself — they’re $15-25 each and take 15 minutes to install
- Start with affordable pendant lights from online retailers — $30-60 each for great-looking options
- Use adhesive LED puck lights inside cabinets for under $20 (battery-operated, no wiring needed)
- Replace all bulbs with warm 2700K LEDs before buying any new fixtures — this alone transforms the room
Styling Tips
- Match pendant metal to hardware — brass pendants with brass cabinet pulls creates a cohesive look
- Vary your light sources — mixing pendant styles, recessed, and strip lights adds visual interest and prevents monotony
- Use glass or open pendants over islands — they provide light without blocking sightlines in open kitchens
- Consider the nighttime view — walk through your kitchen at night to identify dark spots that need additional lighting
- Add a dimmed pendant over the sink — this creates a cozy glow for evening cleanup
- Layer from bottom to top — under-cabinet, pendant, ambient, and above-cabinet creates the most depth
Room-by-Room Inspiration
Galley Kitchen
Recessed ceiling lights every 4 feet, under-cabinet LED strips on both sides, and one pendant over the sink. Dimmers on everything. This simple three-layer approach makes a narrow galley feel spacious and functional.
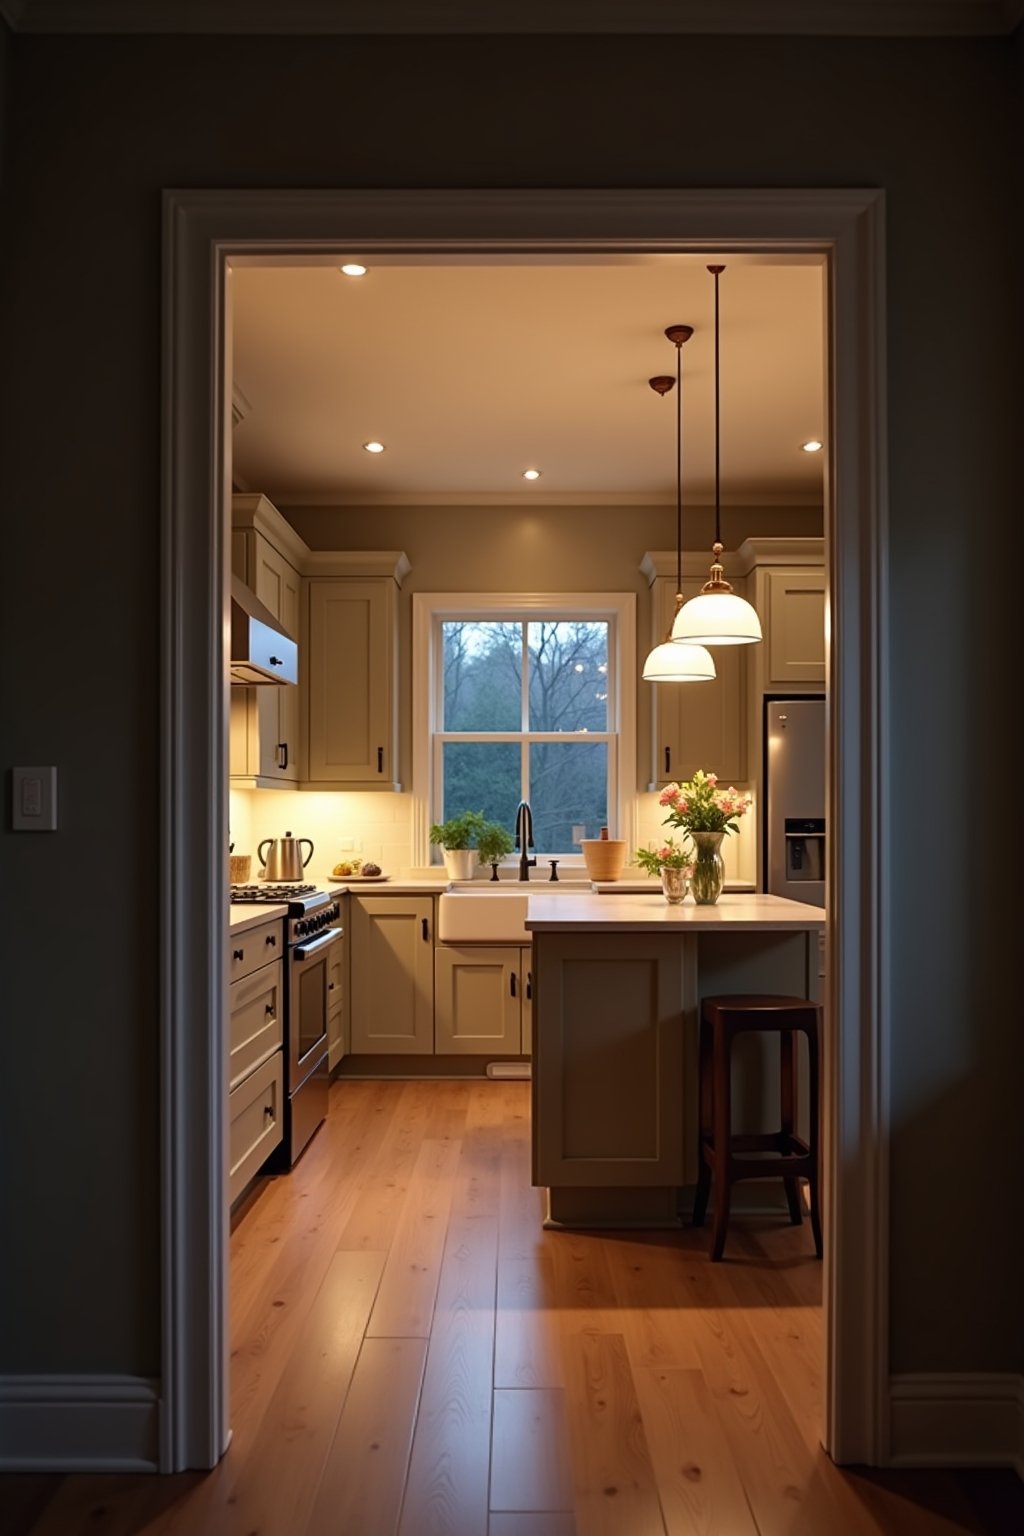
Kitchen with Island
Three matching pendants over the island become the visual centerpiece. Add under-cabinet lighting on the perimeter, recessed lights for general illumination, and accent lighting inside glass-front cabinets.
Open-Concept Kitchen
Lighting helps define zones in open plans. Pendants mark the kitchen, dimmable ambient lights set the mood, and under-cabinet lighting keeps the cooking zone functional without brightening the entire living space.
Frequently Asked Questions
How many pendant lights do I need over a kitchen island?
For a standard 6-foot island, use two large (12-16 inch) pendants or three small (8-10 inch) pendants. Space them 24-30 inches apart and center them over the island width.
What color temperature is best for kitchen lighting?
2700K to 3000K (warm white) is ideal for kitchens. It’s warm enough to feel inviting but bright enough for food preparation. Avoid anything above 4000K, which feels cold and clinical.
How high should pendant lights hang above a kitchen island?
30 to 36 inches above the countertop is the standard recommendation. This provides good task lighting without obstructing sightlines for people sitting at the island.
Can I install under-cabinet lighting myself?
Yes, adhesive LED strip lights are a true DIY project — peel, stick, plug in. Hardwired under-cabinet lights require basic electrical knowledge but are still a manageable DIY for most homeowners.
Do I need an electrician to install dimmer switches?
Most dimmer switches are DIY-friendly — they replace existing switches with the same wiring. However, if you’re adding new circuits or fixtures, hire a licensed electrician.
What’s the most impactful kitchen lighting upgrade for under $50?
Under-cabinet LED strip lights. For $15-30, they eliminate counter shadows, add ambiance, and make your backsplash and countertops look better. It’s the best bang for your buck in kitchen design.