My kitchen island was beige. Not a warm, intentional greige — just plain, builder-grade beige that had been there since the house was built. The day I painted it a deep forest green was the day my kitchen finally looked like mine.
Painting your kitchen island a bold accent color is one of the highest-impact, lowest-cost kitchen upgrades you can make. It takes one weekend, costs under $100, and completely transforms the energy of the room. If you’ve been wanting to dip your toes into color without committing to every cabinet, this is your move.
Why This Works
- One weekend project — from prep to final coat, you can finish this in two days
- Costs under $100 — paint, primer, and hardware are all you need
- Reversible — if you don’t love it, you can repaint. It’s just one piece of furniture
- Instant focal point — a colored island becomes the centerpiece of your kitchen
- Works with any kitchen style — farmhouse, modern, transitional, or traditional
What You’ll Need
Everything you need for a weekend island makeover:
- Cabinet-grade paint — in your chosen bold color (1 quart is usually enough)
- Bonding primer — essential for adhesion on kitchen surfaces
- Fine-grit sandpaper — 150-grit for prep, 220-grit between coats
- Small foam roller and angled brush — for smooth, professional results
- New hardware — brass, black, or contrasting pulls and knobs
- TSP cleaner — to degrease surfaces before painting
Step-by-Step Guide
Choose Your Bold Color
The most popular island accent colors right now are: forest green, navy blue, charcoal, terracotta, deep sage, and even aubergine. Choose a color that contrasts with your perimeter cabinets. If your kitchen is white or cream, nearly any bold color works.
Test your color with a large paint sample on the island surface. Live with it for a few days before committing.
Remove Doors, Drawers, and Hardware
Take off all doors, drawer fronts, and hardware. Label everything with painter’s tape and a marker (“left door”, “right drawer 1”, etc.) so reinstallation is easy. Set up a painting station on sawhorses or a table.
Remove the countertop from the painting plan — you’re only painting the base, doors, and drawer fronts.
Clean, Sand, and Prime
Clean every surface with TSP to cut through kitchen grease. Sand lightly with 150-grit sandpaper to create tooth for the primer. Wipe away all dust.
Apply one coat of bonding primer. Let it dry for 24 hours. This step is absolutely critical for kitchen surfaces that handle heat, moisture, and grease daily.
Paint with Thin, Even Coats
Use a small foam roller on flat surfaces and a quality angled brush on edges and details. Apply two to three thin coats — never one thick coat. Sand lightly with 220-grit between coats.
For the smoothest finish, apply paint in one direction and don’t overwork it. Two thin coats is better than one thick coat every single time.
Install New Hardware and Reassemble
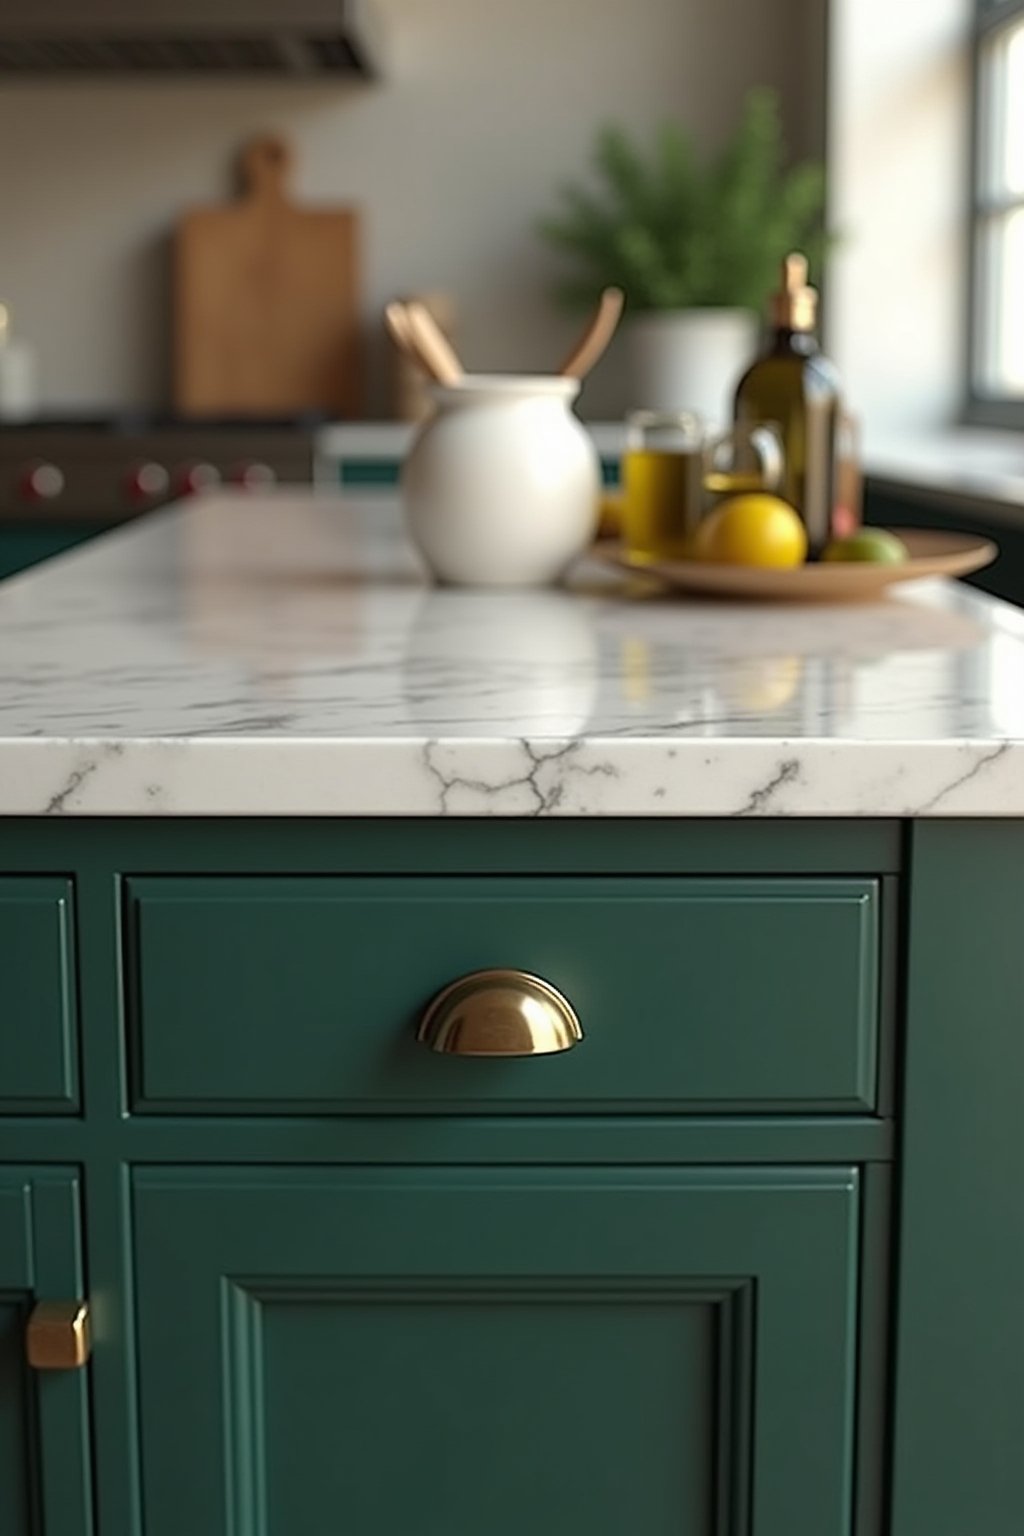
Let the final coat cure for at least 5-7 days before reassembly. This curing time is essential for durability. Install new hardware — brass pulls on a dark green island or black knobs on a navy island create a polished, intentional look.
Take your time reattaching doors, making sure alignment is correct. Adjust hinges if needed.
Common Mistakes to Avoid
- Skipping the degreasing step — kitchen islands accumulate invisible grease that prevents paint adhesion. Always use TSP
- Using wall paint instead of cabinet paint — wall paint isn’t durable enough for kitchen use. Use paint specifically formulated for cabinets or furniture
- Not letting the paint cure — the paint may feel dry in hours but needs 5-7 days to fully harden. Rushing this step leads to chips and scratches
- Choosing a color that clashes with flooring — consider how the island color looks against your floor, not just your other cabinets
- Forgetting the inside edges — when doors are open, unpainted edges are visible. Paint a few inches inside each cabinet opening
Budget Tips
This is already a budget project, but here’s how to save even more:
- One quart of premium cabinet paint ($25-35) is usually enough for a standard island
- Reuse existing hardware if it’s in good shape — just clean and polish it
- Borrow sandpaper and painting supplies from friends doing their own projects
- Buy sample-sized paint first ($5) to test before committing to a full quart
- Skip the painter’s tape for the island body — careful brushwork is faster and just as clean
Styling Tips
- Contrast your hardware — brass hardware on a dark island creates a designer look instantly
- Add a runner rug in front — a patterned or natural fiber rug anchors the island visually
- Style the countertop simply — a cutting board, a vase with greenery, and a fruit bowl is enough
- Match one accessory to the island color — a sage green tea towel on a sage green island ties the look together
- Upgrade your bar stools — new stools that complement the island color complete the transformation
- Add under-island lighting — LED strip lights under the overhang create a floating effect at night
Room-by-Room Inspiration
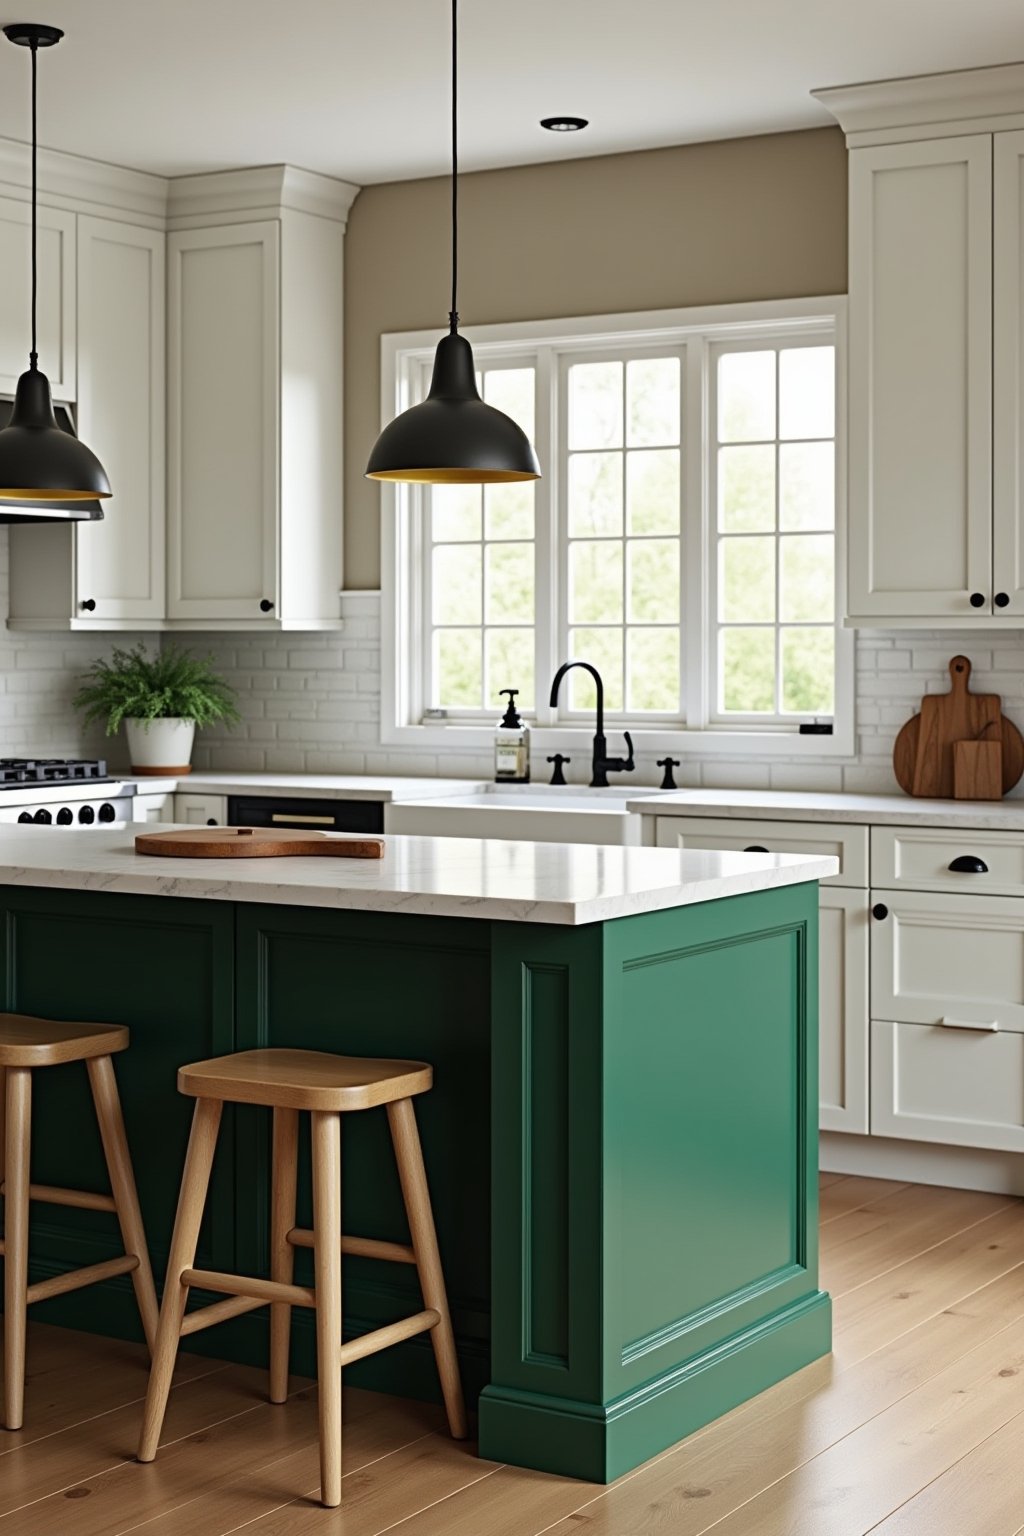
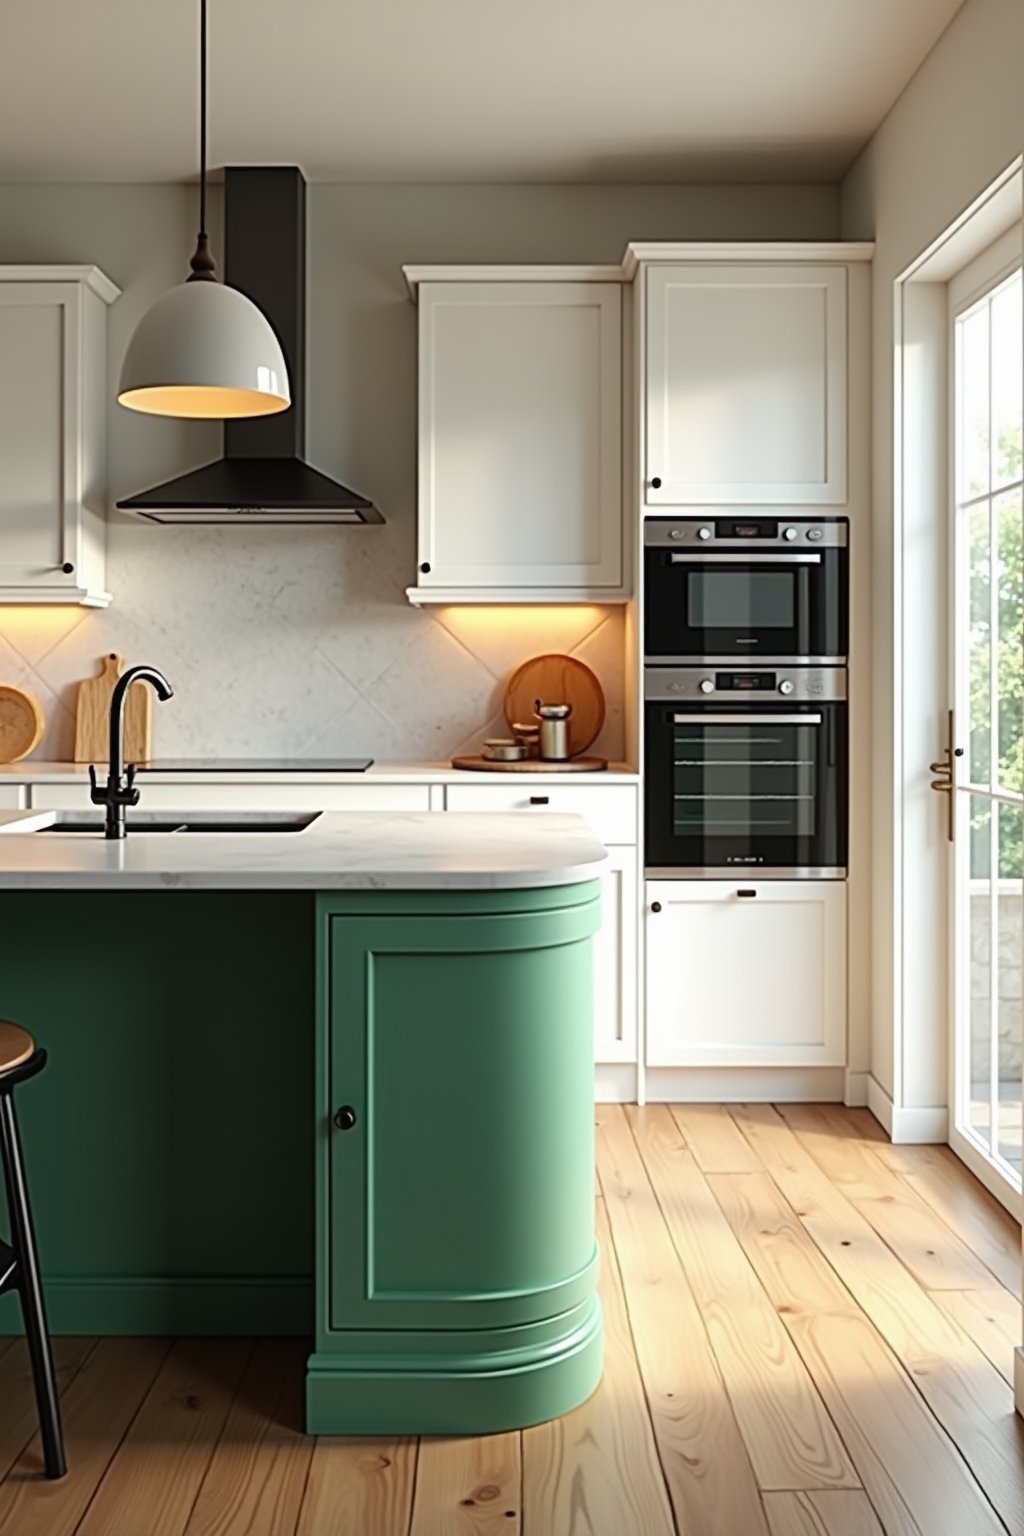
White Kitchen + Green Island
The classic combination. Forest green or sage green against white perimeter cabinets is fresh, modern, and endlessly Pinnable. Add brass hardware and a marble top for perfection.
Wood Kitchen + Navy Island
If you have warm wood cabinets, a navy blue island provides stunning contrast. The warm-cool interplay between wood and blue is one of the most sophisticated kitchen palettes.
Gray Kitchen + Terracotta Island
A terracotta or rust-colored island warms up a gray kitchen instantly. This combination is unexpected but incredibly inviting.
Frequently Asked Questions
How long does it take to paint a kitchen island?
Active painting time is about 4-6 hours spread over two days (for proper drying between coats). Including prep, priming, and cure time, plan for one full weekend plus a week before heavy use.
Do I need to sand my kitchen island before painting?
Yes, light sanding with 150-grit sandpaper creates tooth for the primer to grip. You don’t need to sand down to bare wood — just scuff the existing finish.
What’s the most popular kitchen island accent color?
In 2026, the top choices are forest green, navy blue, deep sage green, and charcoal. Earthy tones like terracotta and warm black are also gaining popularity.
Can I paint a kitchen island without removing the doors?
You can, but the results won’t be as smooth. Removing doors allows you to paint them flat on sawhorses, which prevents drips and gives an even finish.
Will a bold island color hurt my home’s resale value?
A well-executed painted island in a classic color (navy, green, charcoal) actually increases perceived value. It signals a custom, designed kitchen rather than builder-grade.
How durable is a painted kitchen island?
With proper prep (degreasing, sanding, bonding primer) and quality cabinet paint, a painted island can last 10+ years with normal use. The key is allowing full cure time before heavy use.